How to tighten the steering head bearing on a V-Strom
Posted onThis is how I tightened the steering head bearing on my 2017 V-Strom 650. The process is the same on other motorcycles.
The what?
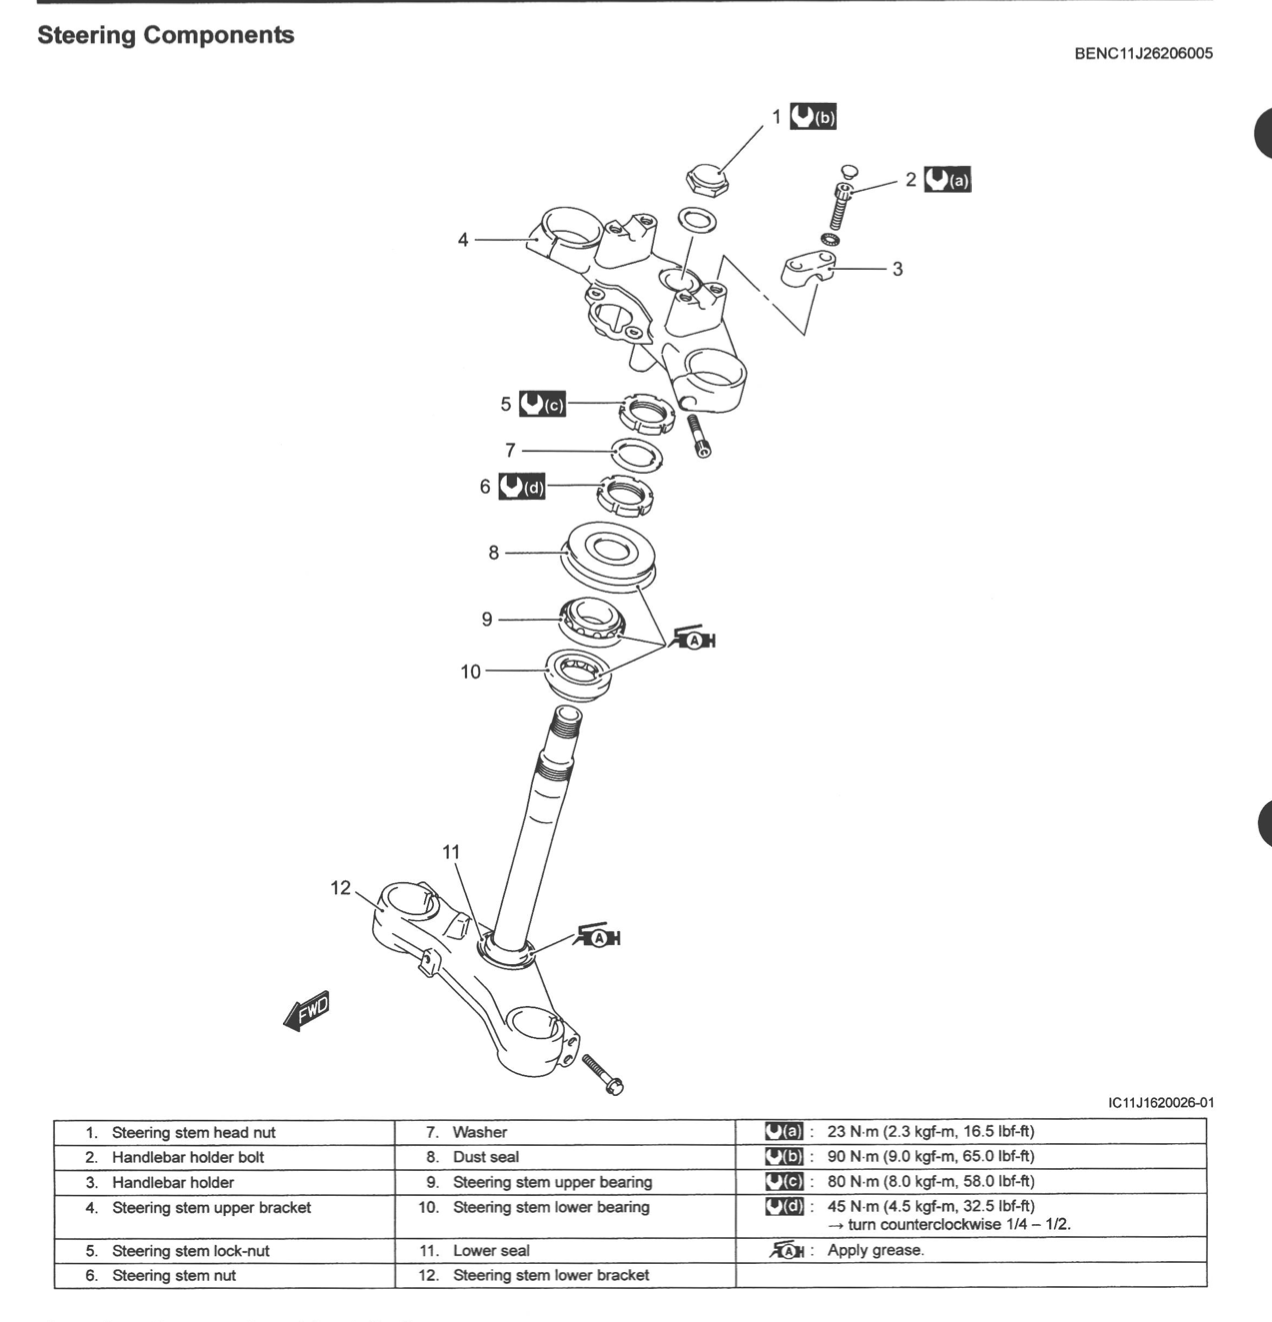
The steering head bearing. Parts 9 and 10 on the diagram below. It’s the bearing that turns when you move the handlebar.
Over time, it becomes loose, and then the whole front part of the motorcycle wobbles. You must tighten it enough to stop the wobbling, but not tight enough to prevent steering.
Symptoms of a loose steering head bearing
Lift the front wheel, grab the forks near the front wheel, and try to wobble them back and forth. If it moves at all, you have to tighten the steering head bearing.
If it’s really loose, you will feel the wobble when you go over a speed bump or go off-road. When you lift the front wheel, the handlebar will fall to one side, because there is not enough resistance in the steering.
How to tighten the steering head bearing
Next to each part, there is a number. It helps you find the part on the diagram above.
Before you start:
- Remove the plastics around the steering. You will need a bit of space to fit your tools later. This is covered in your owner’s manual.
- Take note of the angle of your handlebar. It will be easier to reinstall it the same way later.
Ready? Let’s do this.
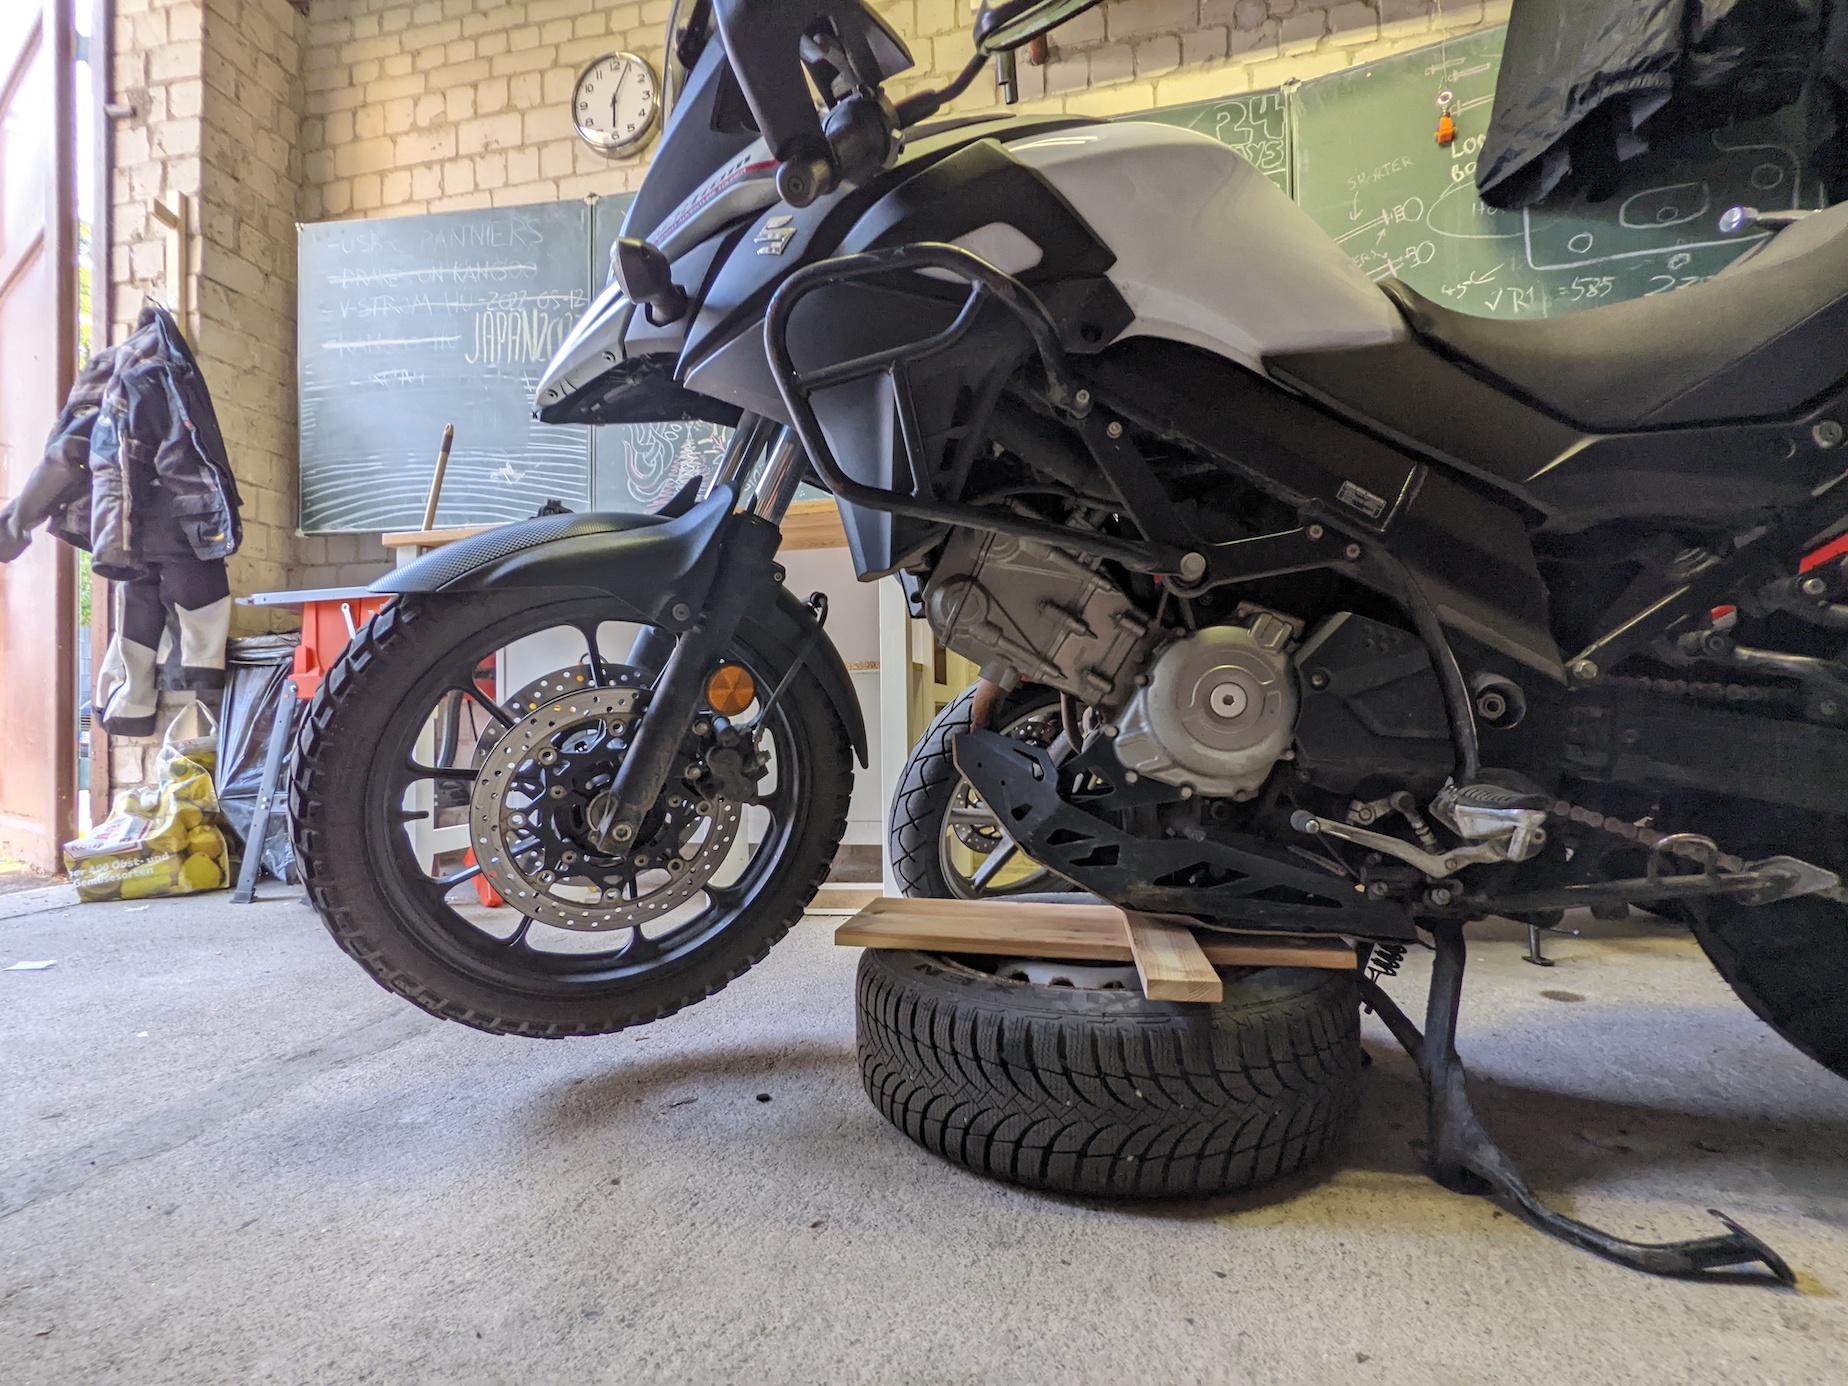
Raise the front wheel so that it does not touch the ground. The handlebar must move freely. I just put the bike on the center stand, then propped it with things I had laying around.
Remove the 4 plastic bolt protectors with a flat head screwdriver. Careful, they are very fragile.
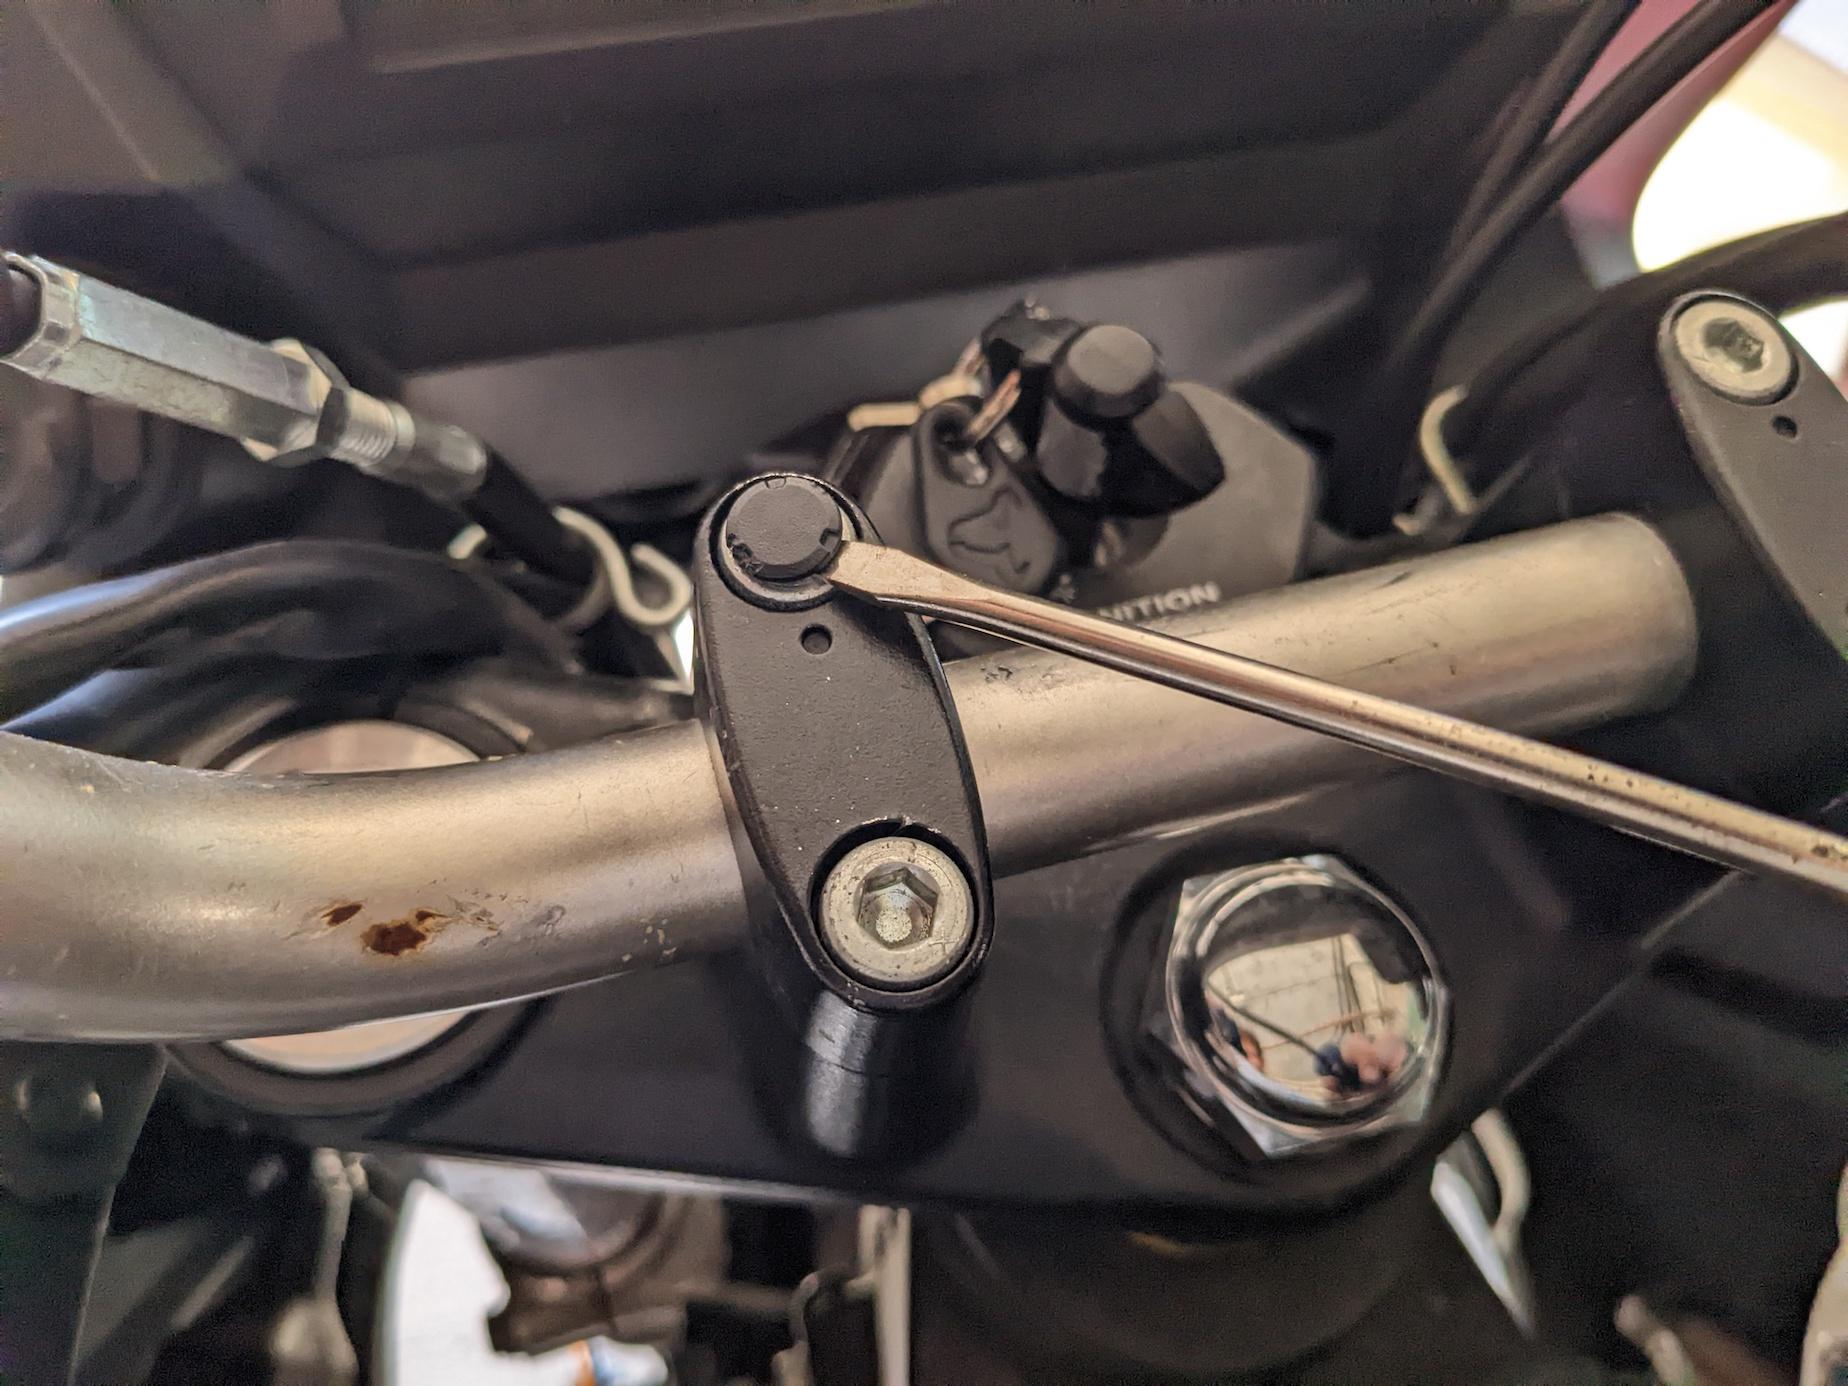
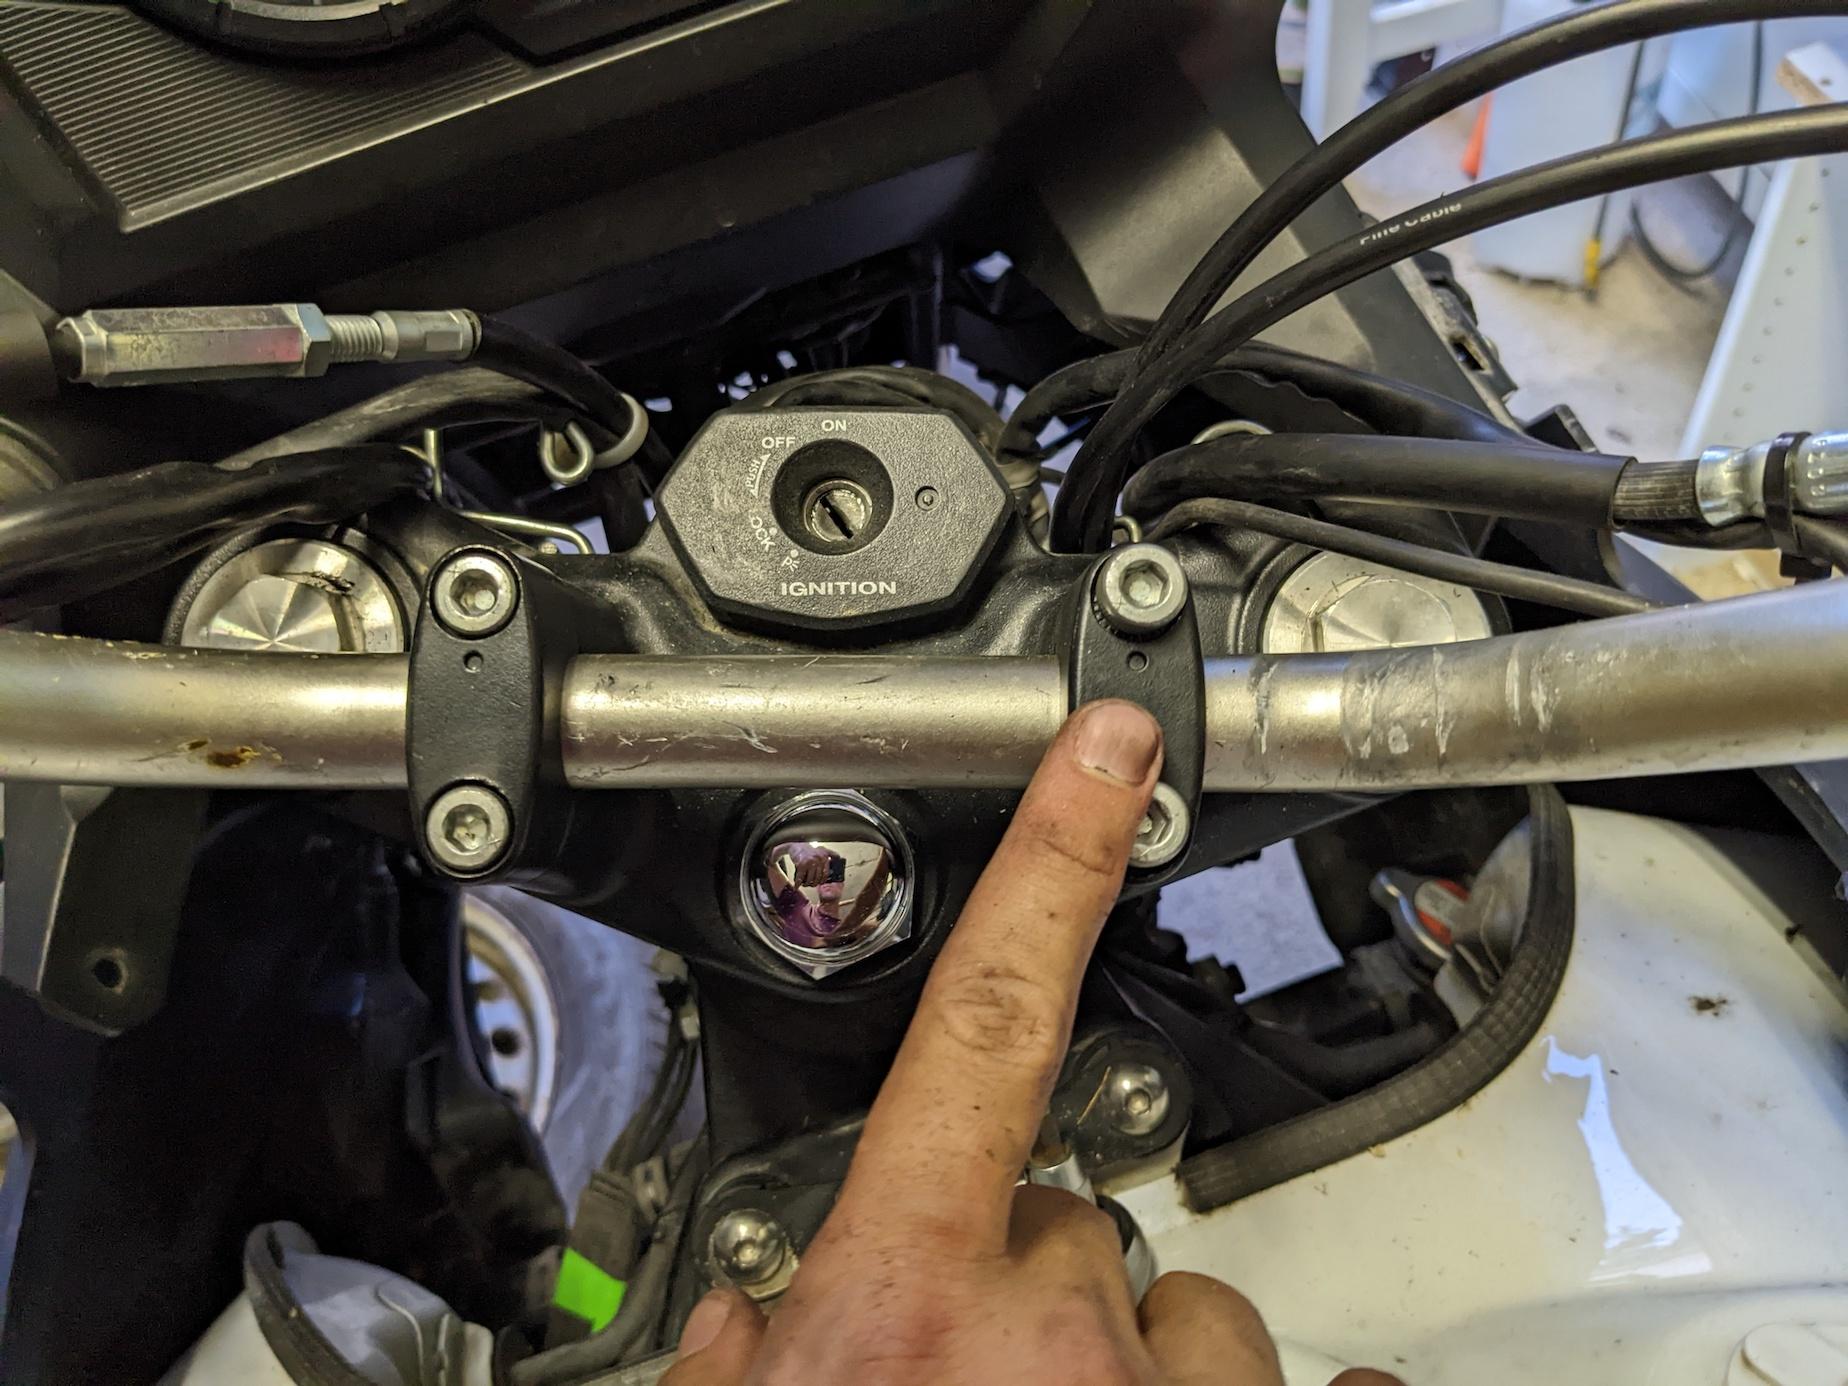
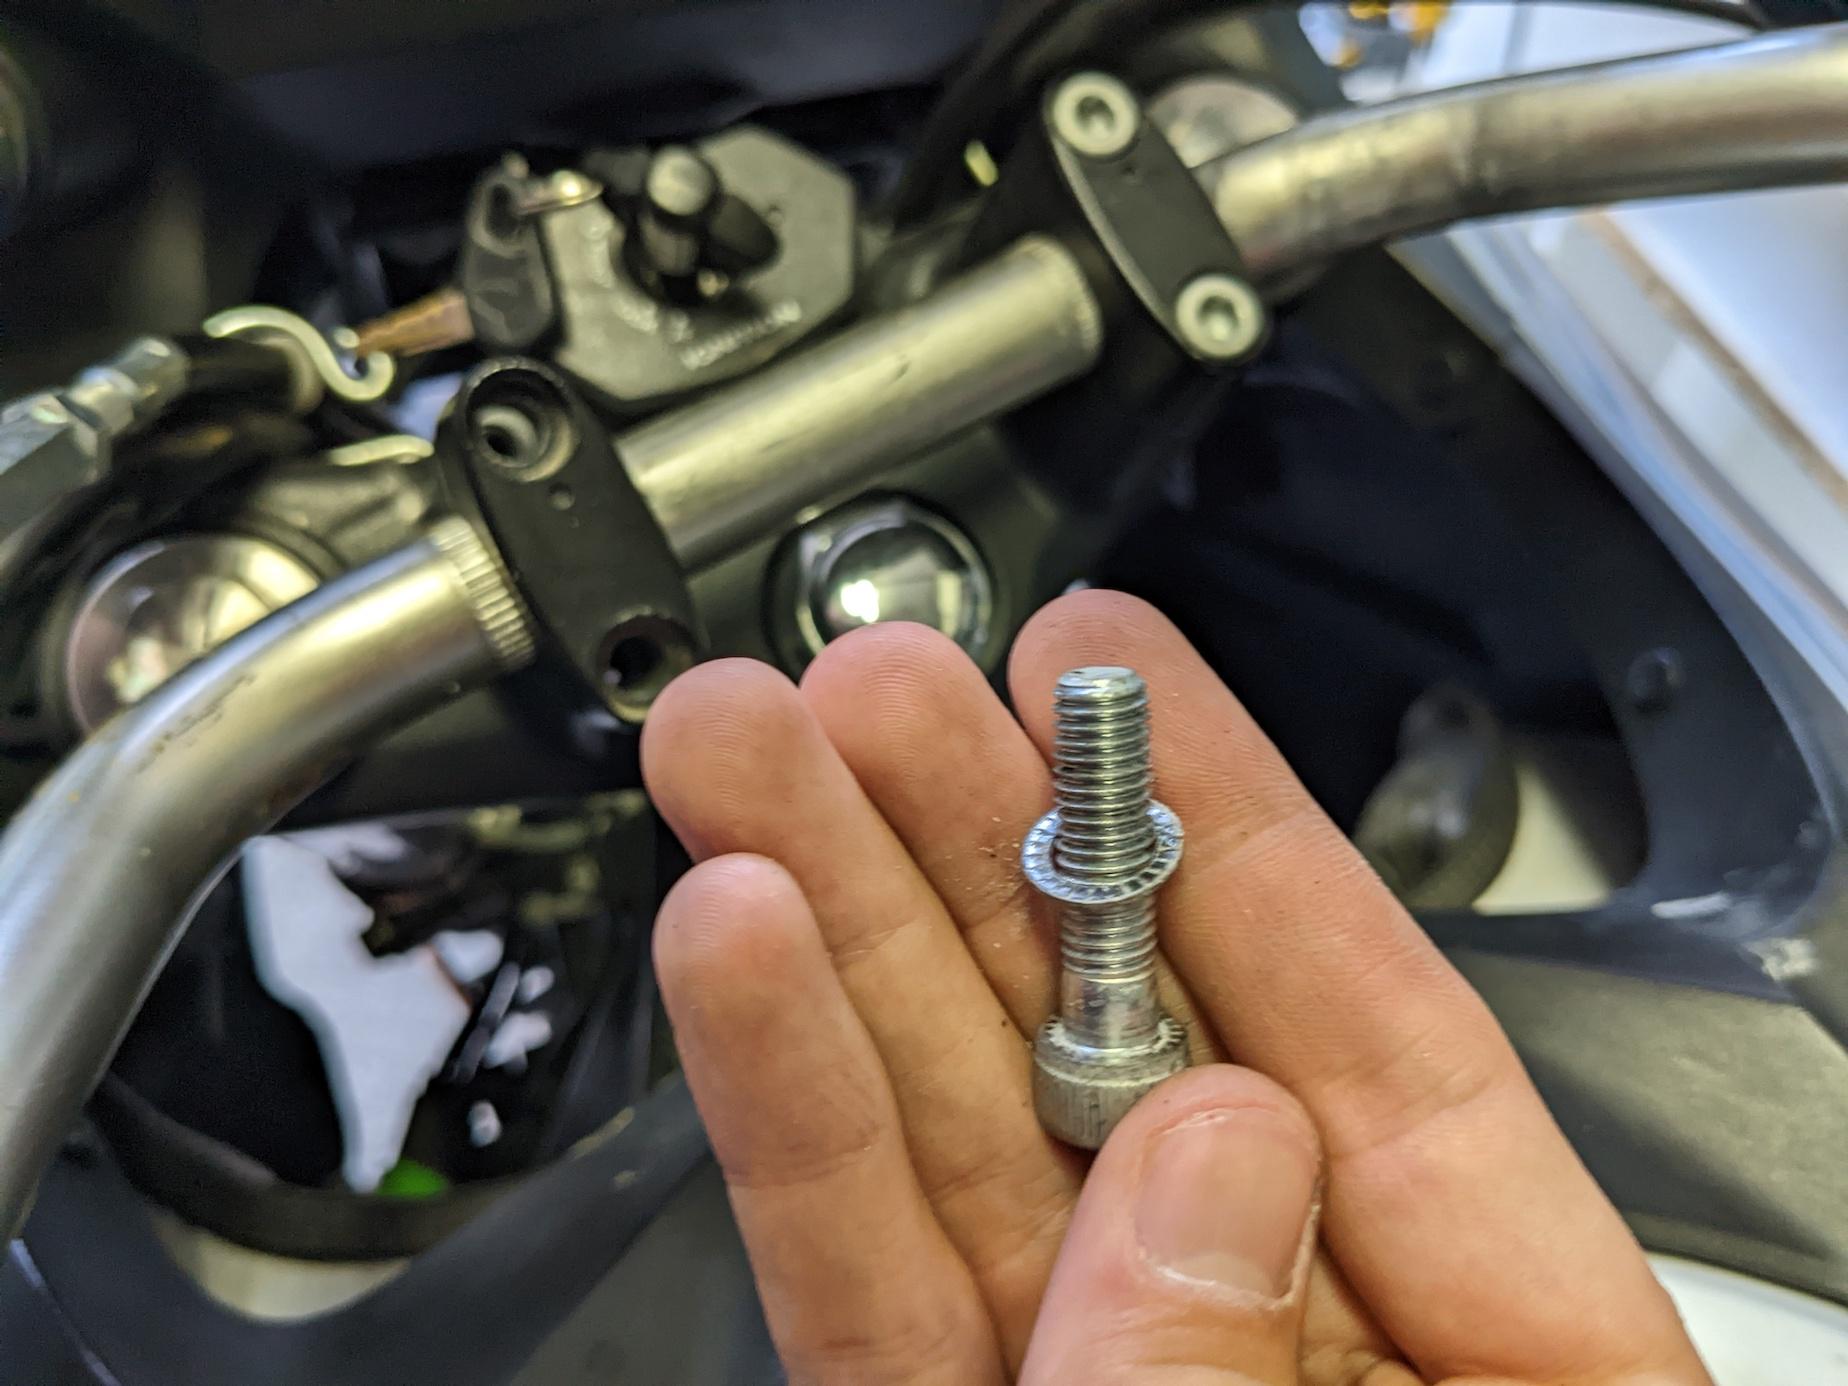
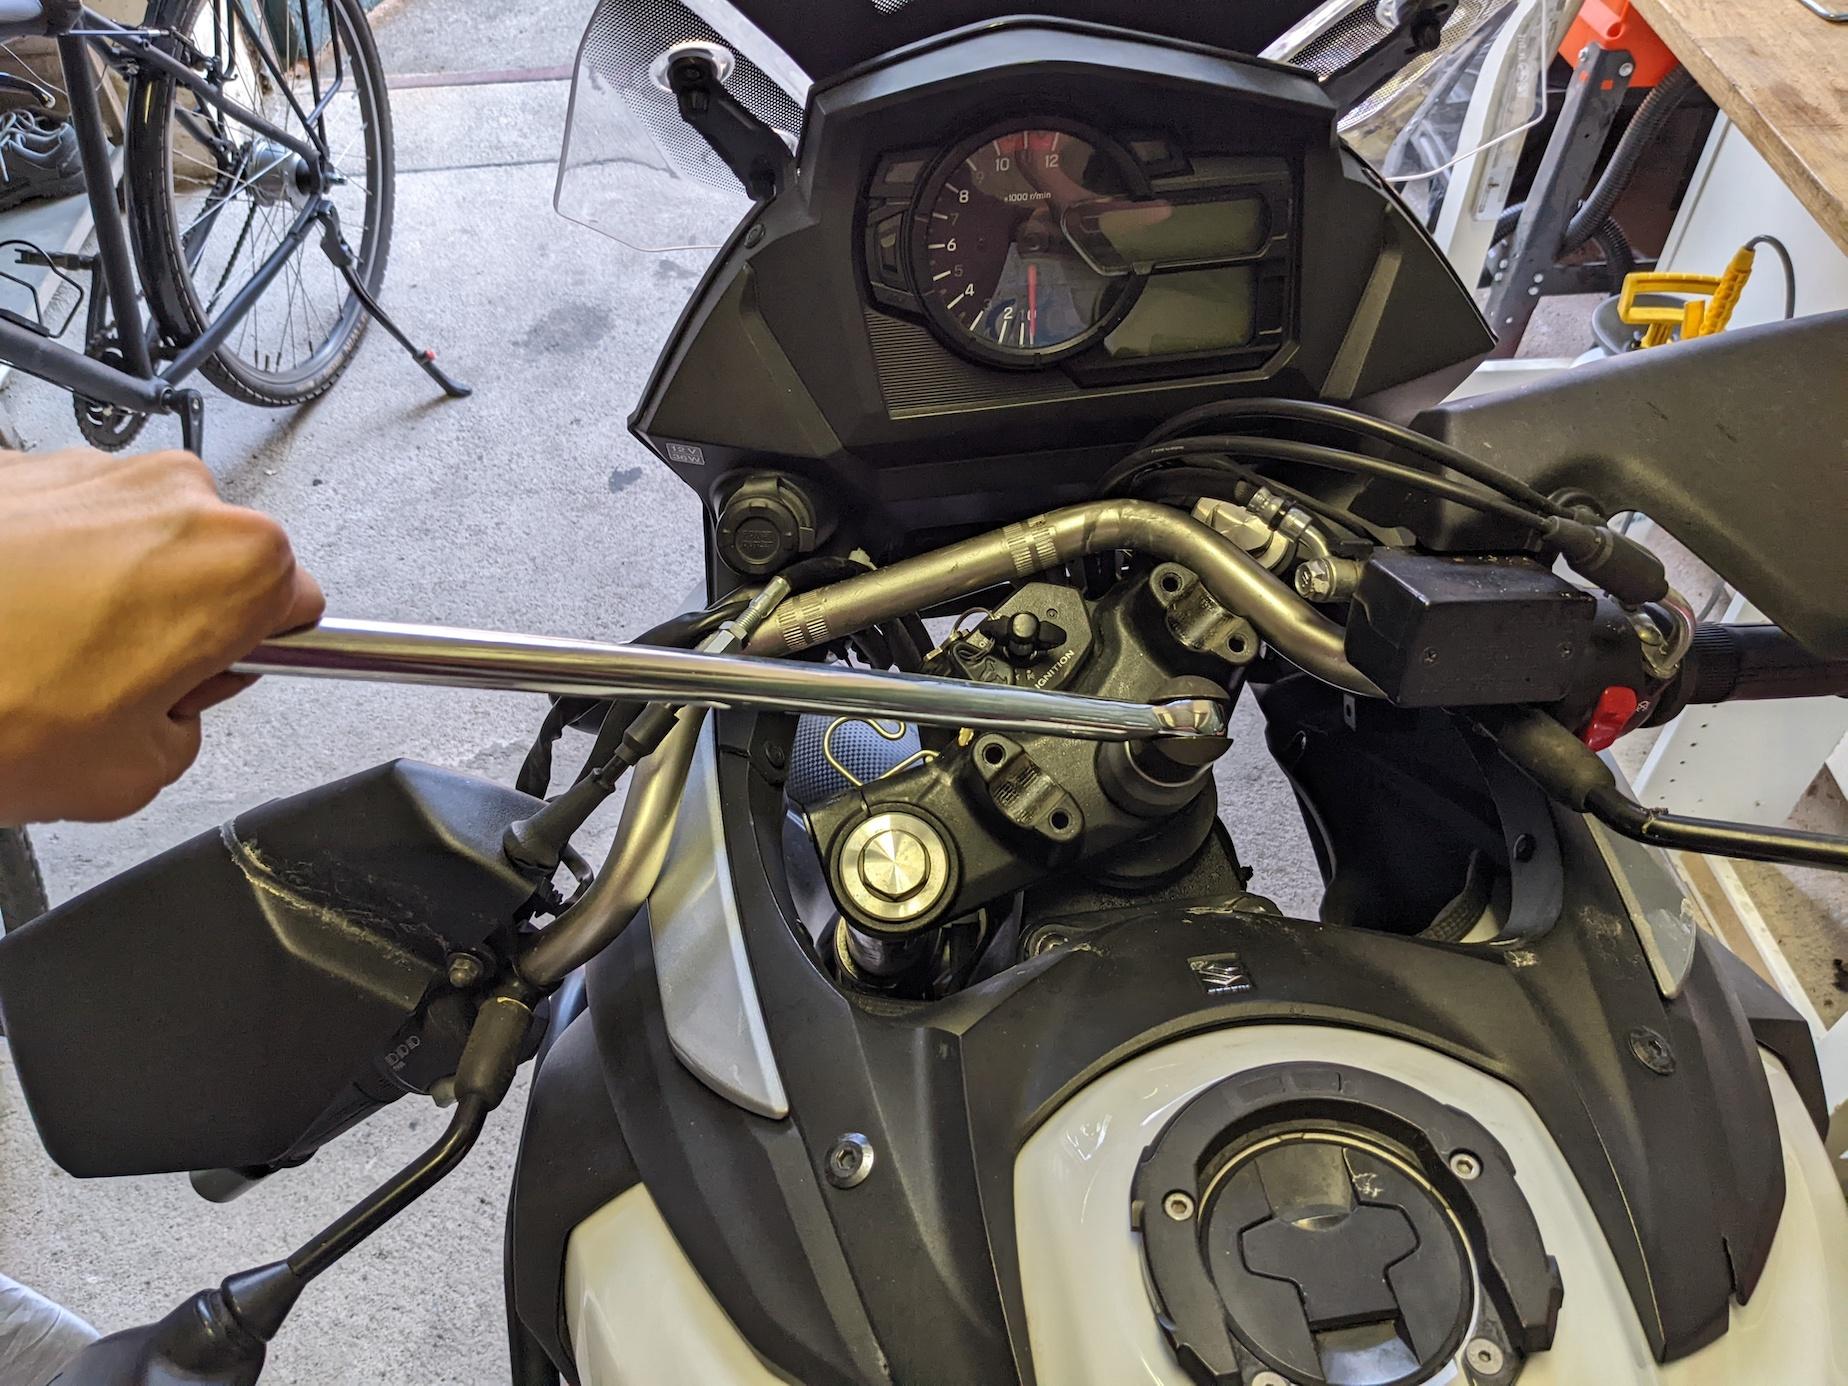
Remove the 4 handlebar holder bolts (2). You need a longer Allen key than on the picture.
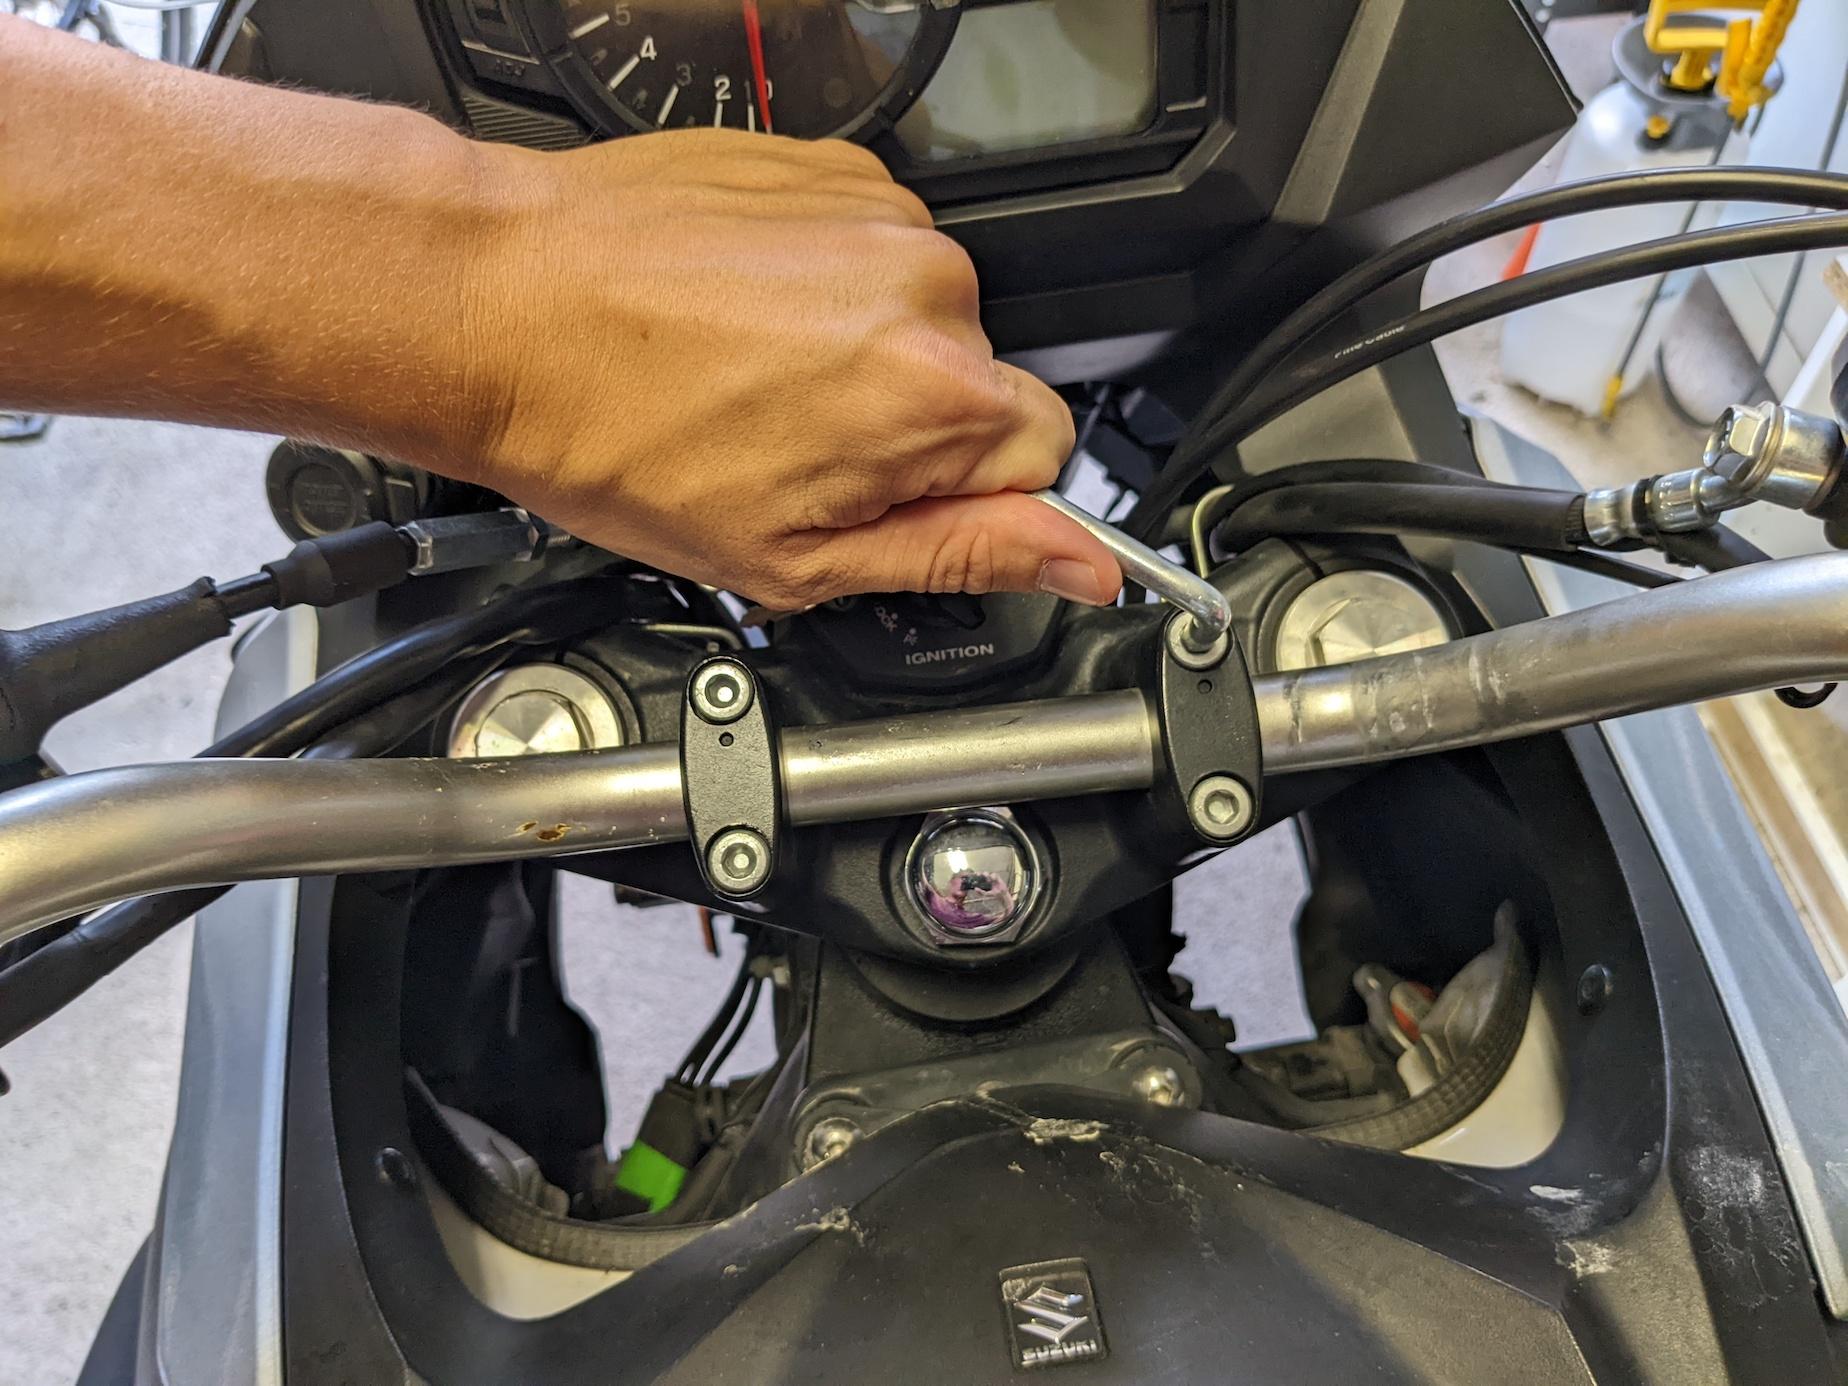
Each handlebar holder bolt has 1 washer (2). Don’t lose those 4 washers.
The handlebar comes off easily, but they are held to the motorcycle by the brake cables and other wires. You don’t need to remove them completely, just move them aside.
Remove the handlebar cables from the cable holders, then move the handlebar aside. It gives you more space to work.

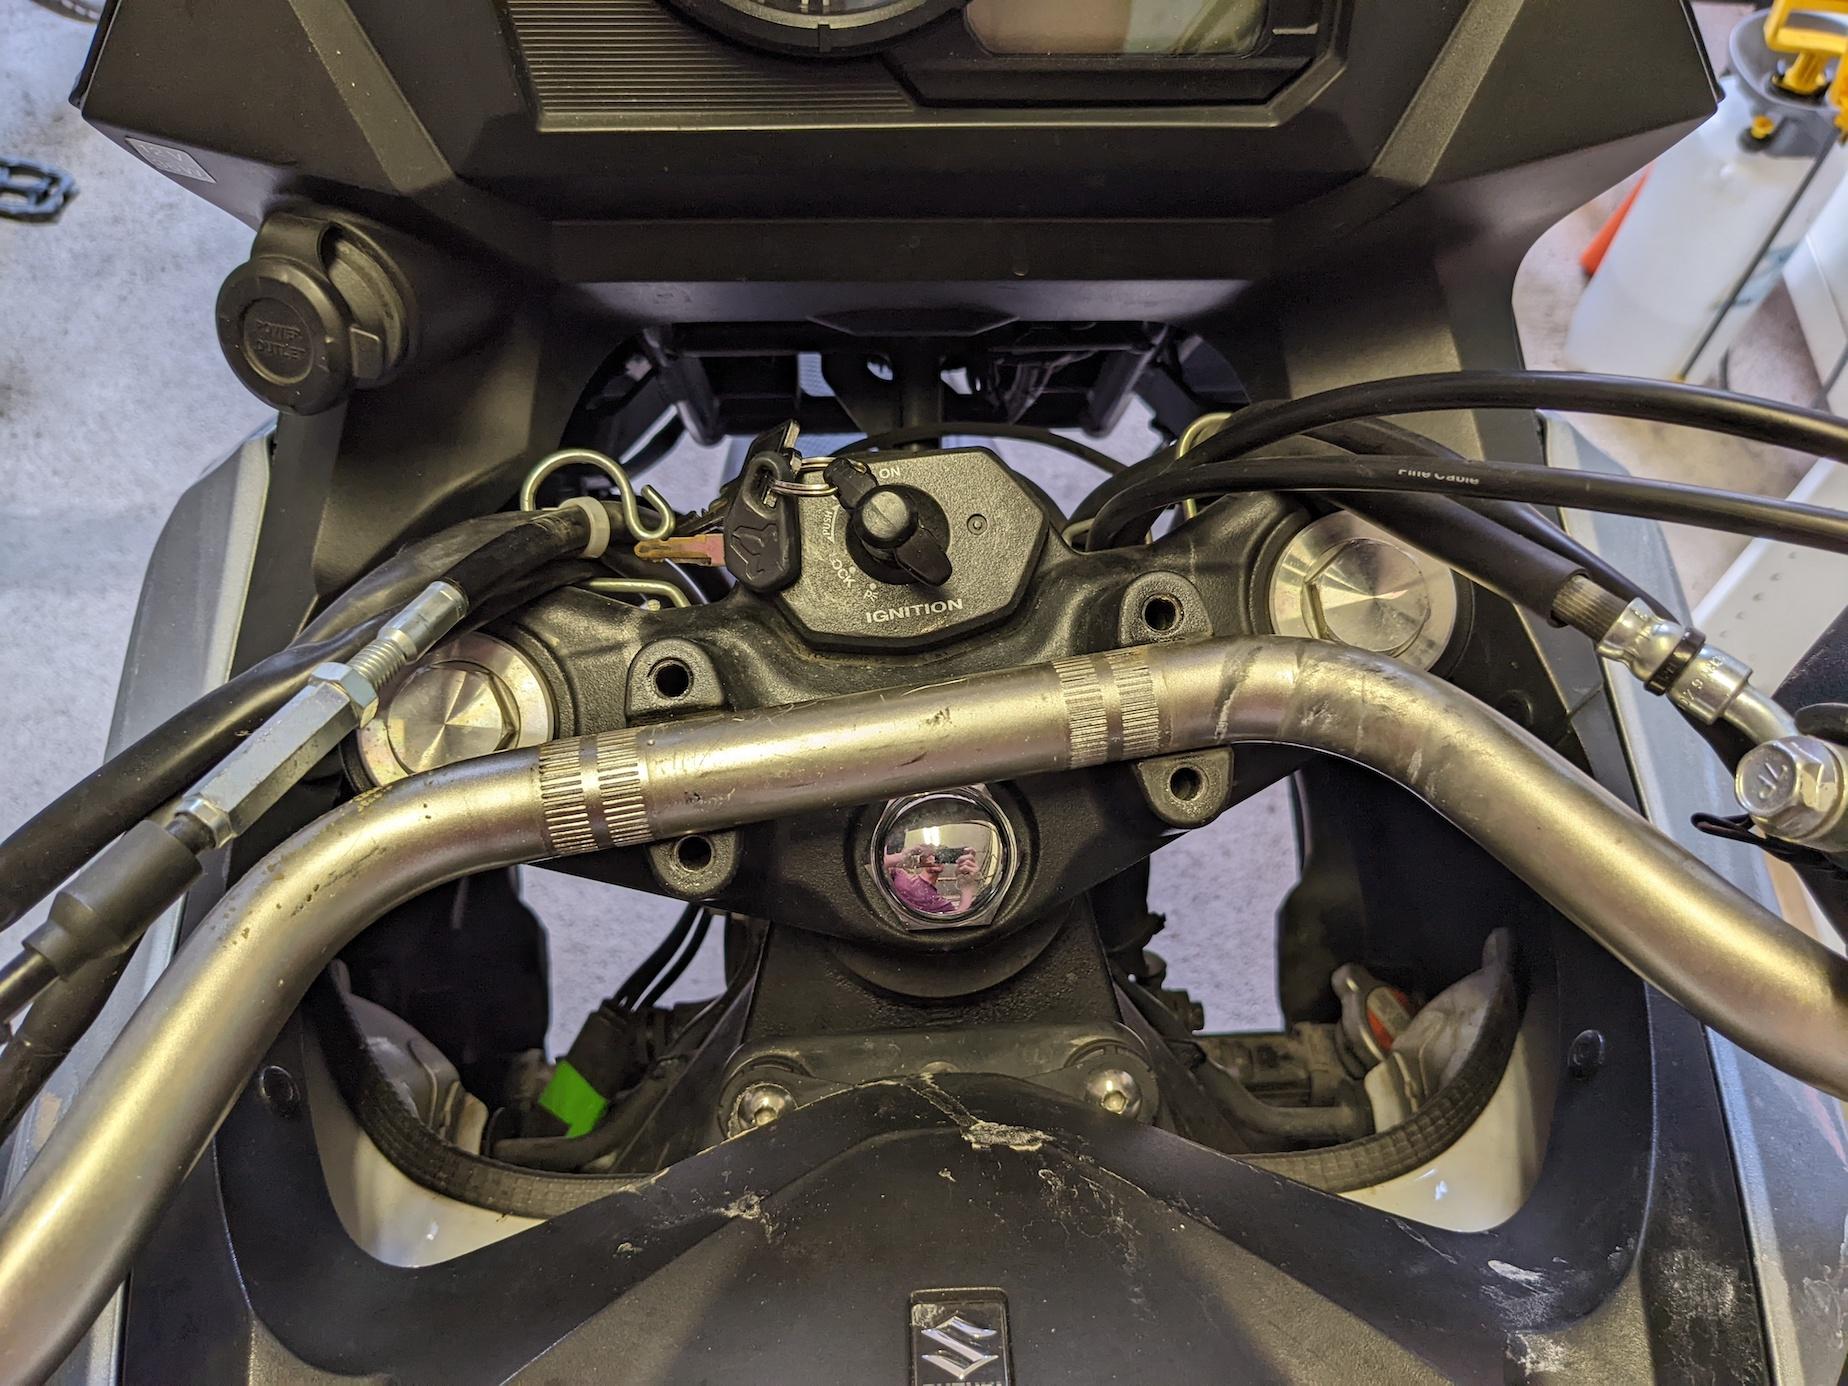
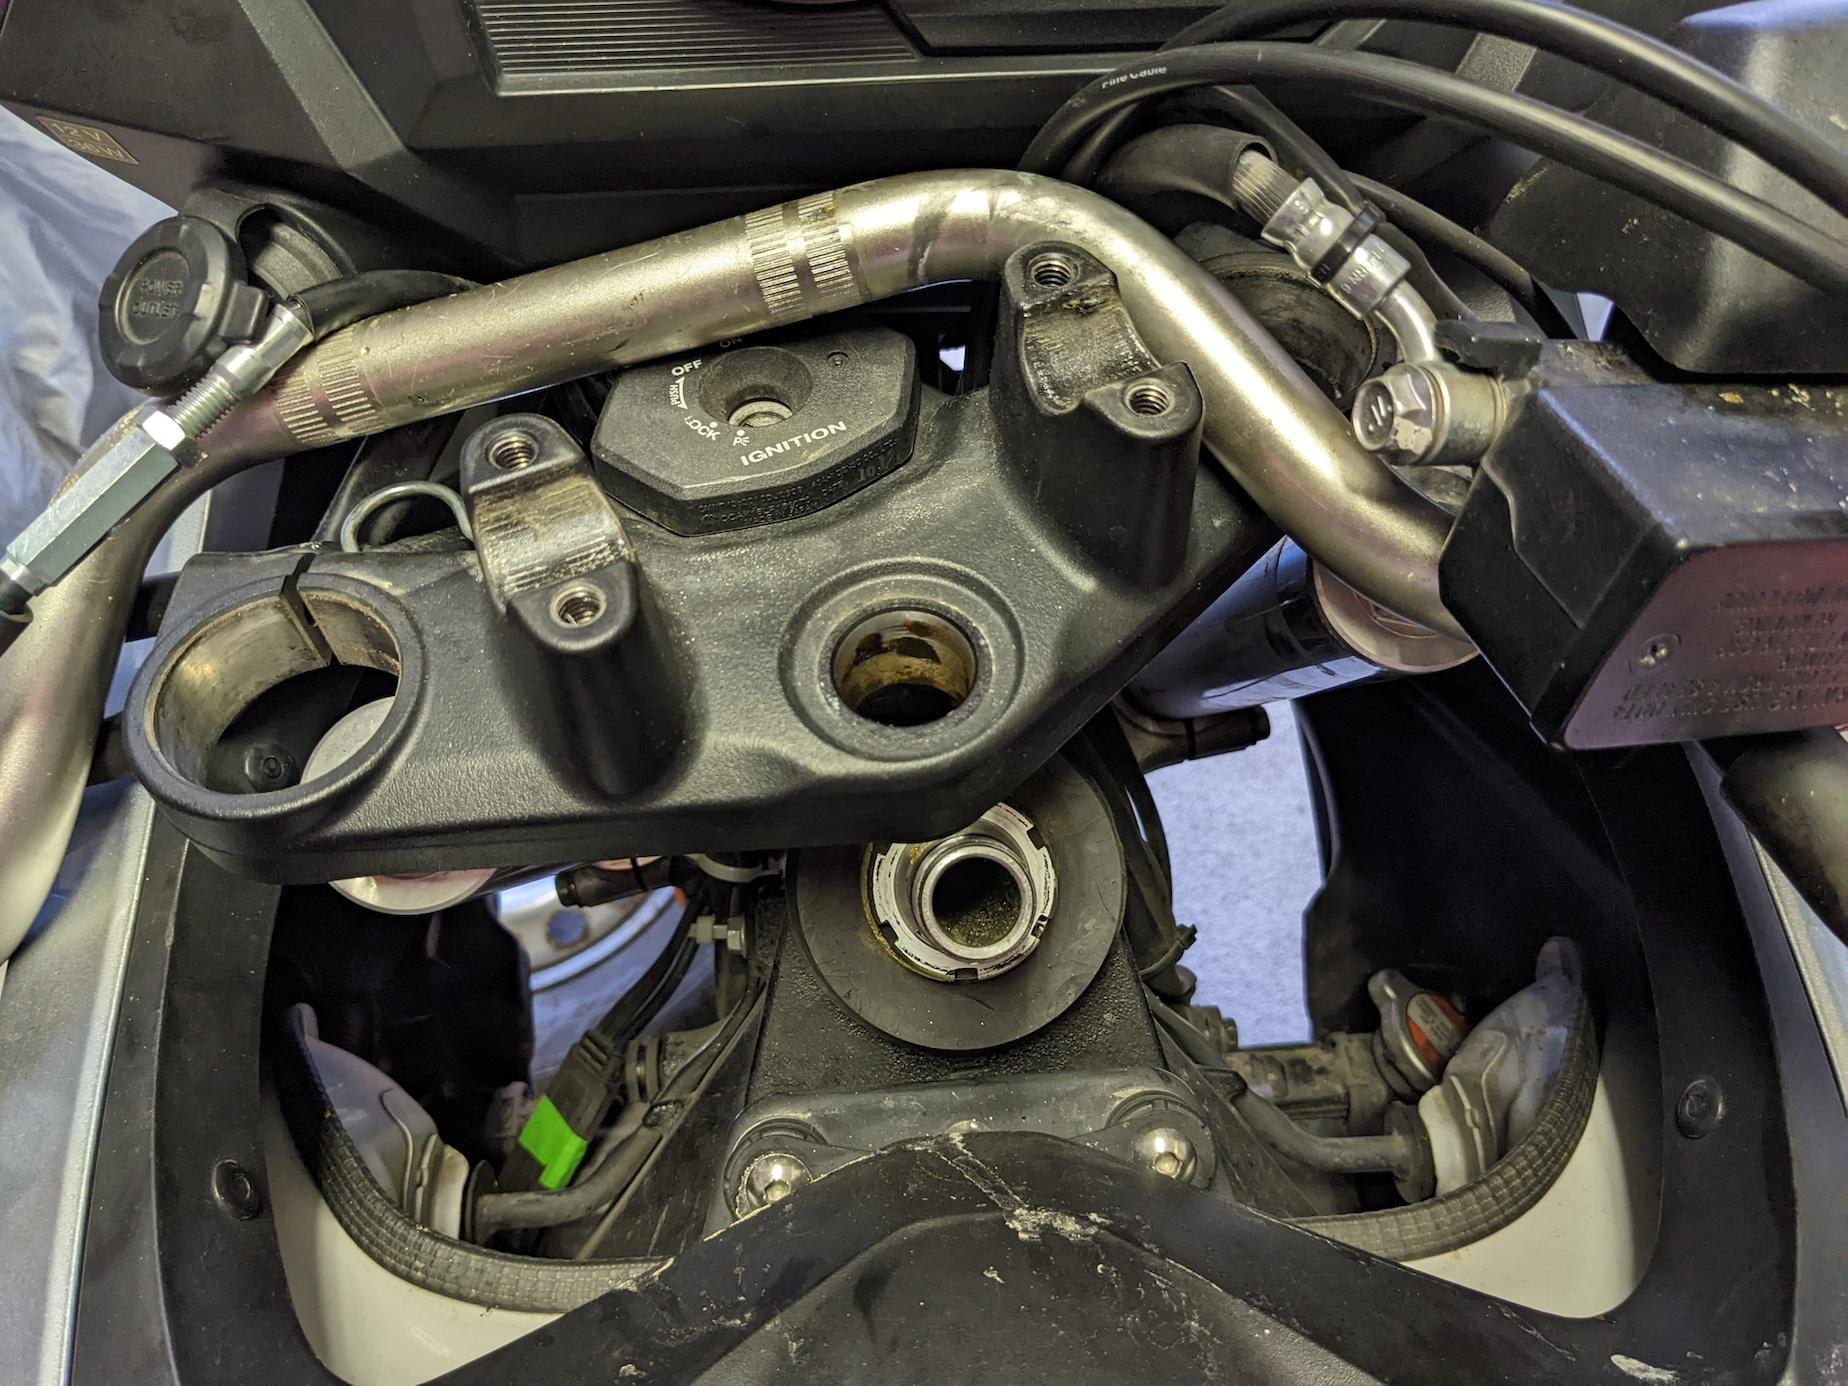
Loosen the 2 bolts on the top part of the steering stem upper bracket (4). There is one bolt on each side. Do not remove the bolts on the bottom part.
Remove the steering stem head nut (1). Cover it with a rag to protect the chrome.
There is a washer under the steering stem head nut (1). Don’t lose it.
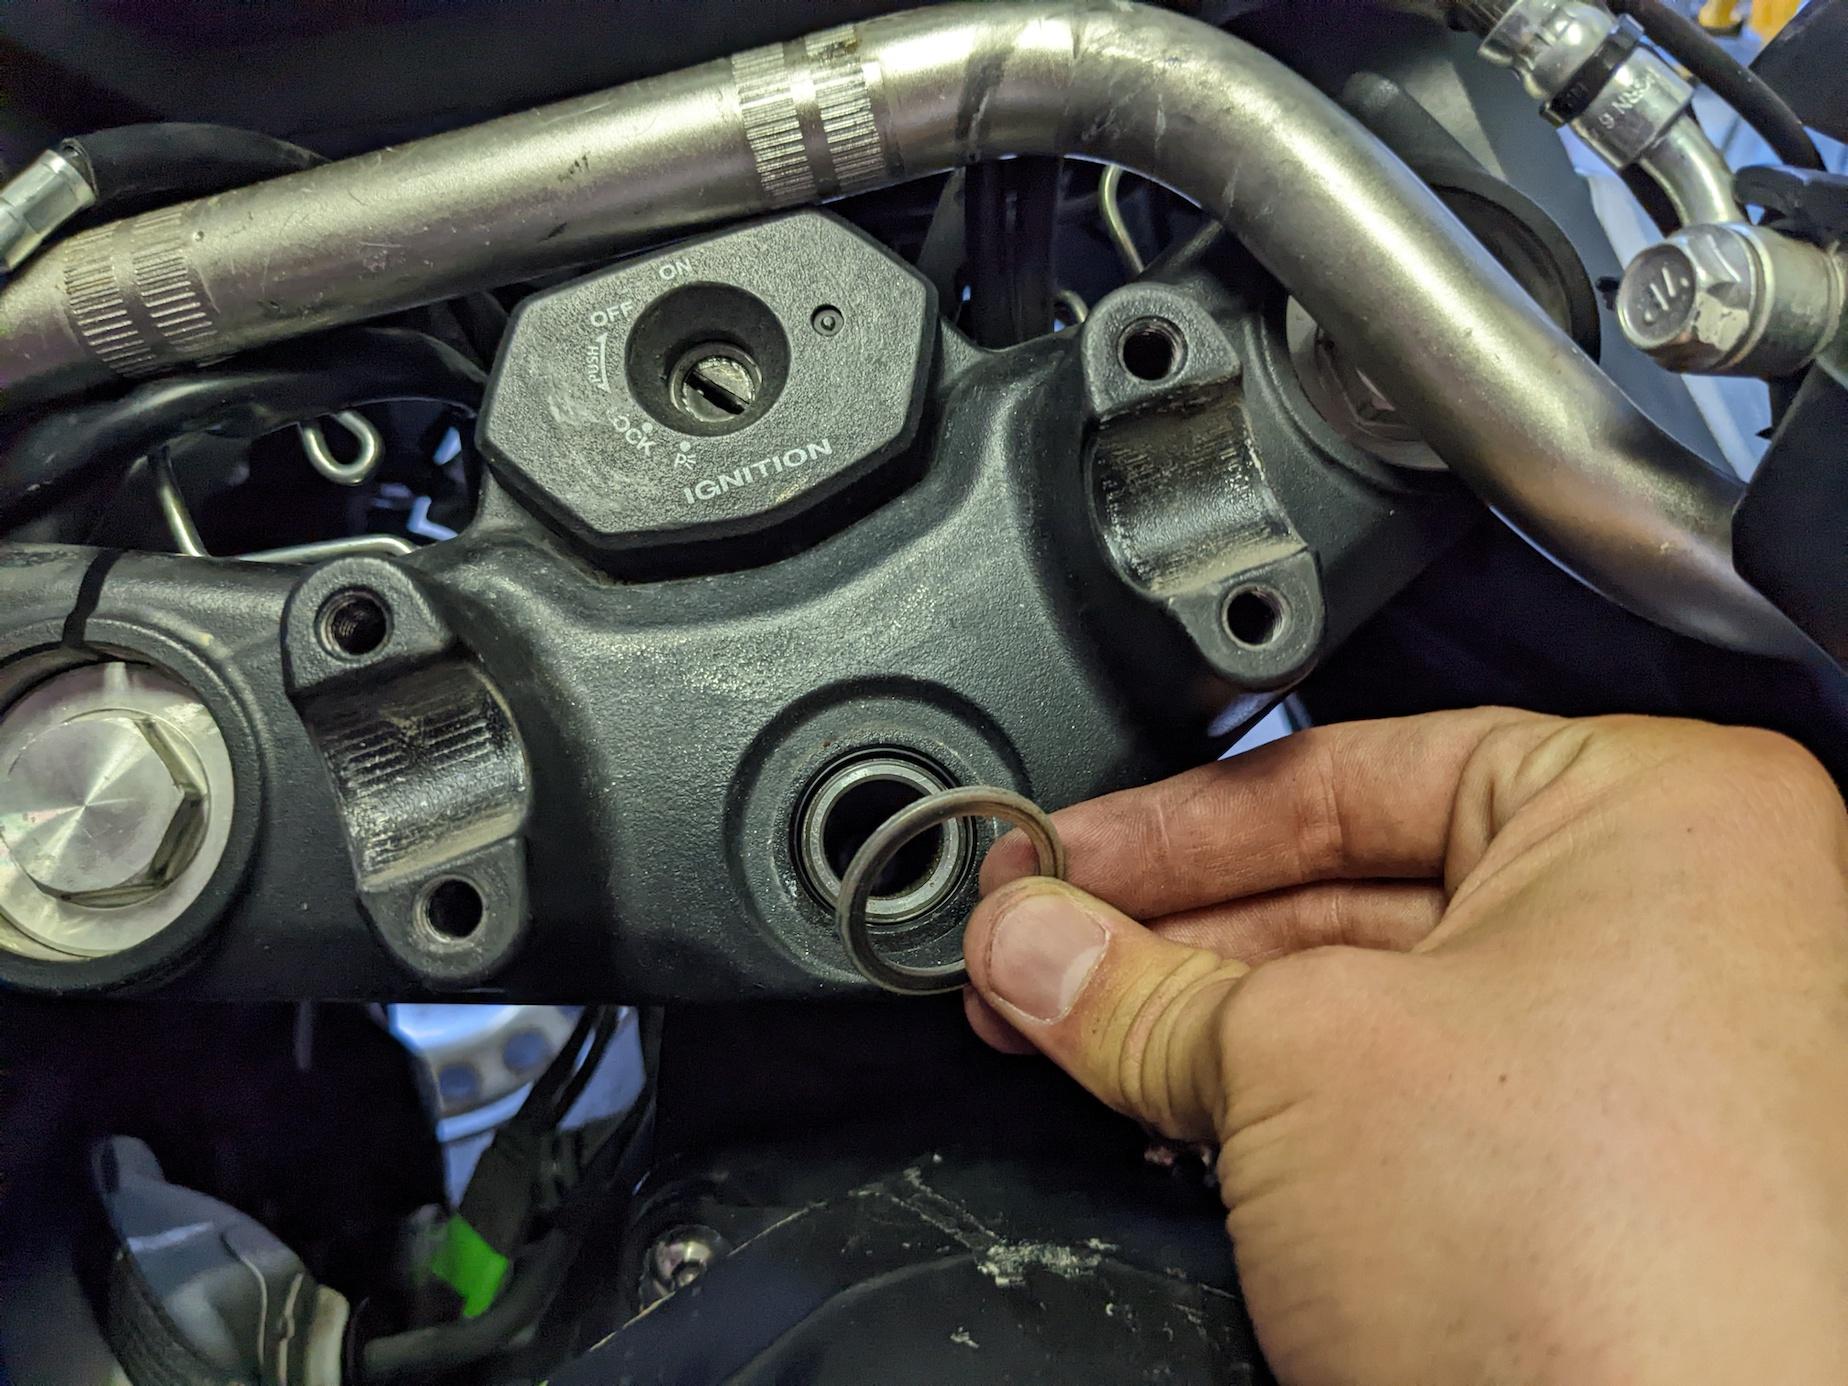
Remove the steering stem upper bracket (4). It should come off fairly easily if you just wiggle it. It should still be attached to the motorcycle by the ignition switch, so just move it aside.
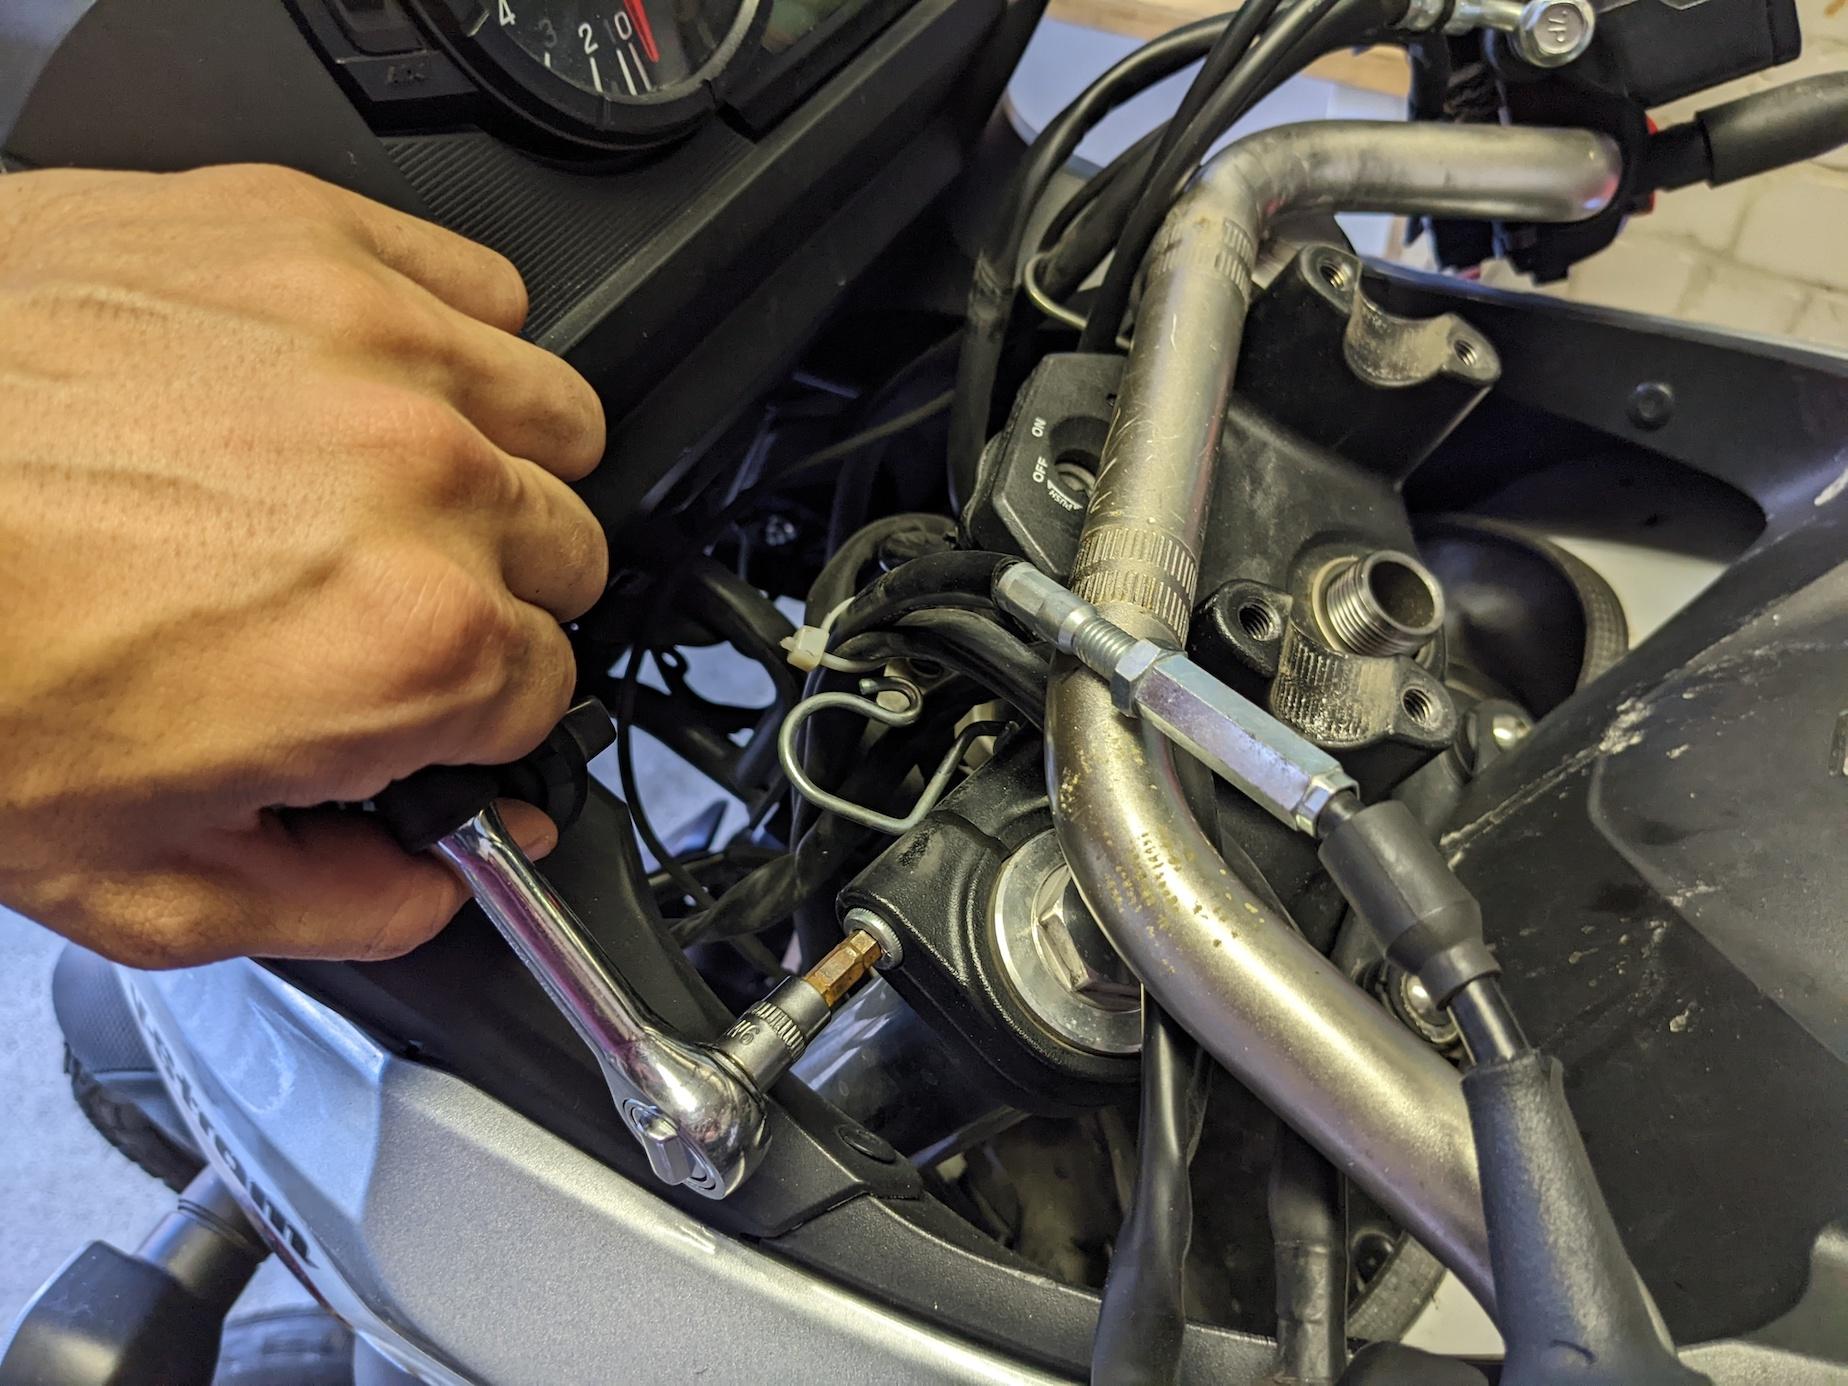
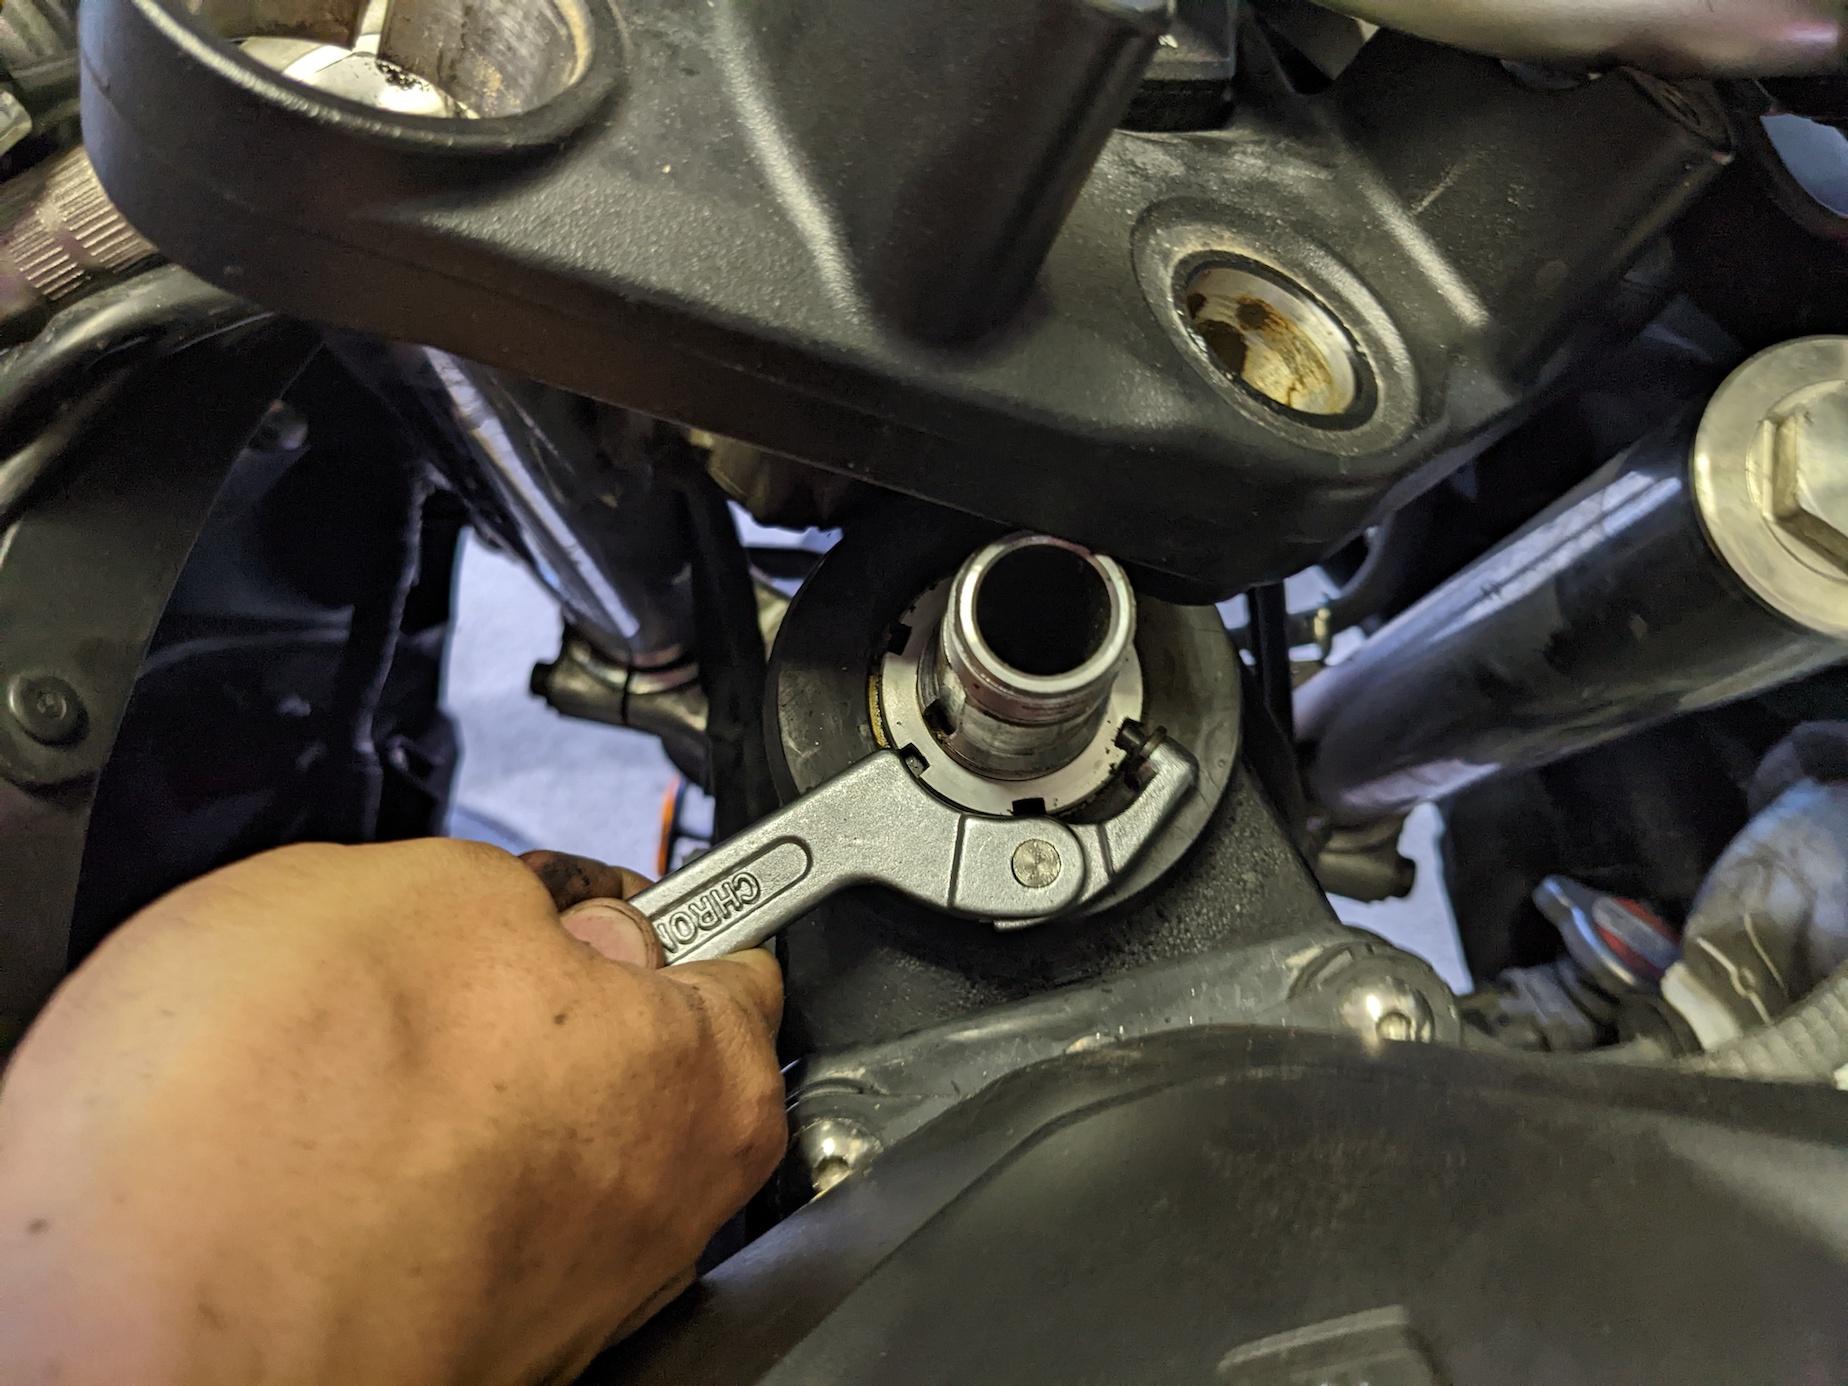
Remove the steering stem lock nut (5). It’s really tight. You will need a long tool with a lot of leverage. The one on the picture was too short. You will need to remove plastics around the handlebar to fit the tool.
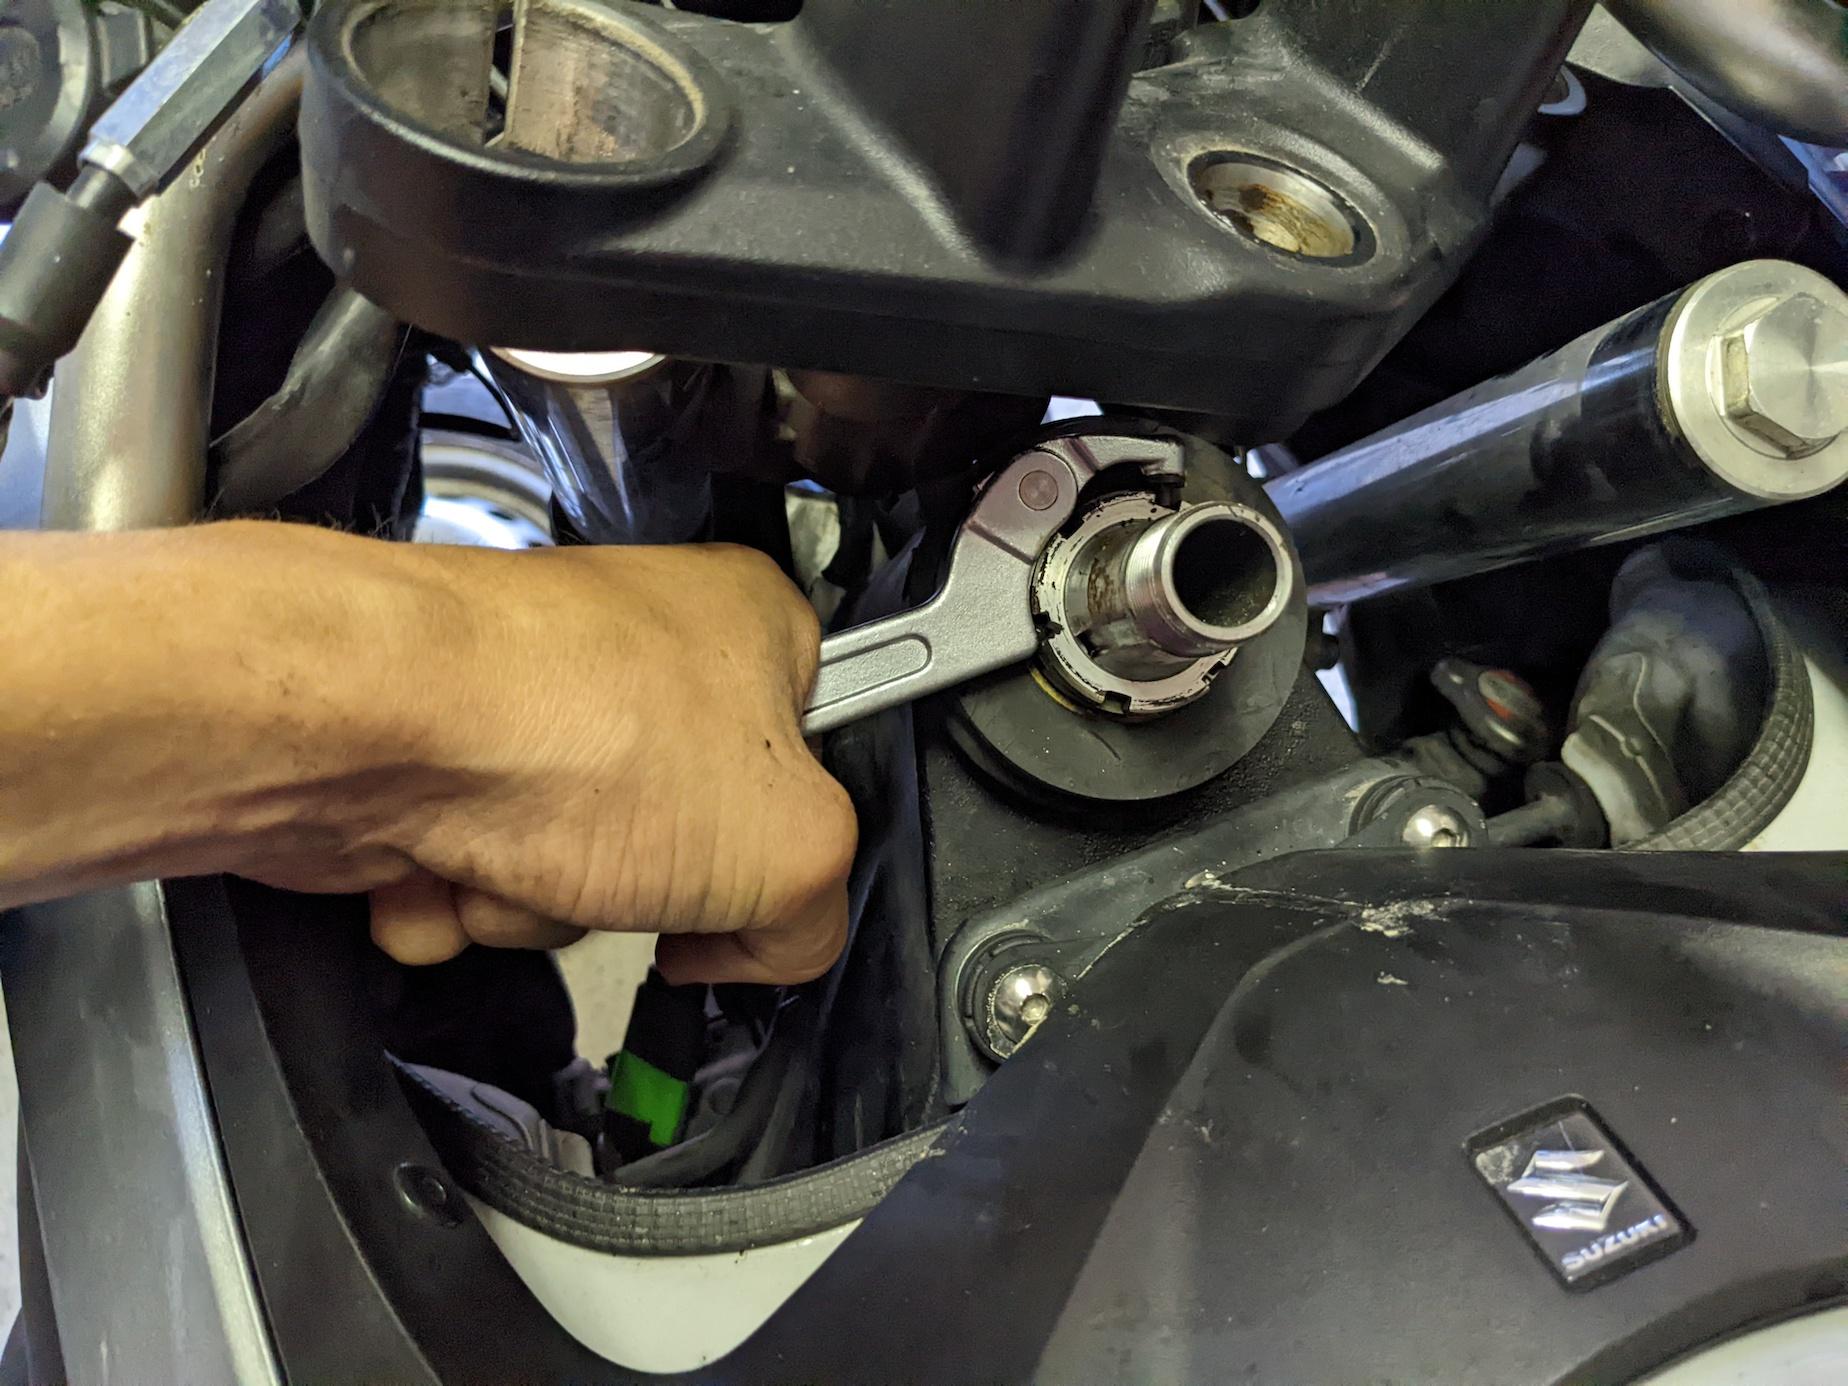
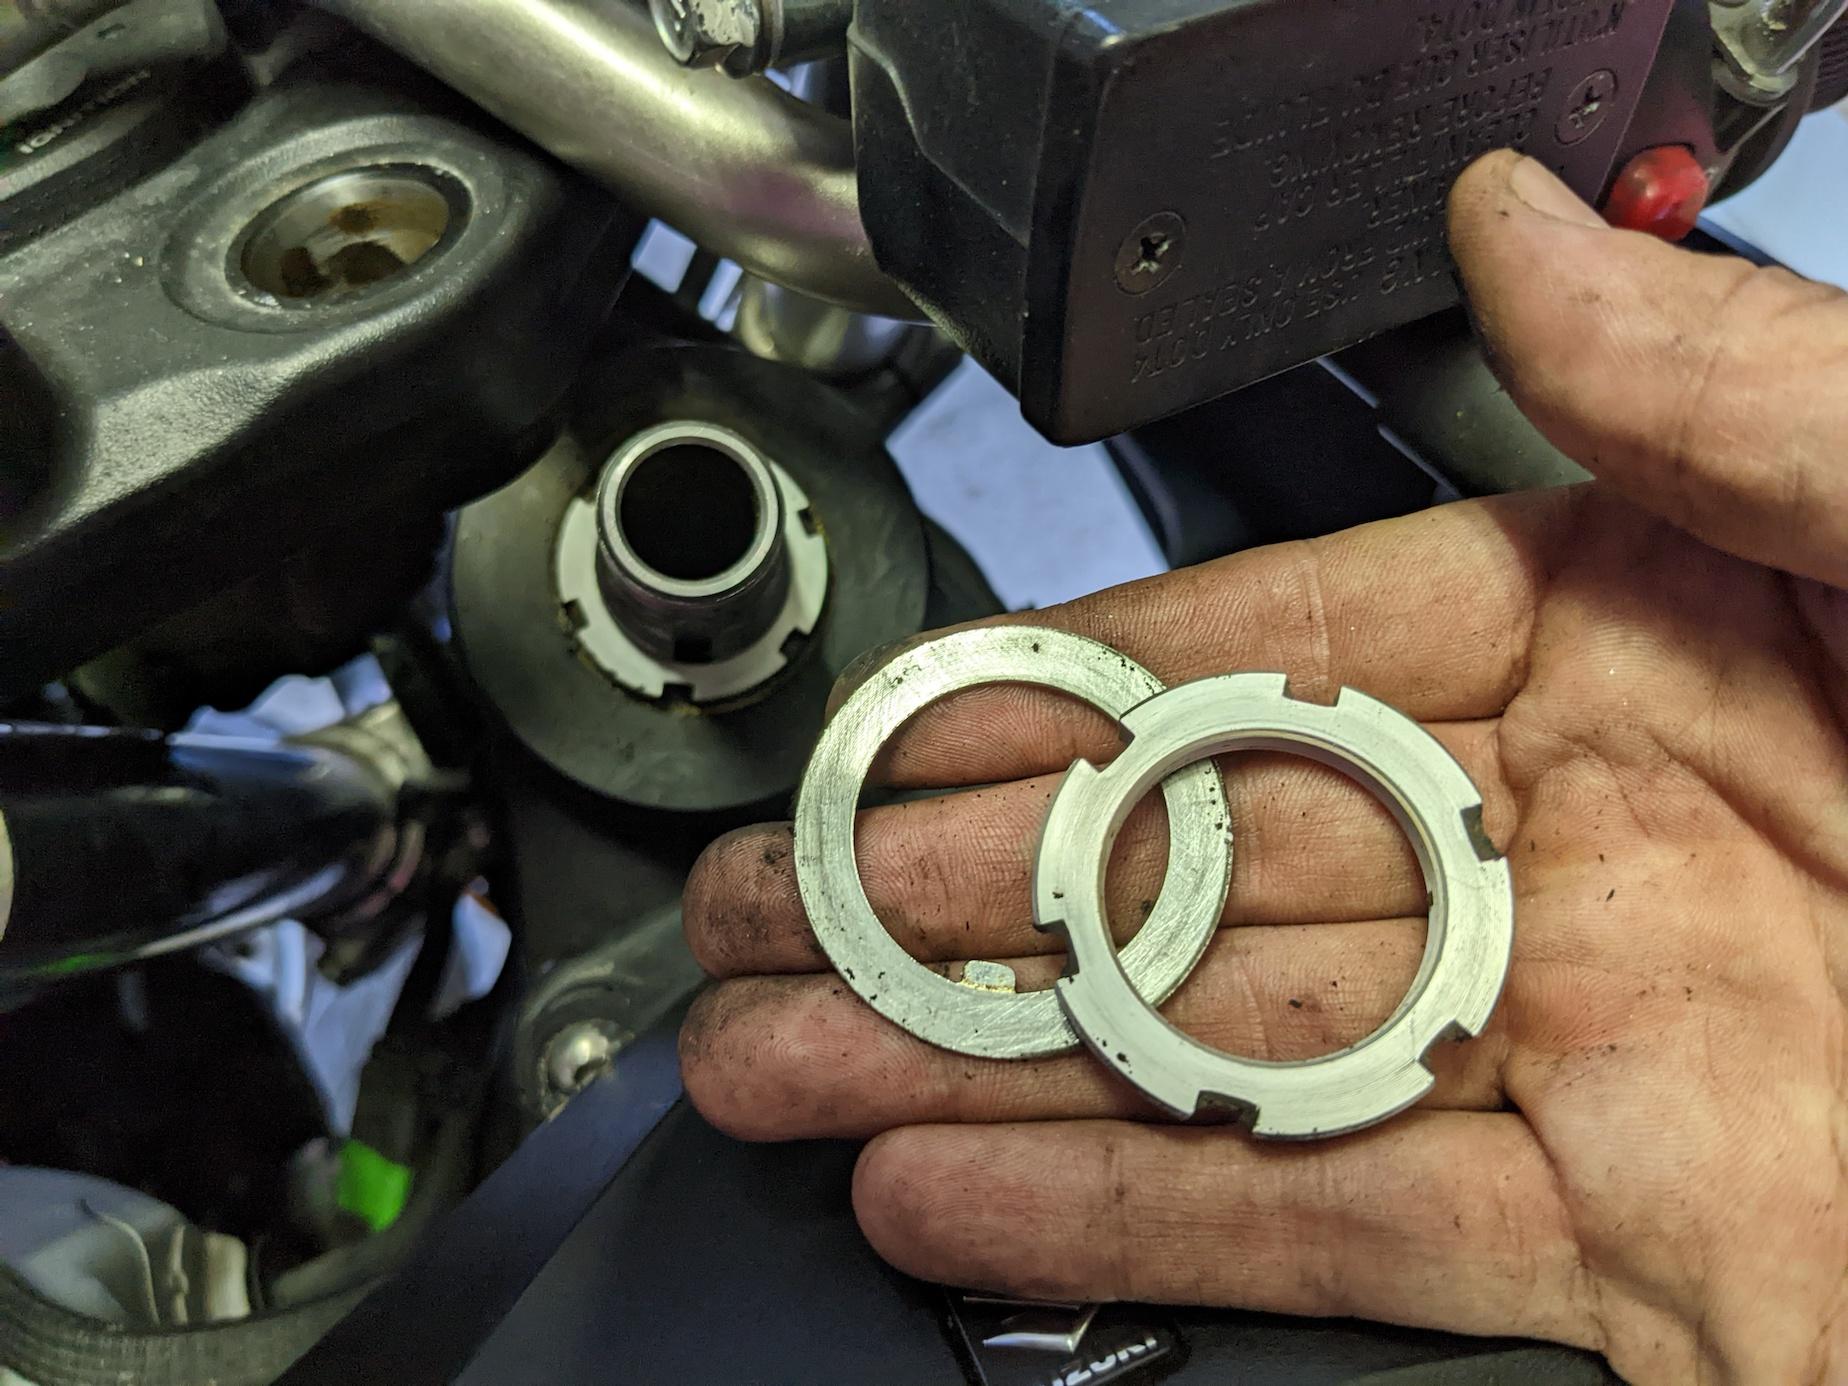
There is one locknut on top (5), then one washer in the middle (7), then one last nut under them (6). You must tighten that nut (6) to tighten the steering head bearing.
Tighten the nut. Grab the forks near the front wheel, and try to move them back and forth. There should be no play. Move the handlebar left and right with just one finger. They should move perfectly smoothly, with a light, steady resistance. If you feel “bumps” when you move the handlebar, you over-tightened, or you must replace your steering head bearing.
Reassemble everything. Torque everything according to the service manual.
- Steering stem nut: 45 N⋅m (32.5 ft⋅lbf)
- Steering stem lock nut: 80 N⋅m (58 ft⋅lbf)
- Steering stem head nut: 90 N⋅m (65 ft⋅lbf)
- Handlebar holder bolts: 23 N⋅m (16.5 ft⋅lbf)
- Steering stem upper bracket bolts: ??? (I used 23 N⋅m)
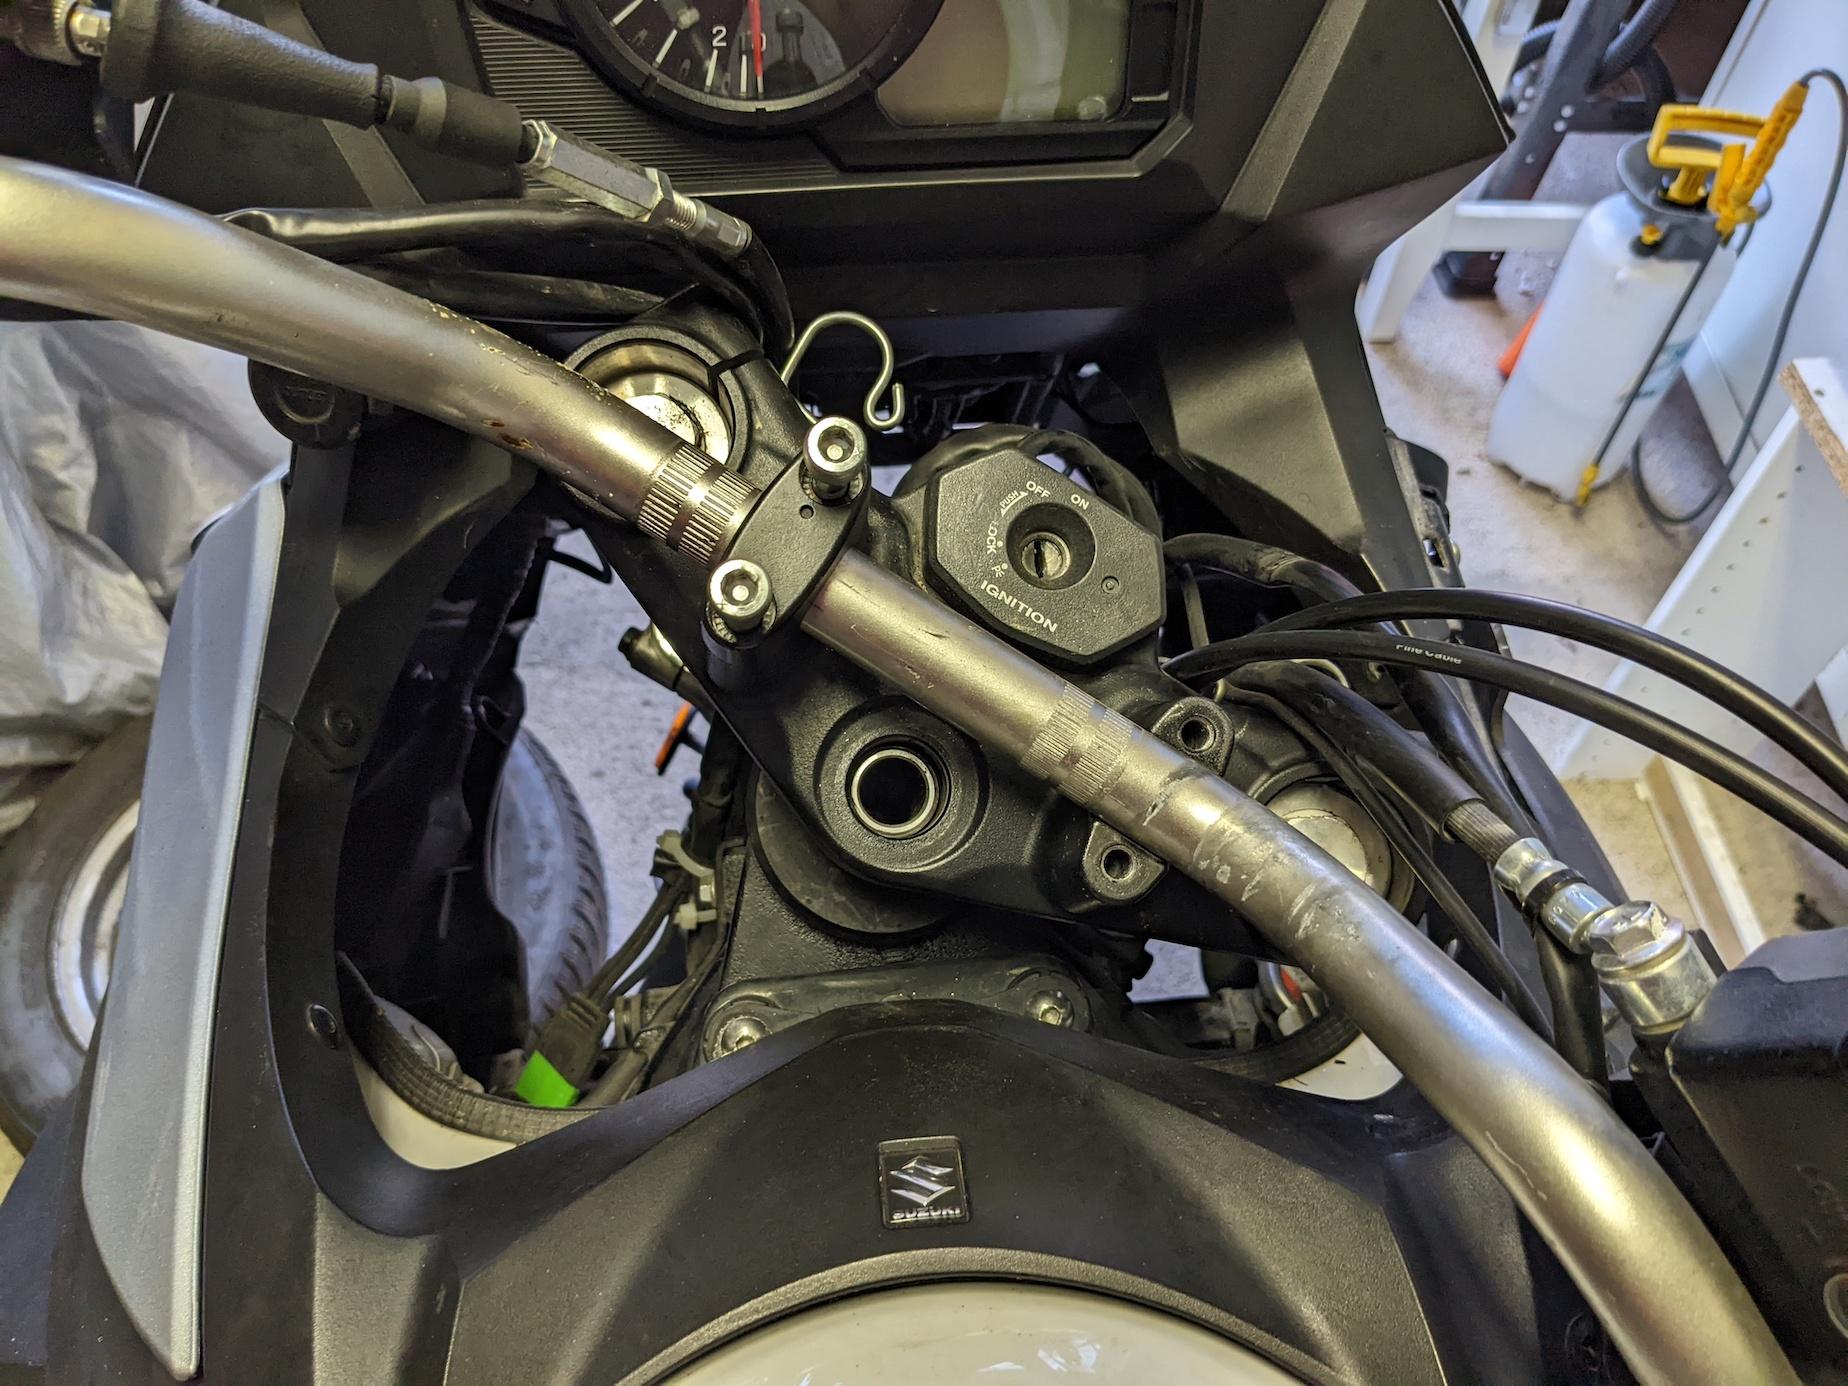
When you reattach the handlebar, make sure that the little dots on (3) are pointing toward the front wheel.