Powered panniers
Built in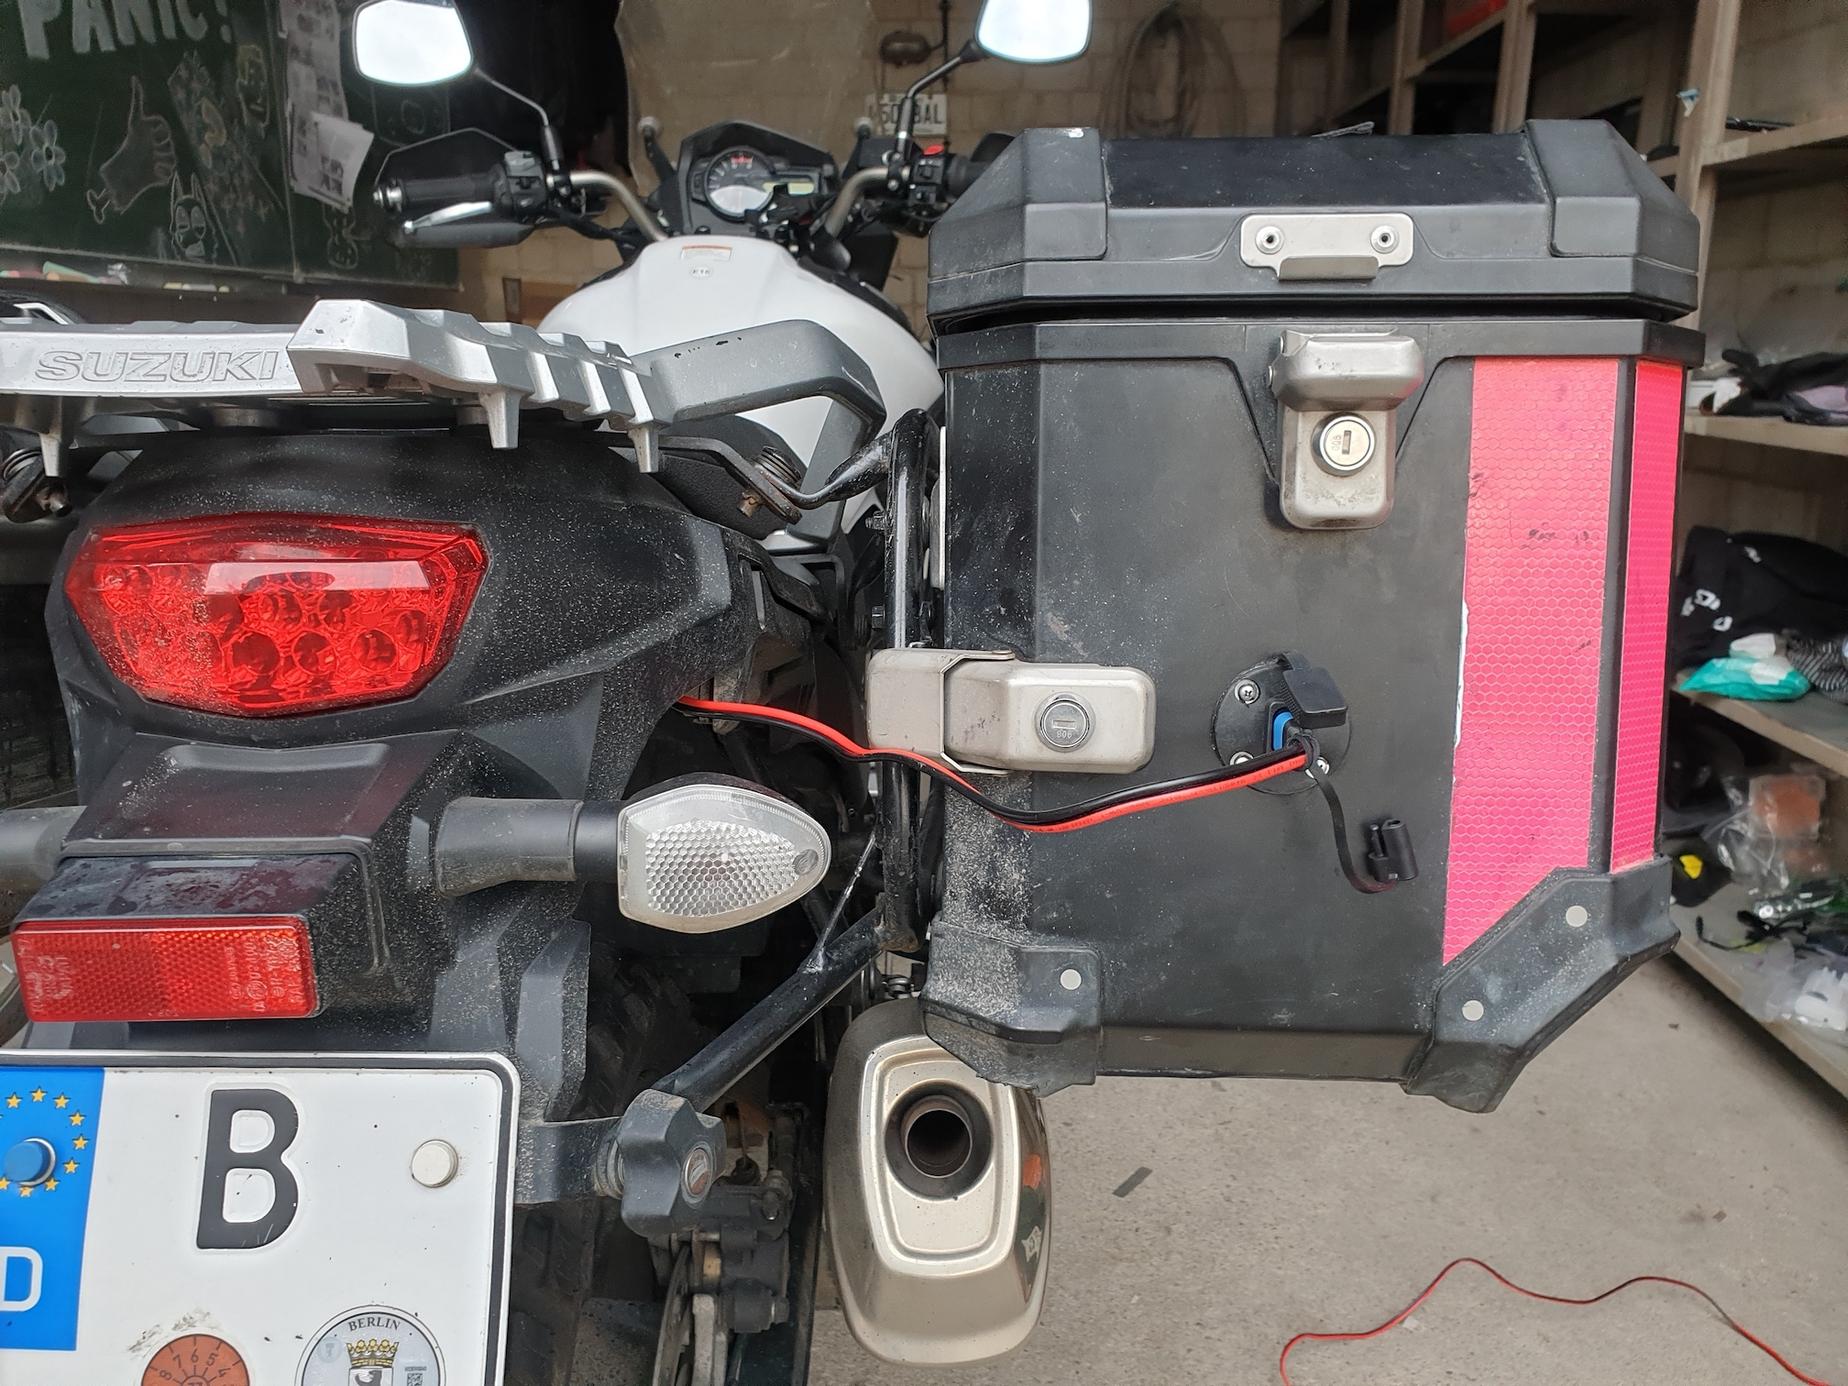
On longer motorcycle trips, it’s a hassle to keep everything charged: phone, laptop, power bank, shaver, Airpods, head lamp, GPS beacon and so on. When I’m camping, I can’t find a wall socket. When I sleep in hostels, I don’t want to leave my things unattended. Even when I sleep in hotels, I’m too exhausted to think about it.
It might seem like a trifle, but I’m only off the saddle for a few hours, and my attention is split between finding food, cleaning up, planning the route ahead, keeping the bike running and… oh right, seeing the sights!
I figured I’d rather charge everything on the motorbike as I ride, and reach my destination ready to keep going.

Thinking inside the box
Bringing power inside the pannier was no walk in the park. I needed a connector that could handle mud, dust and torrential downpours, and still work safely. It had to be easy to connect and disconnect, as I take the panniers off every night.
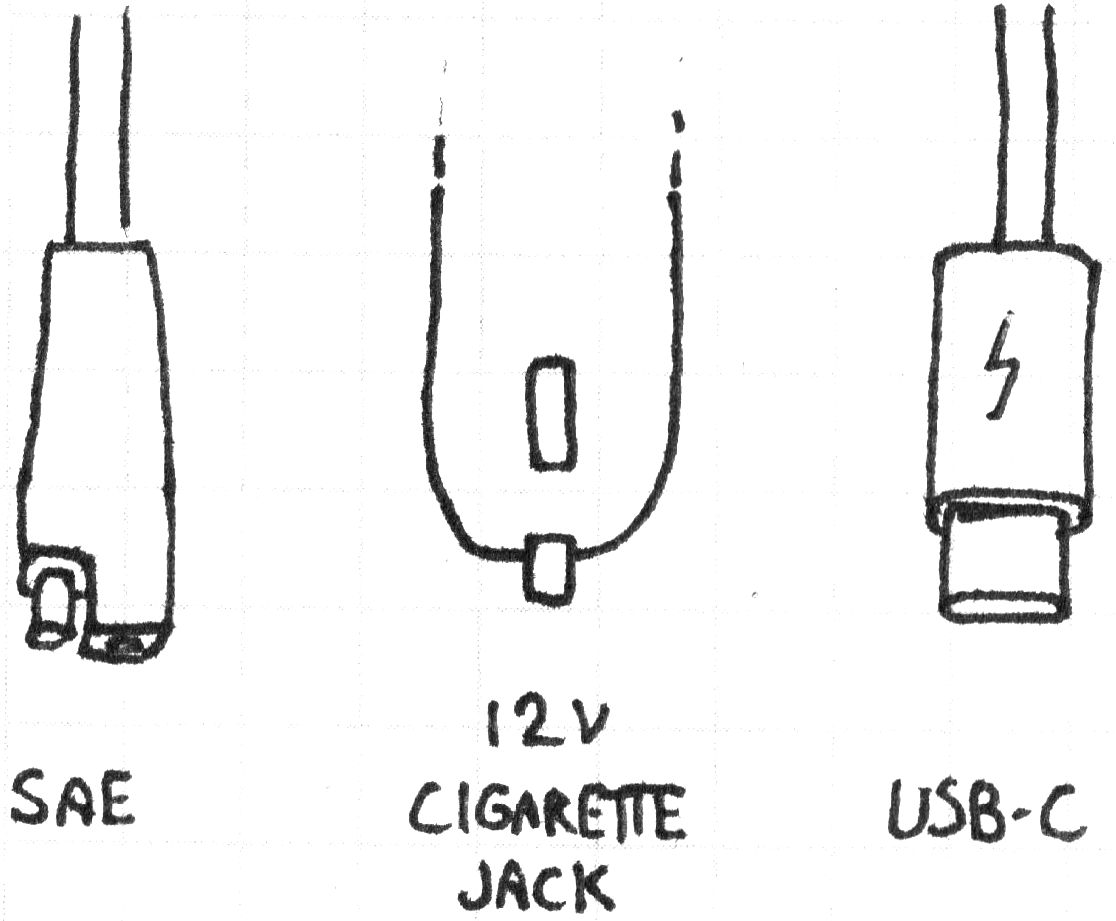
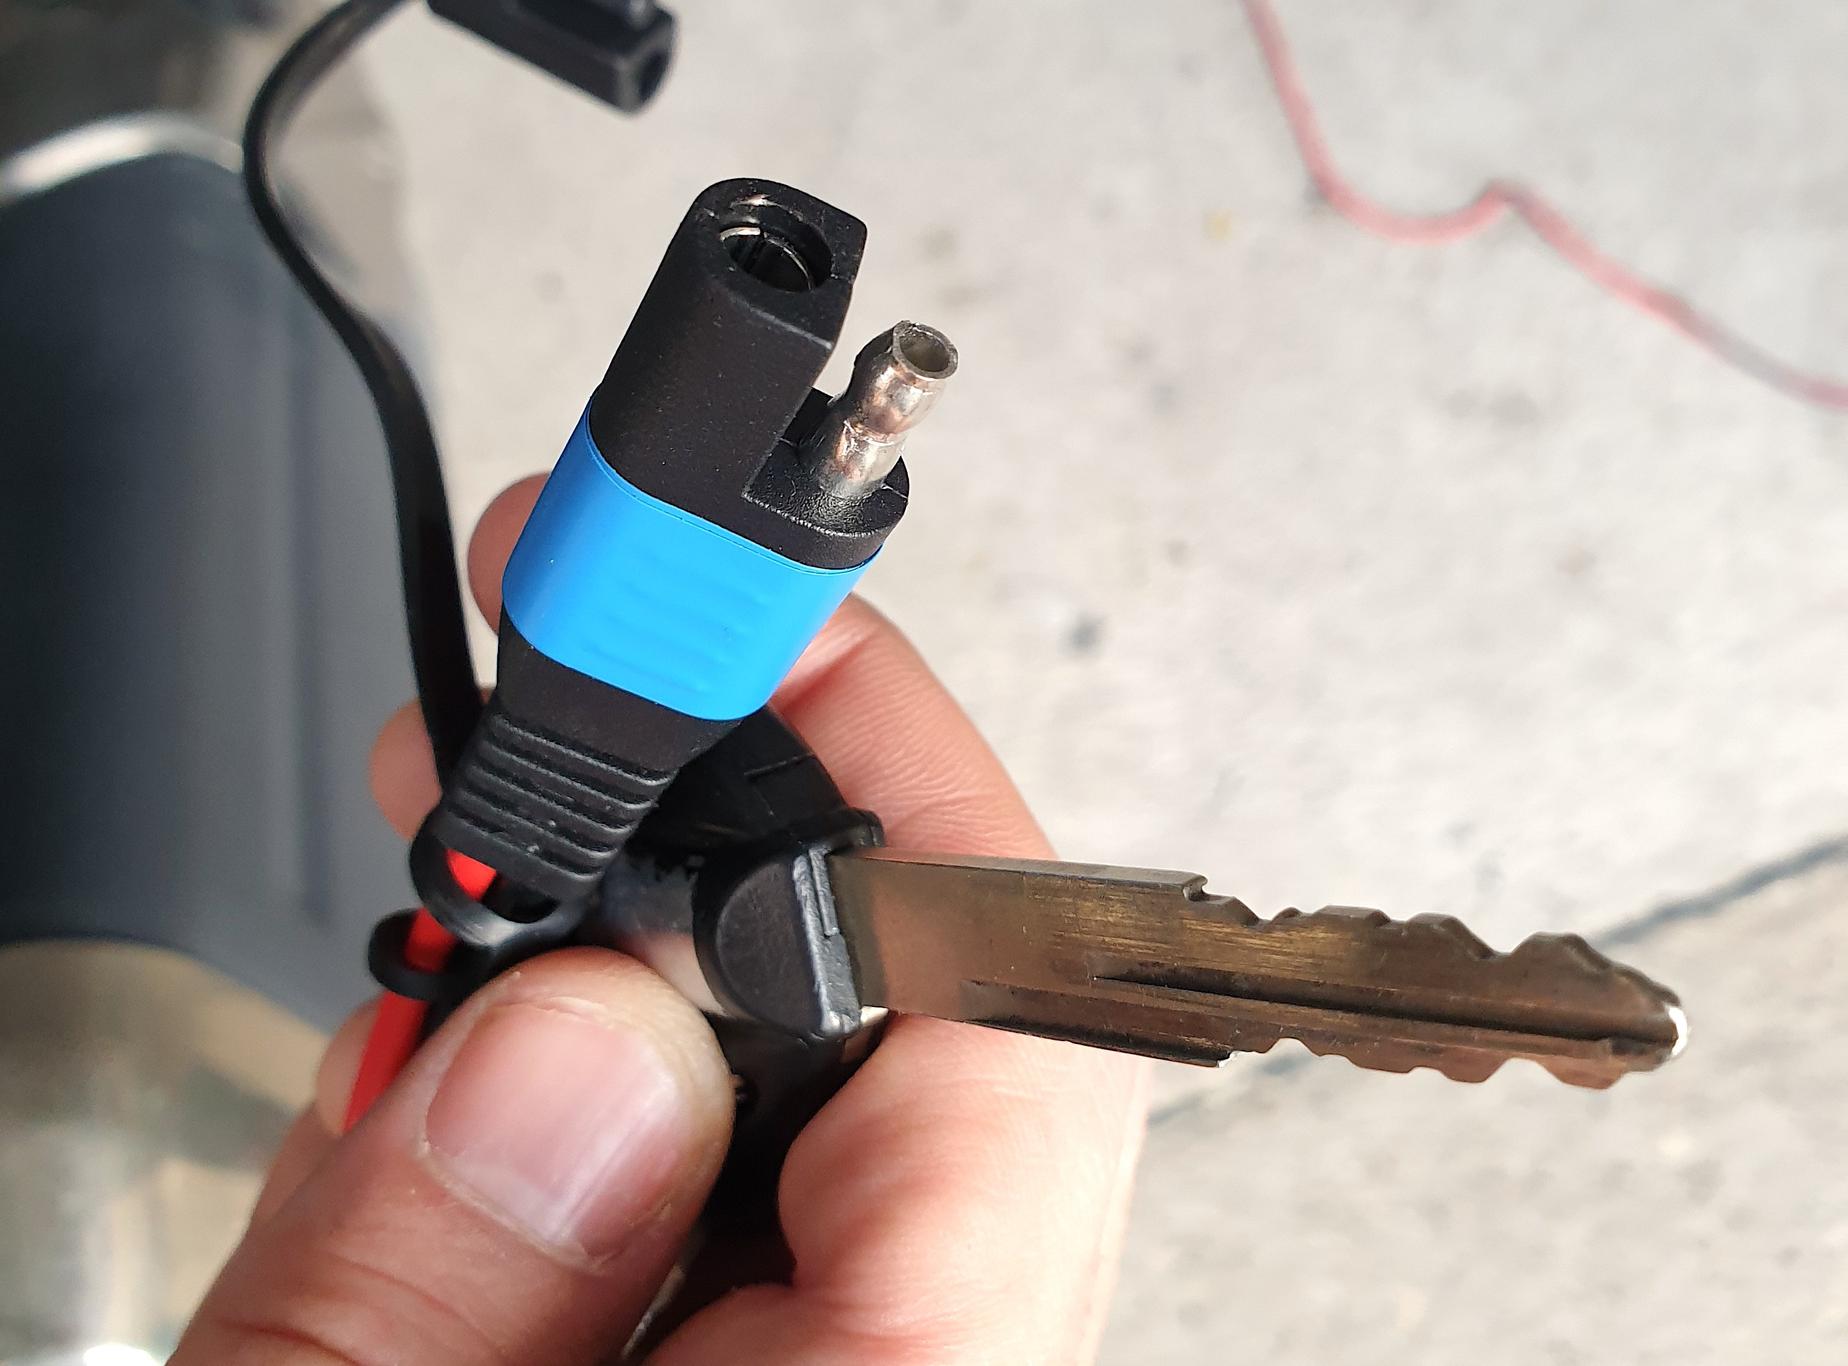
I wasted a whole day on Digikey racking up an insane bill of materials before I discovered SAE connectors. They’re tough, they’re waterproof, and they’re an automotive industry standard. They’re also dirt cheap. I found an SAE panel mount connector on Amazon, and lots of cheap cables and adapters to bring the system together.
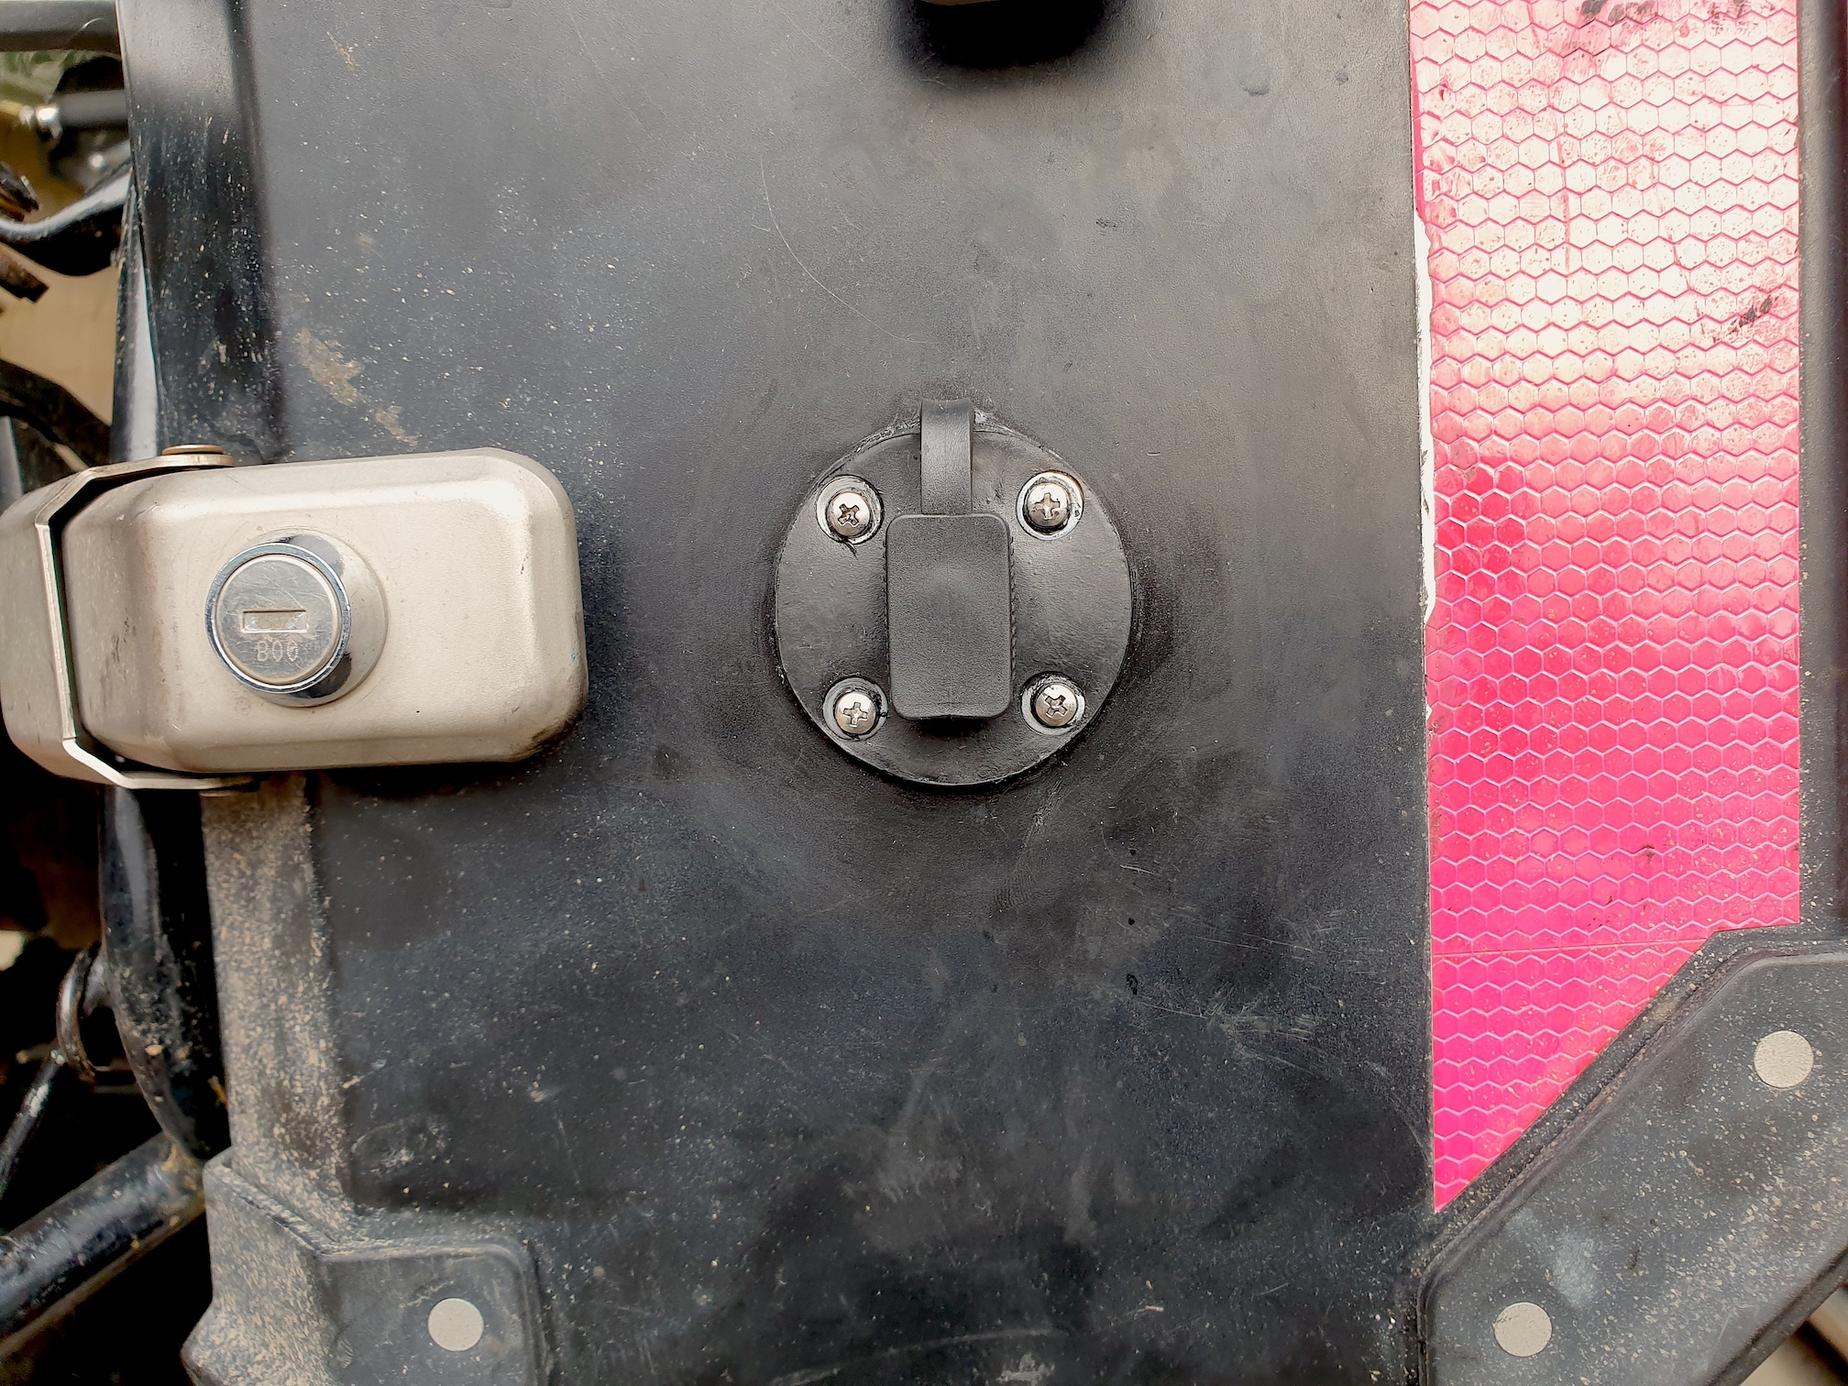
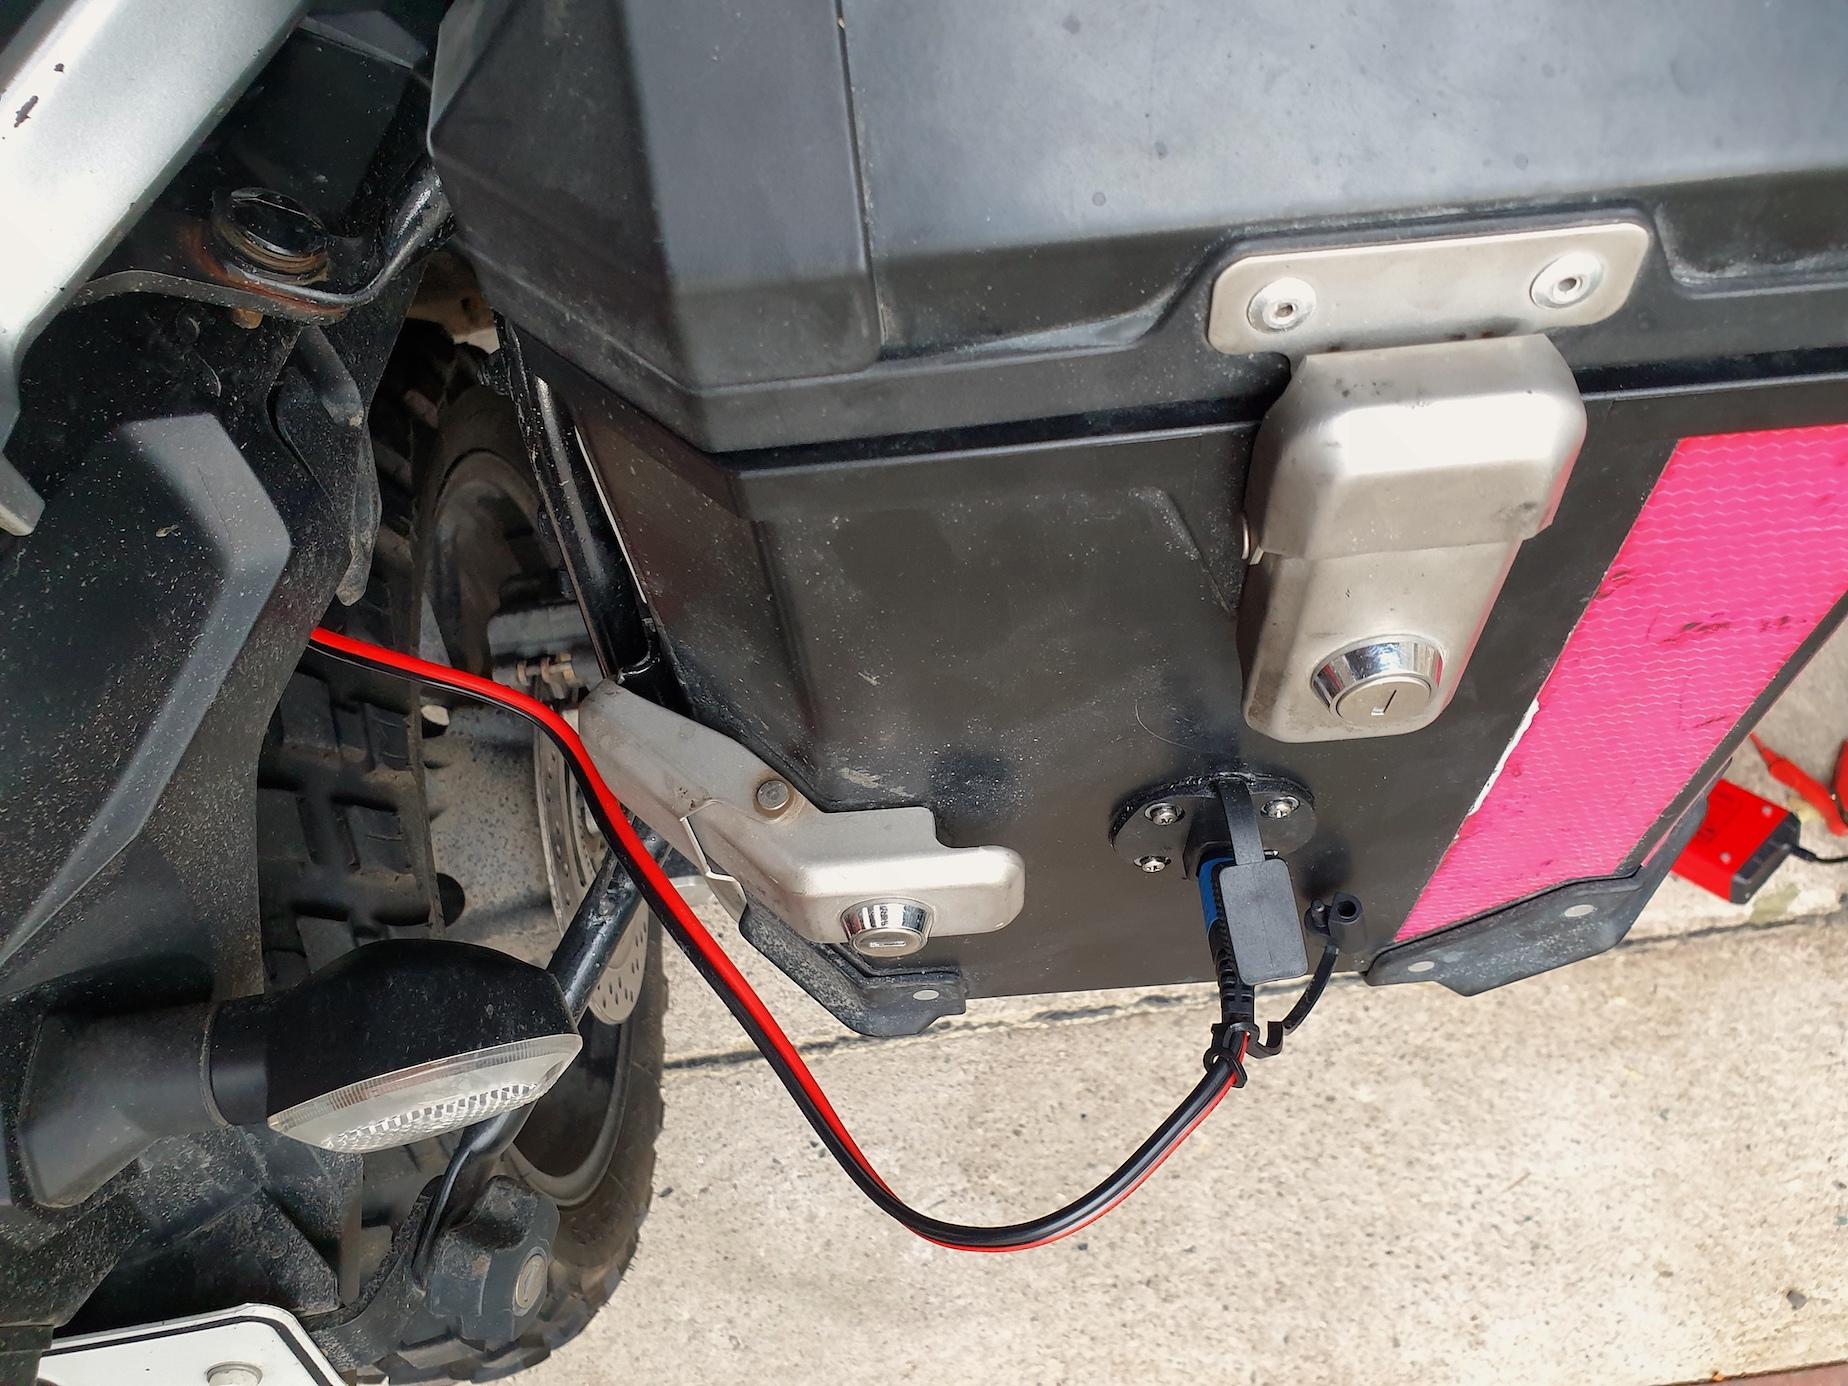
When the panniers are on the bike, the connector faces to the rear. This way, I can check if my panniers are mounted, locked and connected at a glance. If I placed the connector in the front, I’d constantly bump into it until I destroy it. The front also tends to get caked in mud and bugs. If I placed it on the inner side (between the pannier and the motorcycle), I’d likely forget it’s there and tear it off within a week.
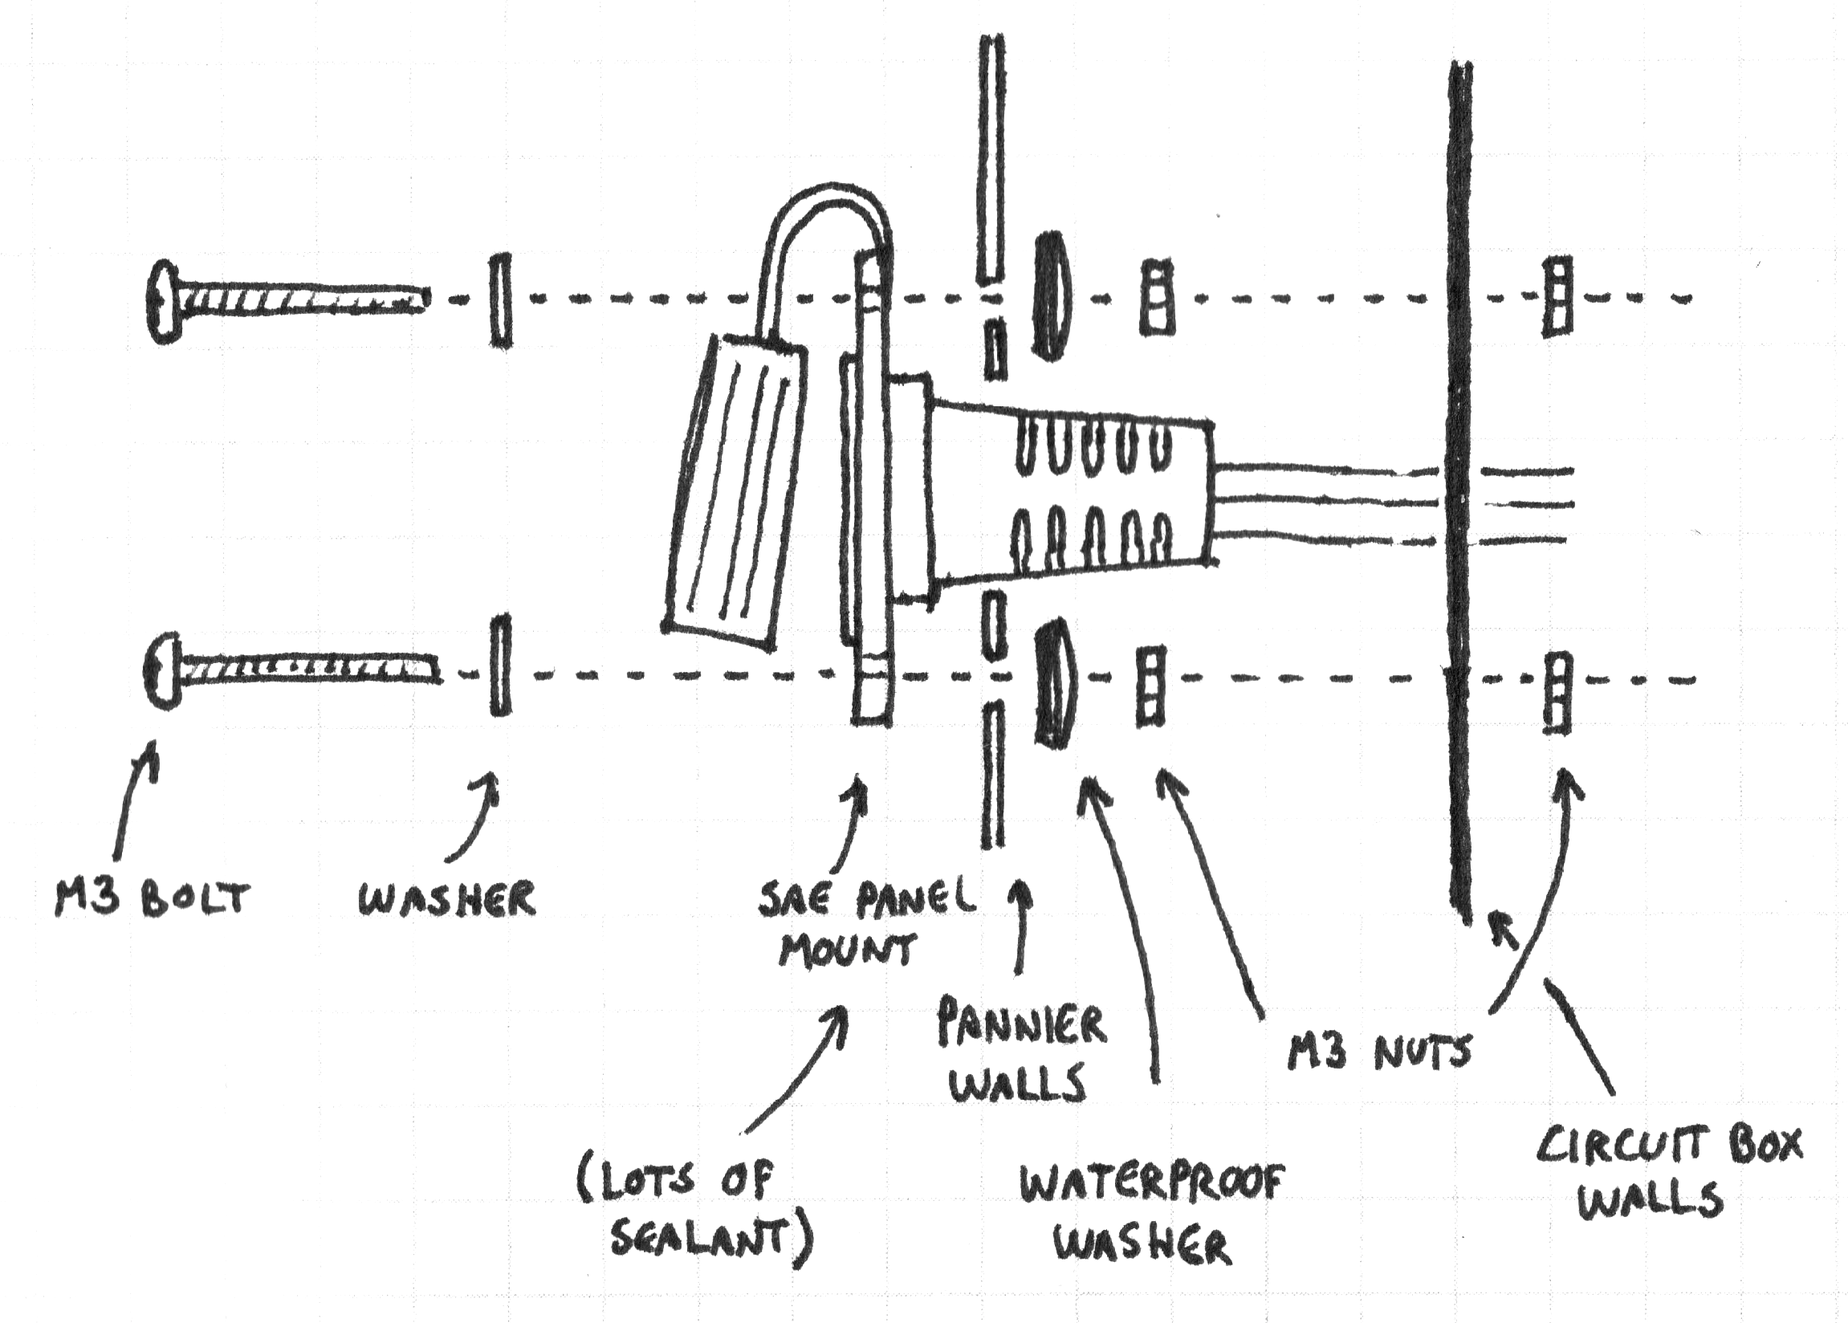
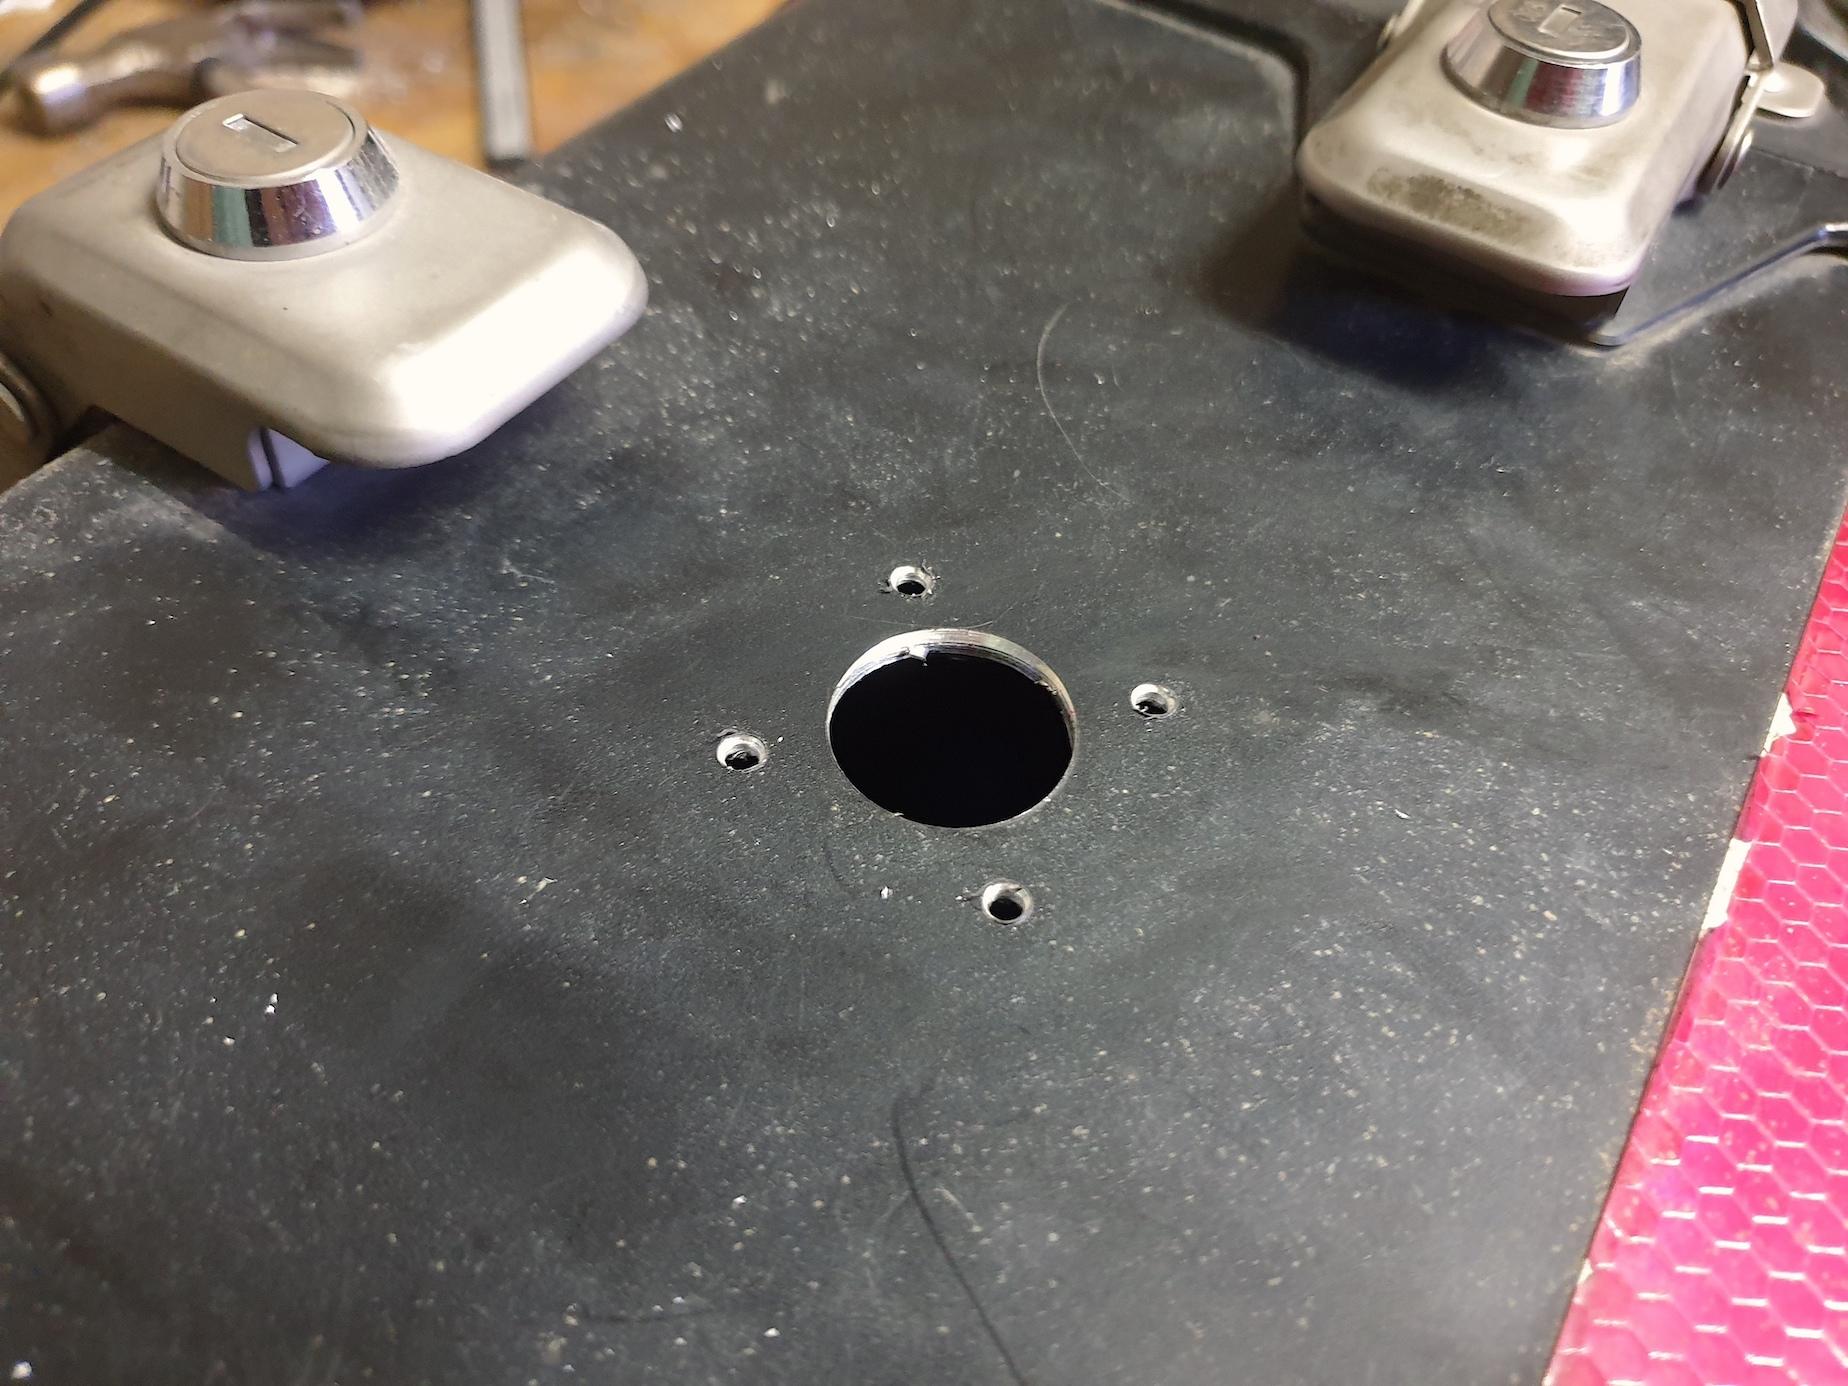
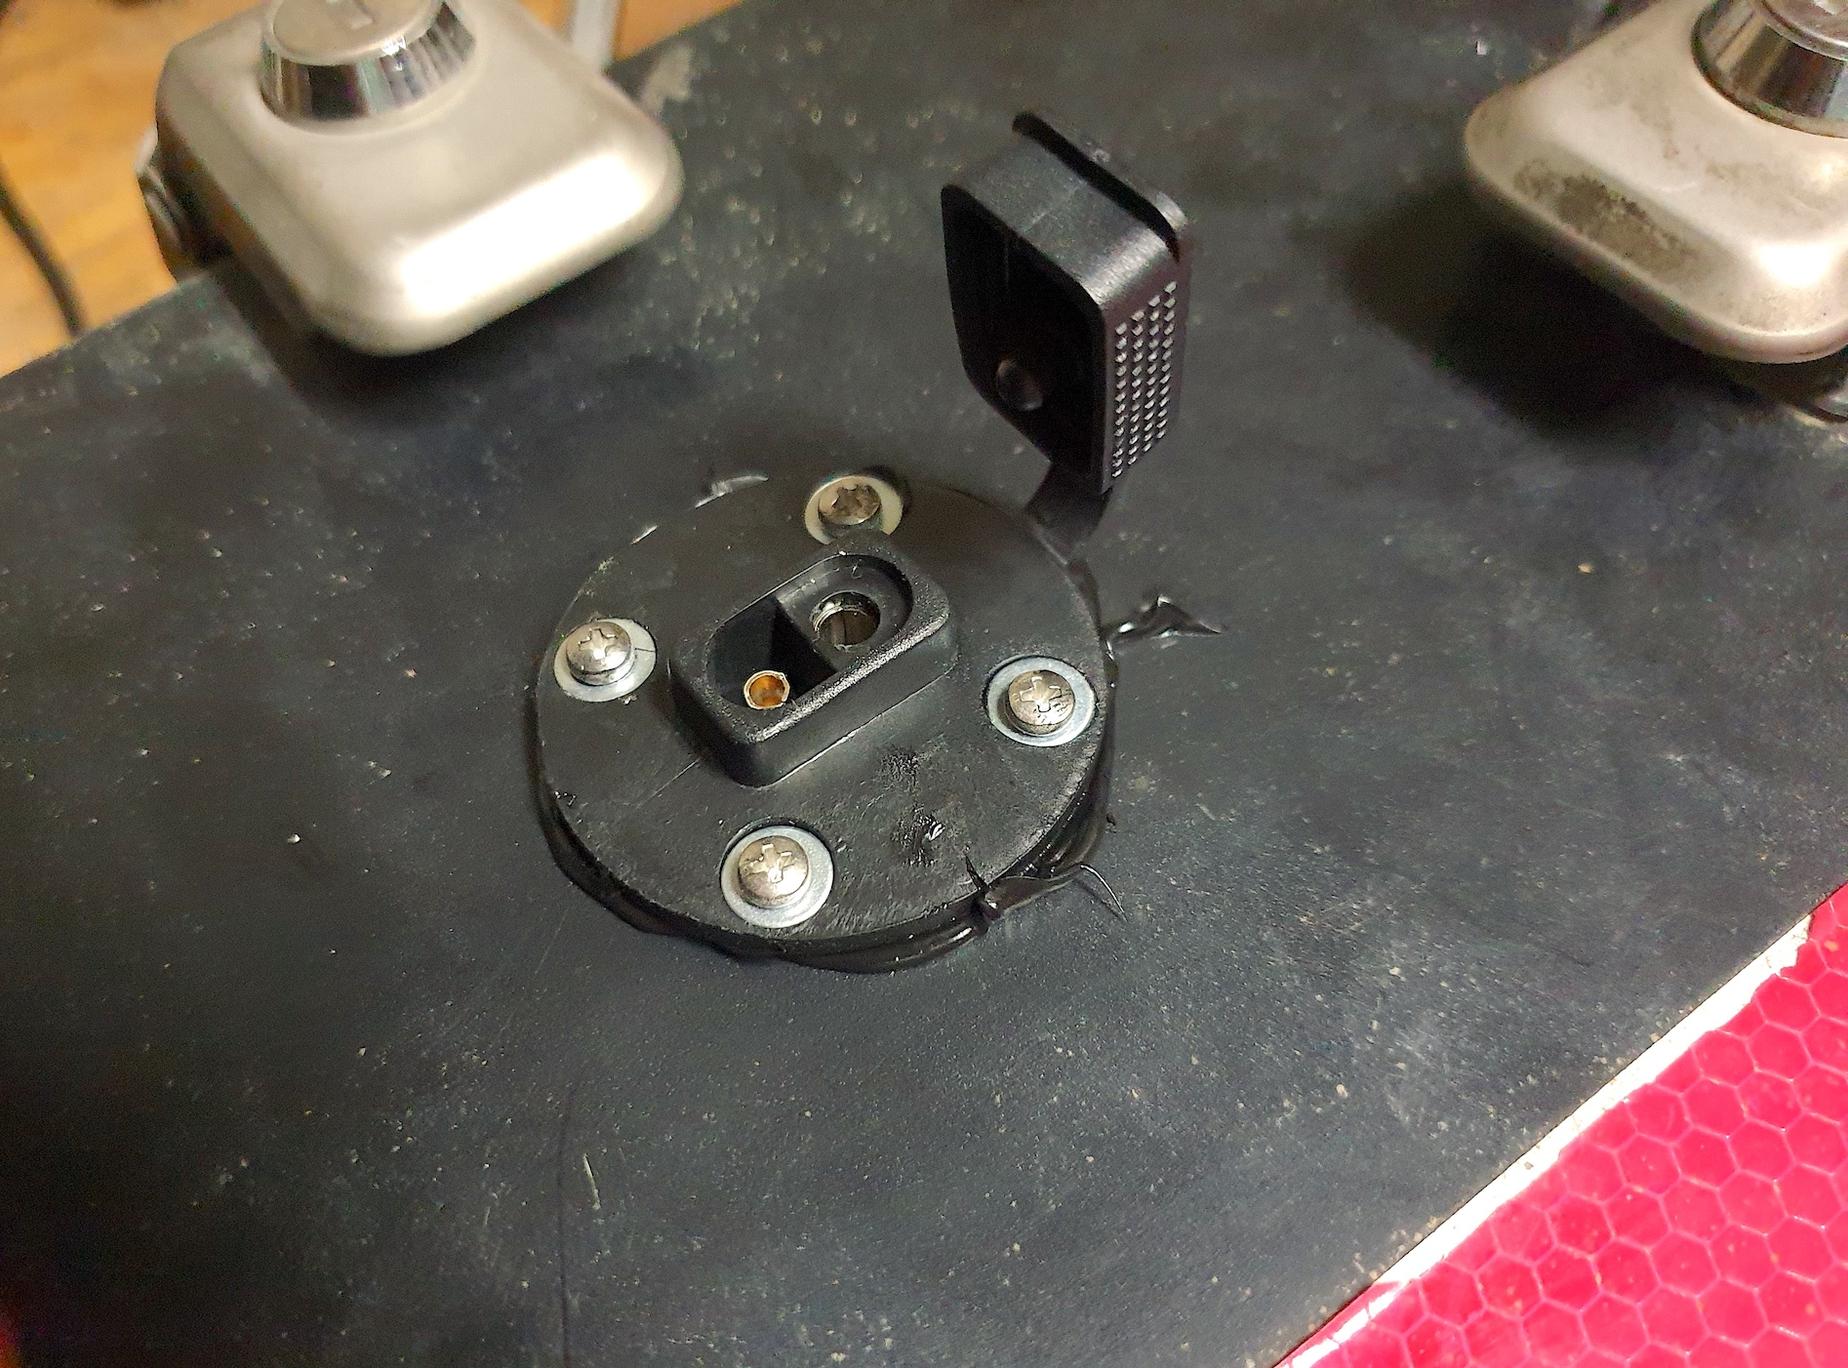
I made the connector holes with step drill bit, and bolted the connector in place. I used a generous amount of automotive silicon to waterproof the whole thing. That’s the same product they use to install windscreens, so it ought to keep the water out. I used waterproof washers on the other side, just in case. As I tightened the bolts, the extra silicon oozed out, and I wiped it off with a rag. I left the whole contraption in the shower for 15 minutes, and it didn’t leak. I had many more opportunities to test it in the rain, and it held.
I wanted to use M5 bolts for the connector, because I already pack the right tool for those, but the holes were too small. I used smaller M3 bolts and added a 5.5 mm socket to my packing list.
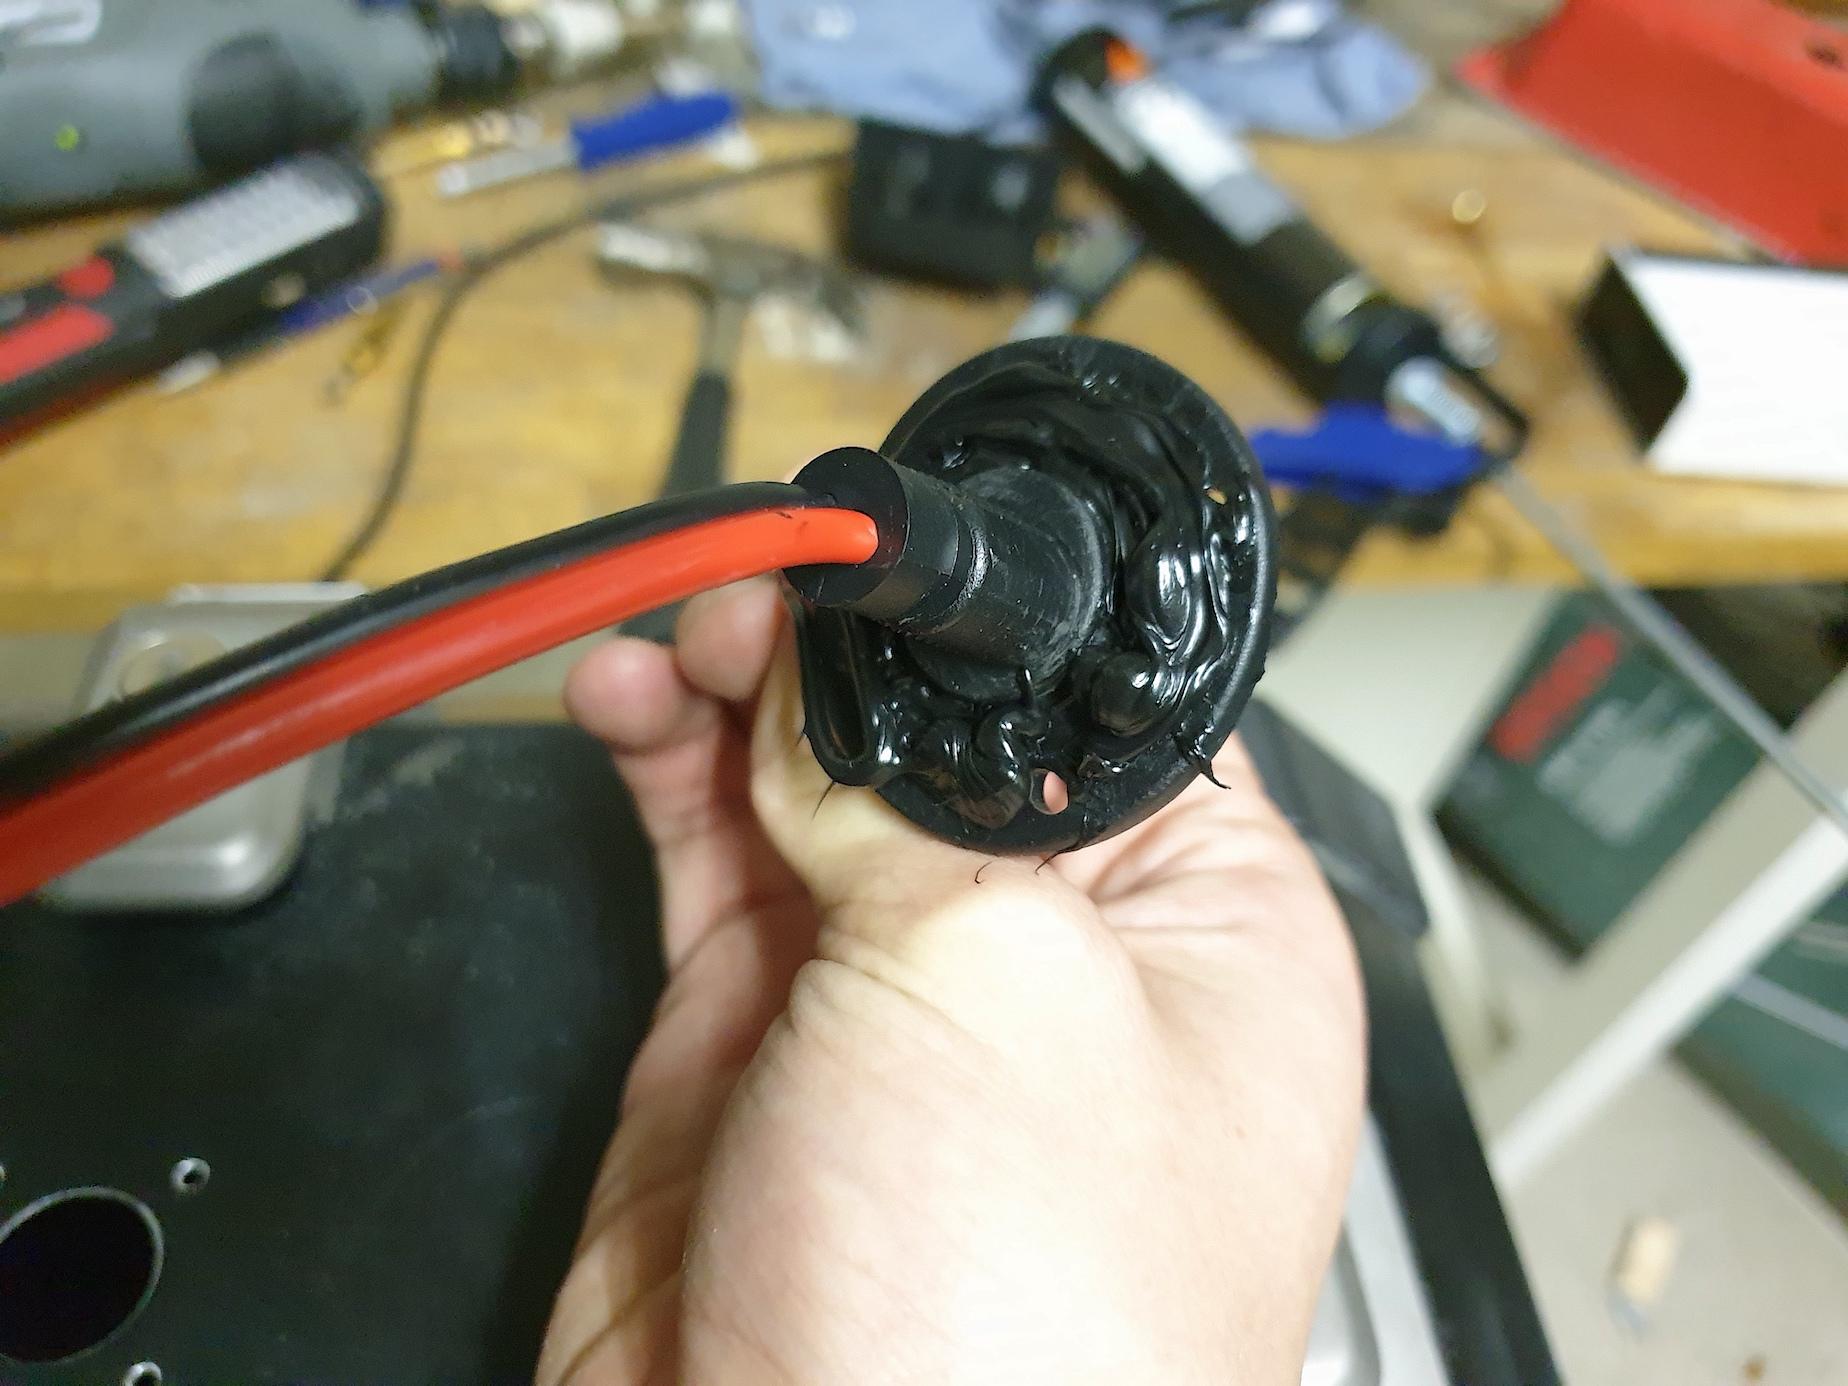
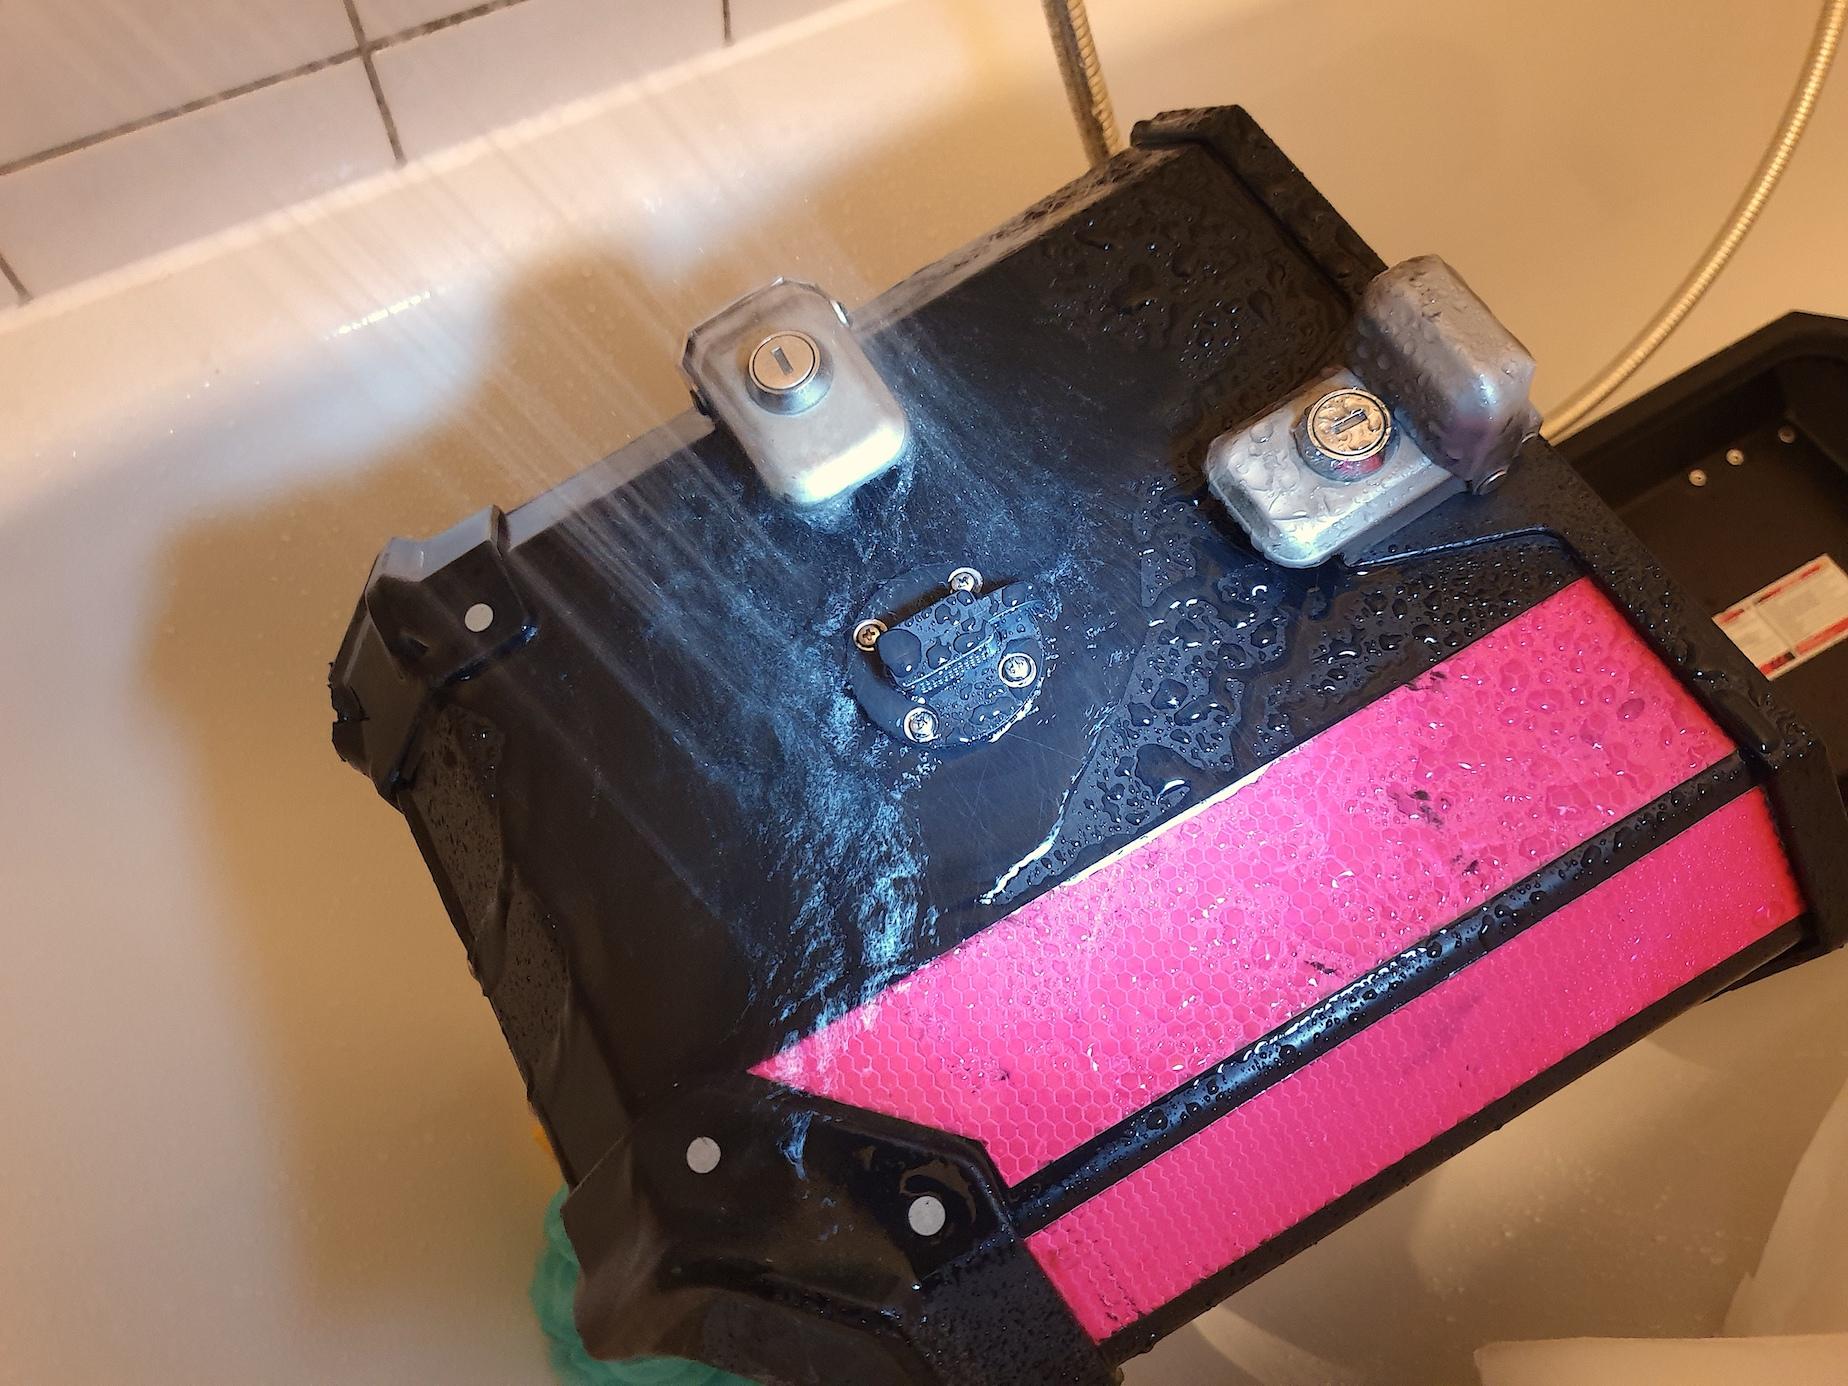
It turned out exactly as I hoped. The connector is tough and waterproof, and it looks halfway decent.
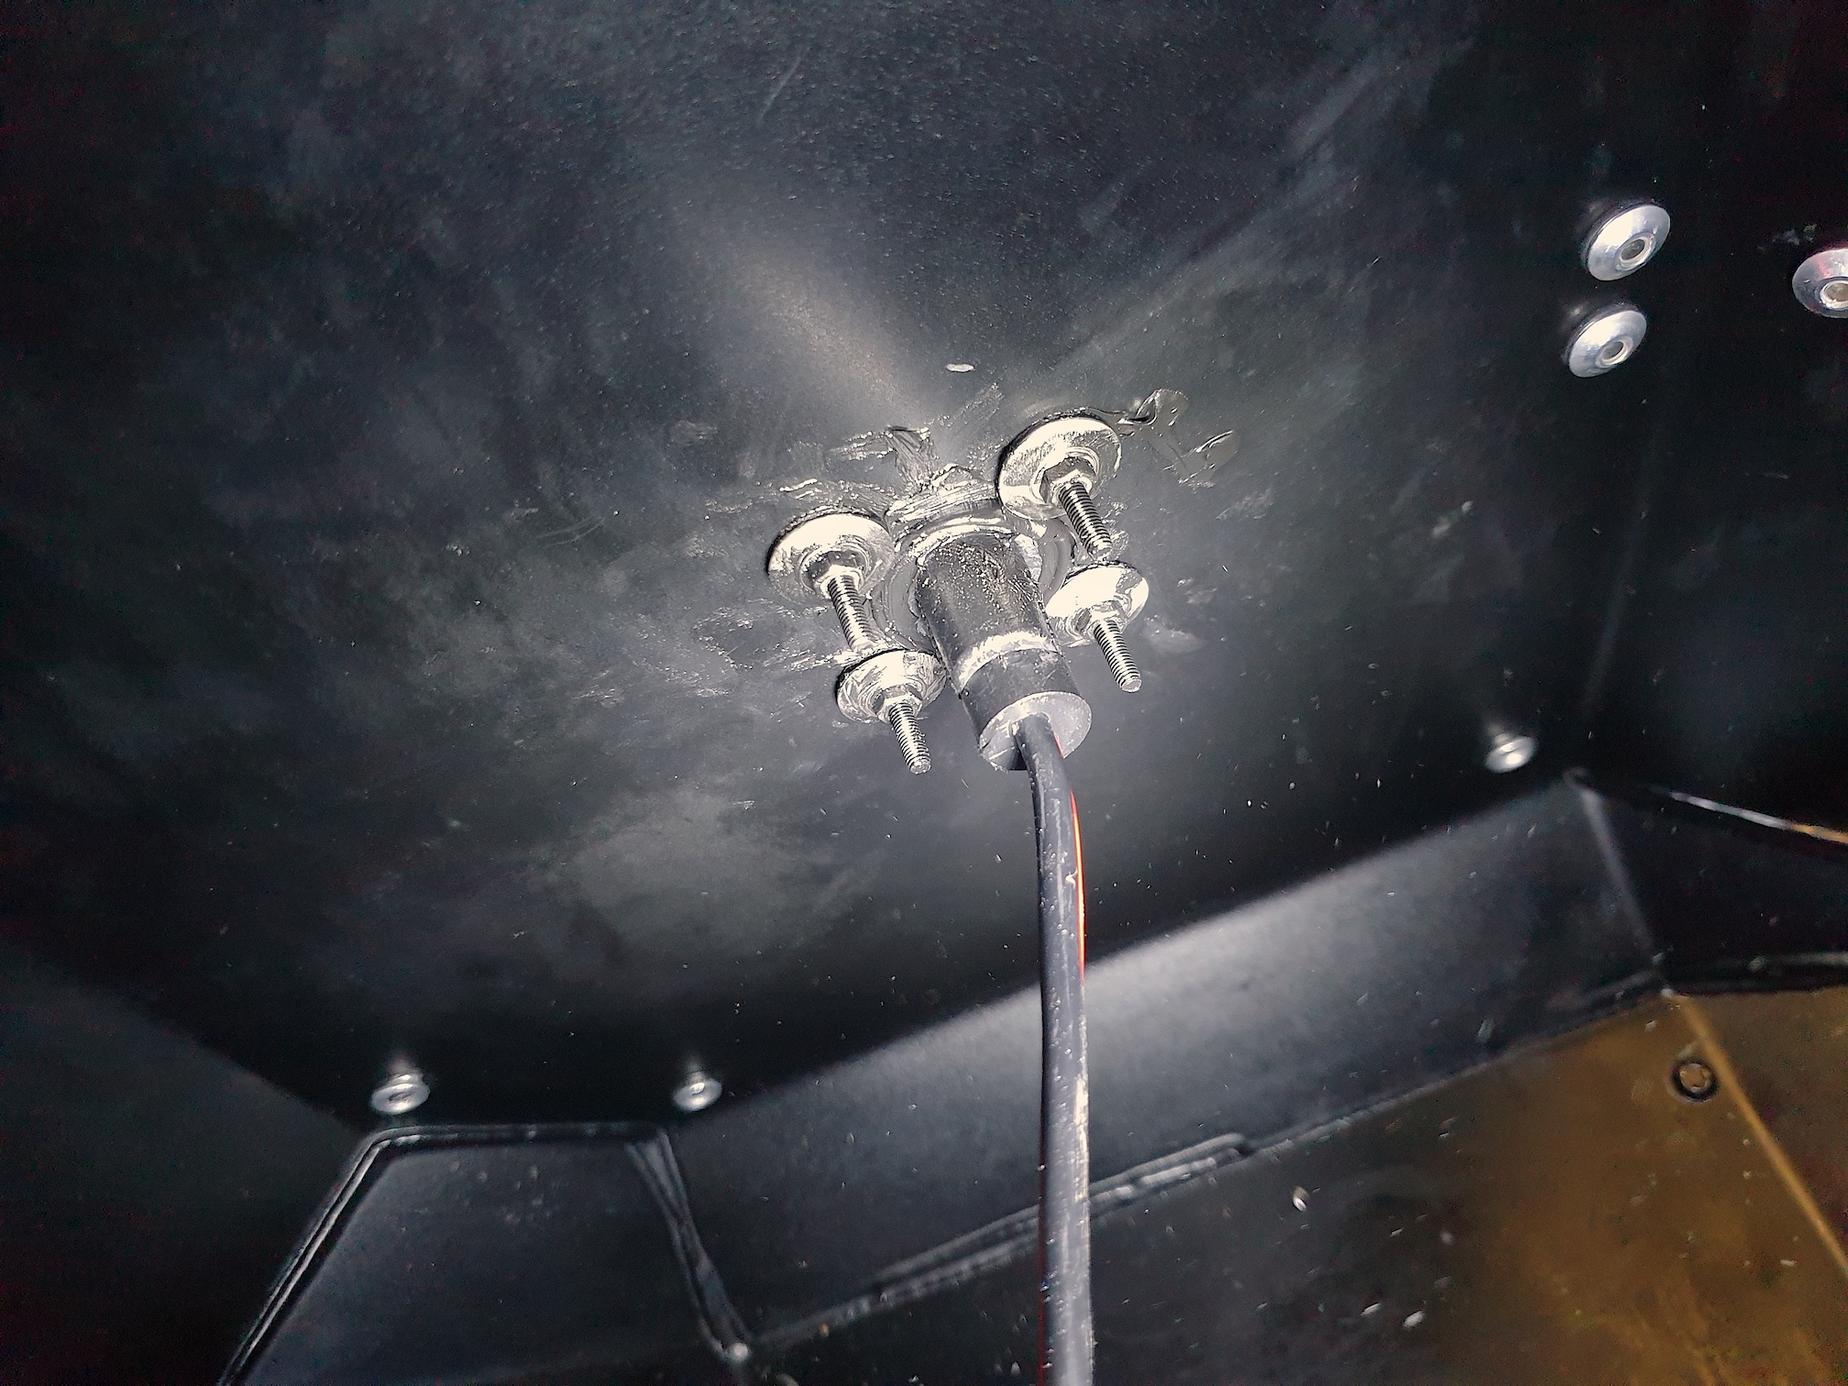
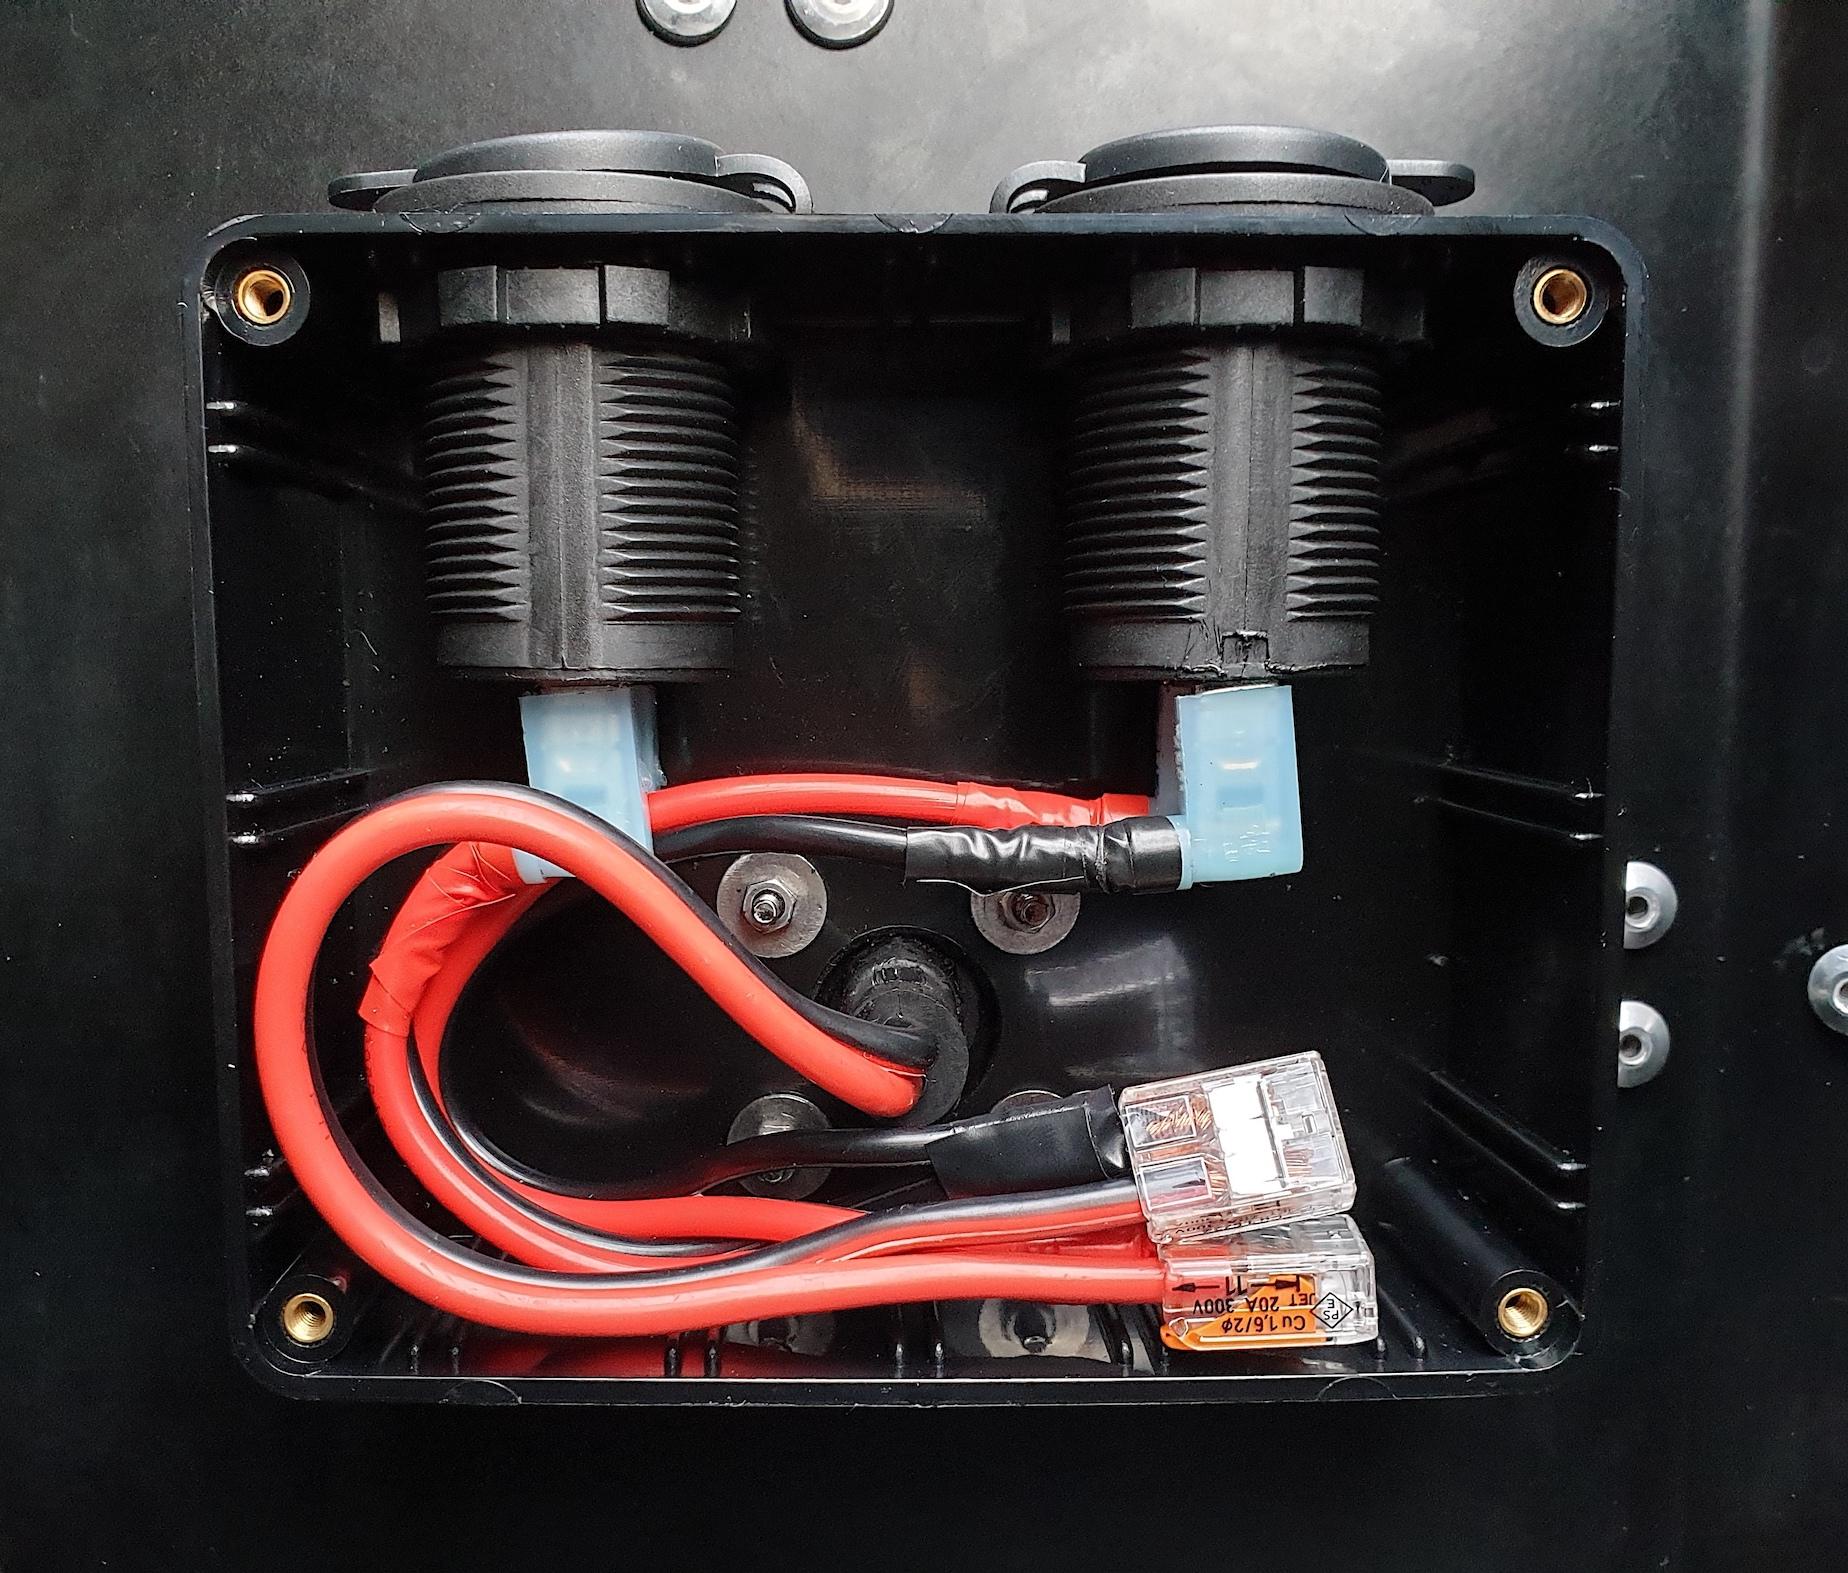
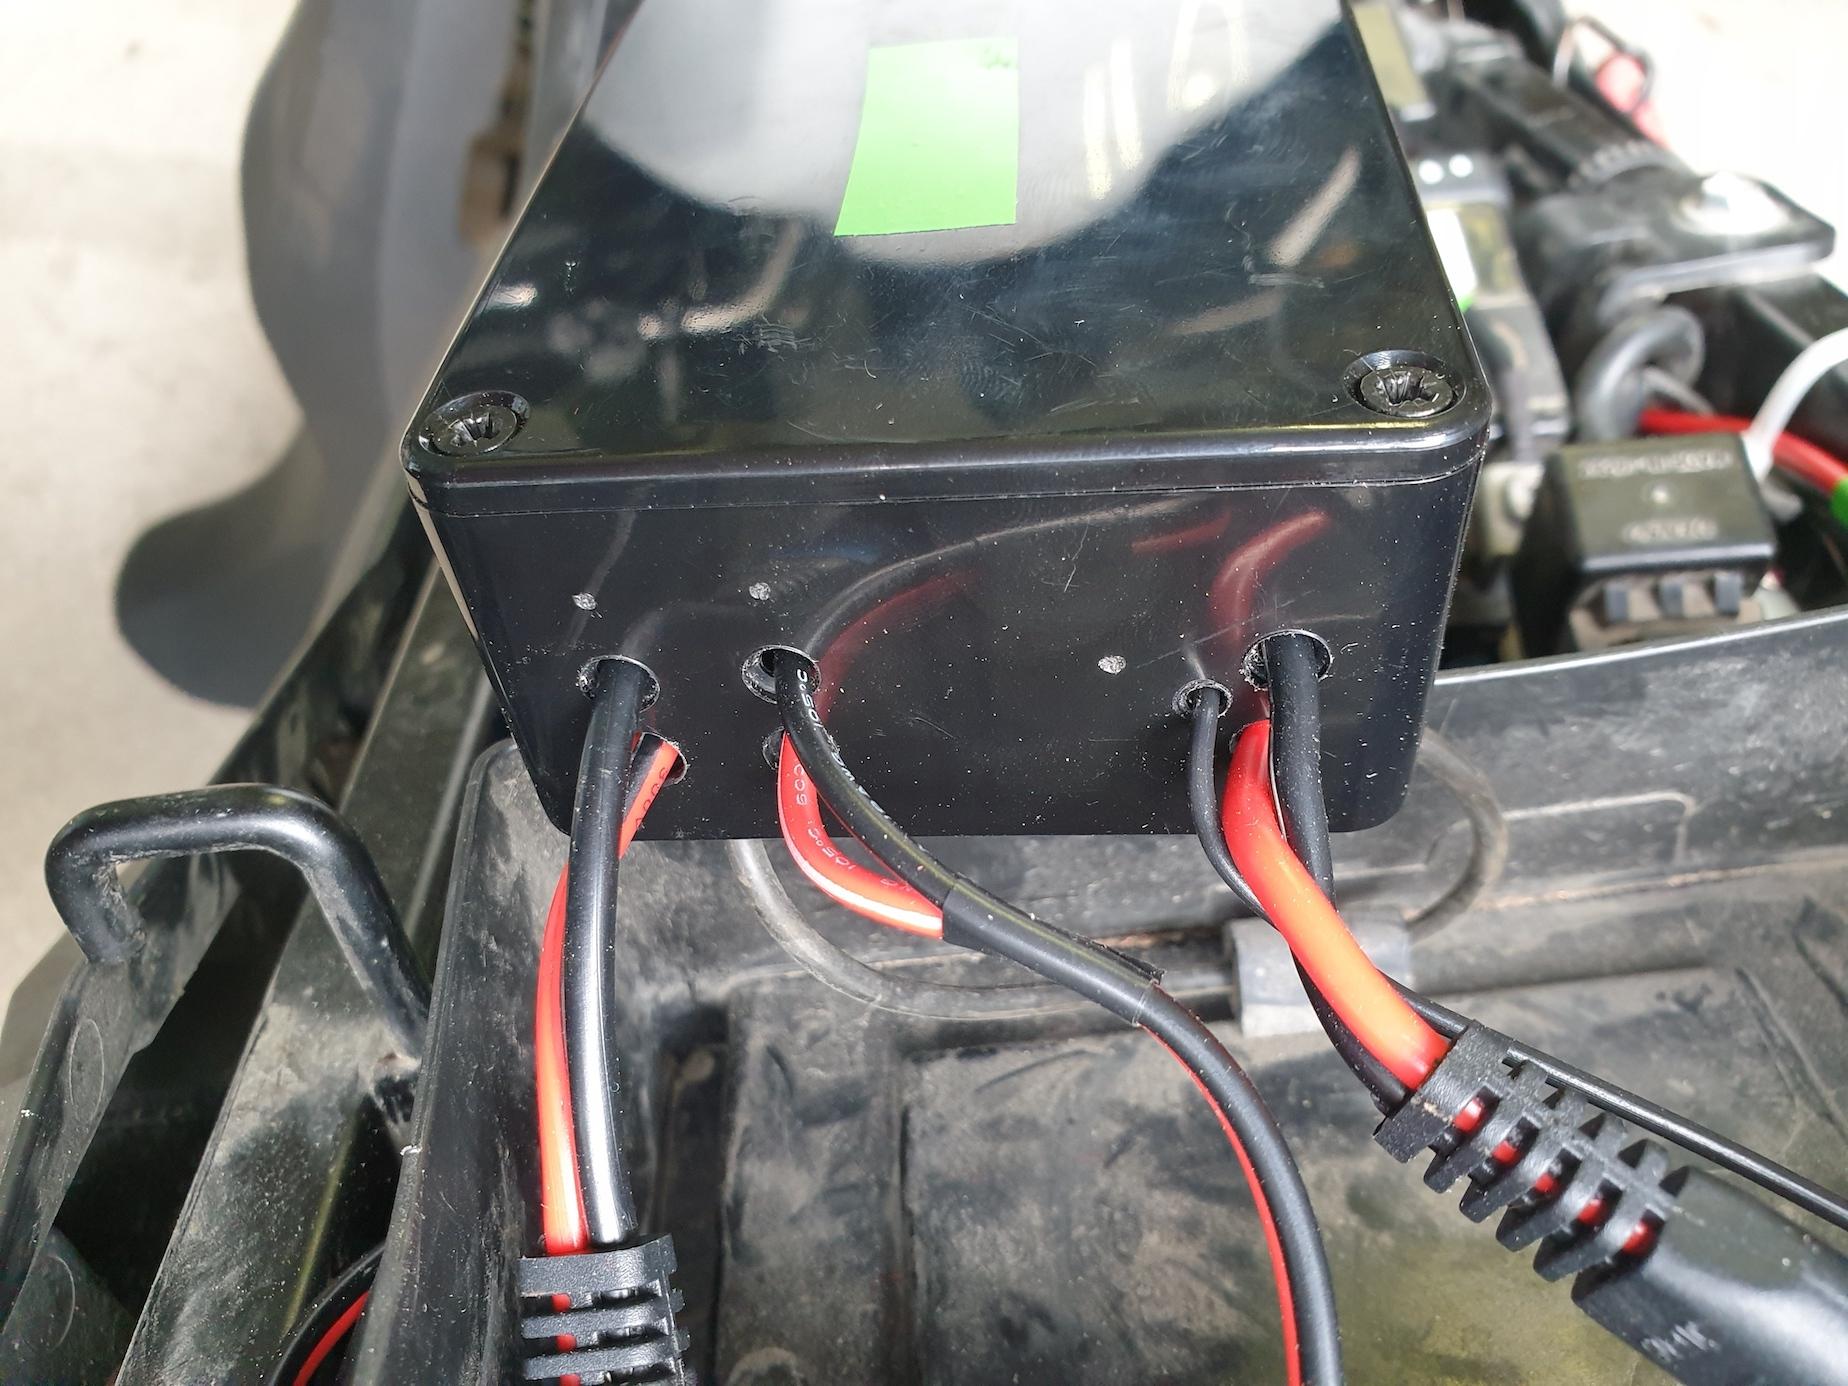
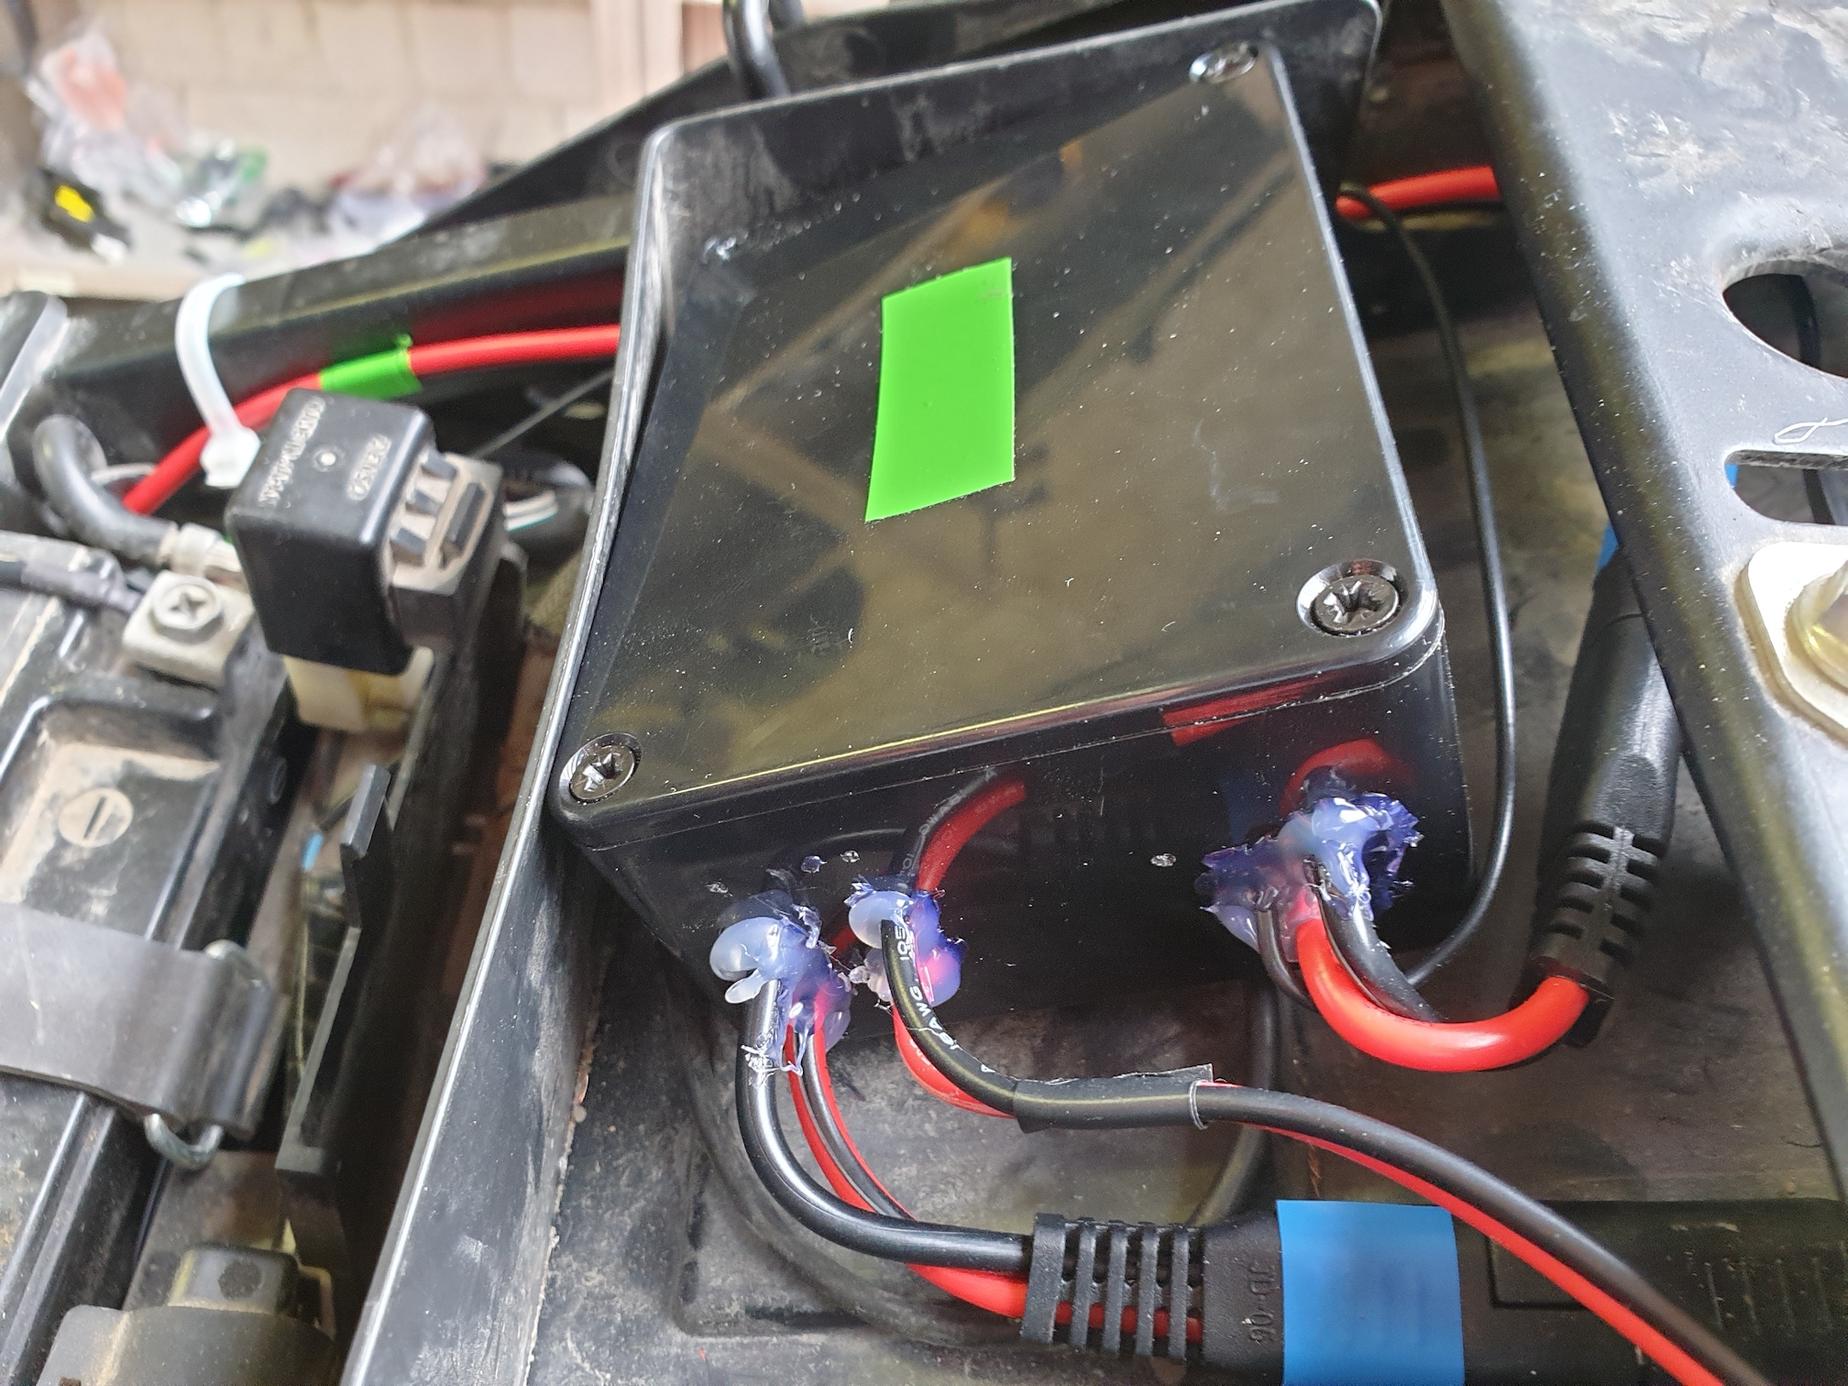
Inside the panniers, I fit two 12V cigarette lighter sockets in a plastic box. The box is held closed by four small screws, so it can be opened for inspection during border crossings. I attached the box to the pannier using the same bolts that secure the SAE connector.
Inside the box, I avoided using any solder. Instead, I used removable Wago connectors. This makes field repairs a lot easier. I only need a Phillips screwdriver and a 5.5 mm socket, no soldering iron. Since it’s all detachable, I could transfer the whole circuit to a new set of panniers later.
At around the same time, I fully switched to USB-C. I can charge everything with the same charger. It packs a lot lighter.
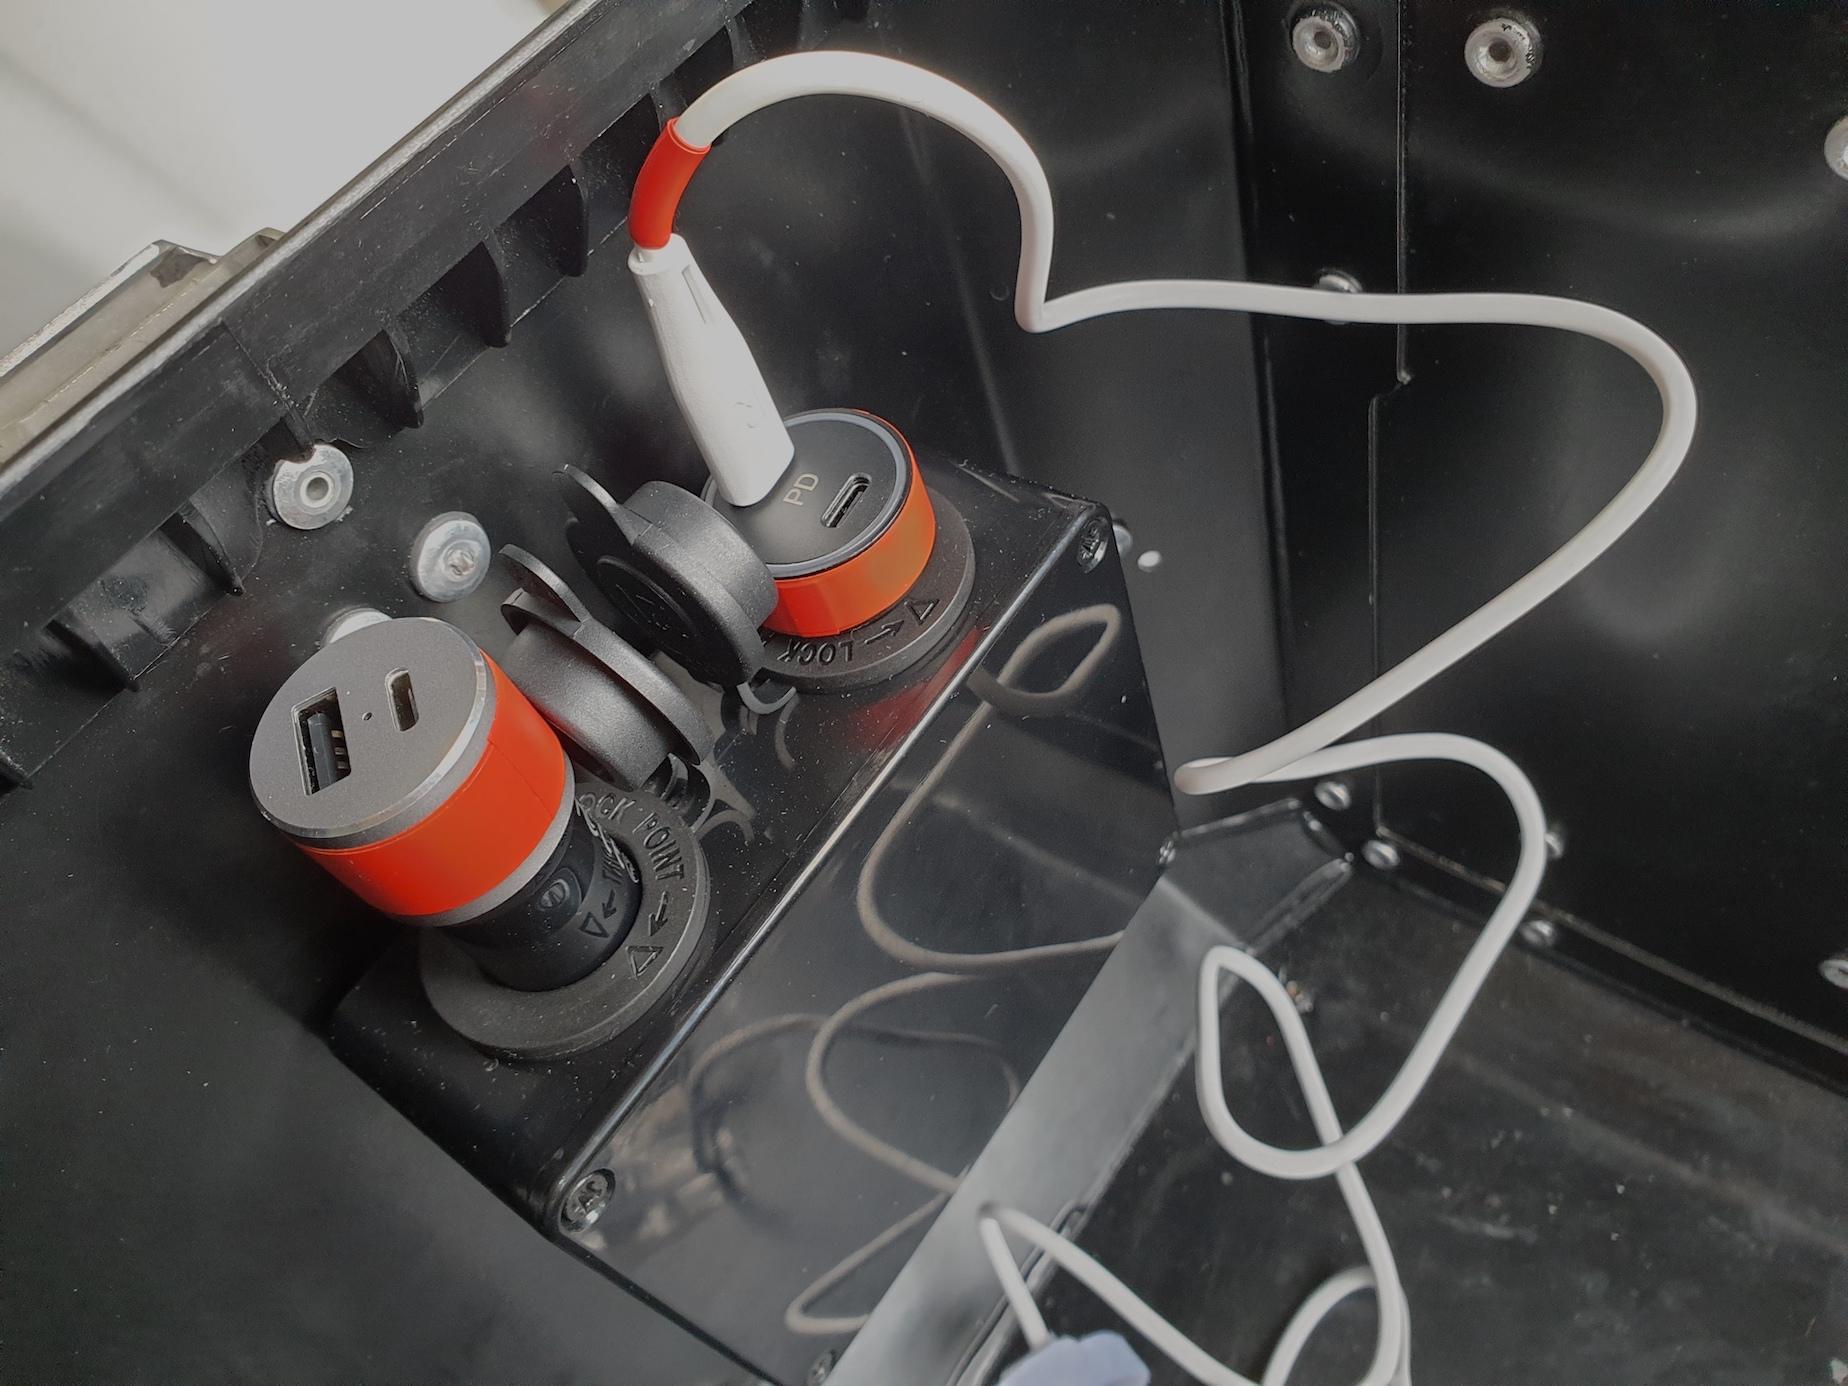
I put a USB-C adapter in each cigarette lighter socket. One charges two devices at once, and the other delivers enough power to charge my Macbook.
If I need a different charger, I can just buy a different cigarette lighter adapter.
From the battery to the panniers
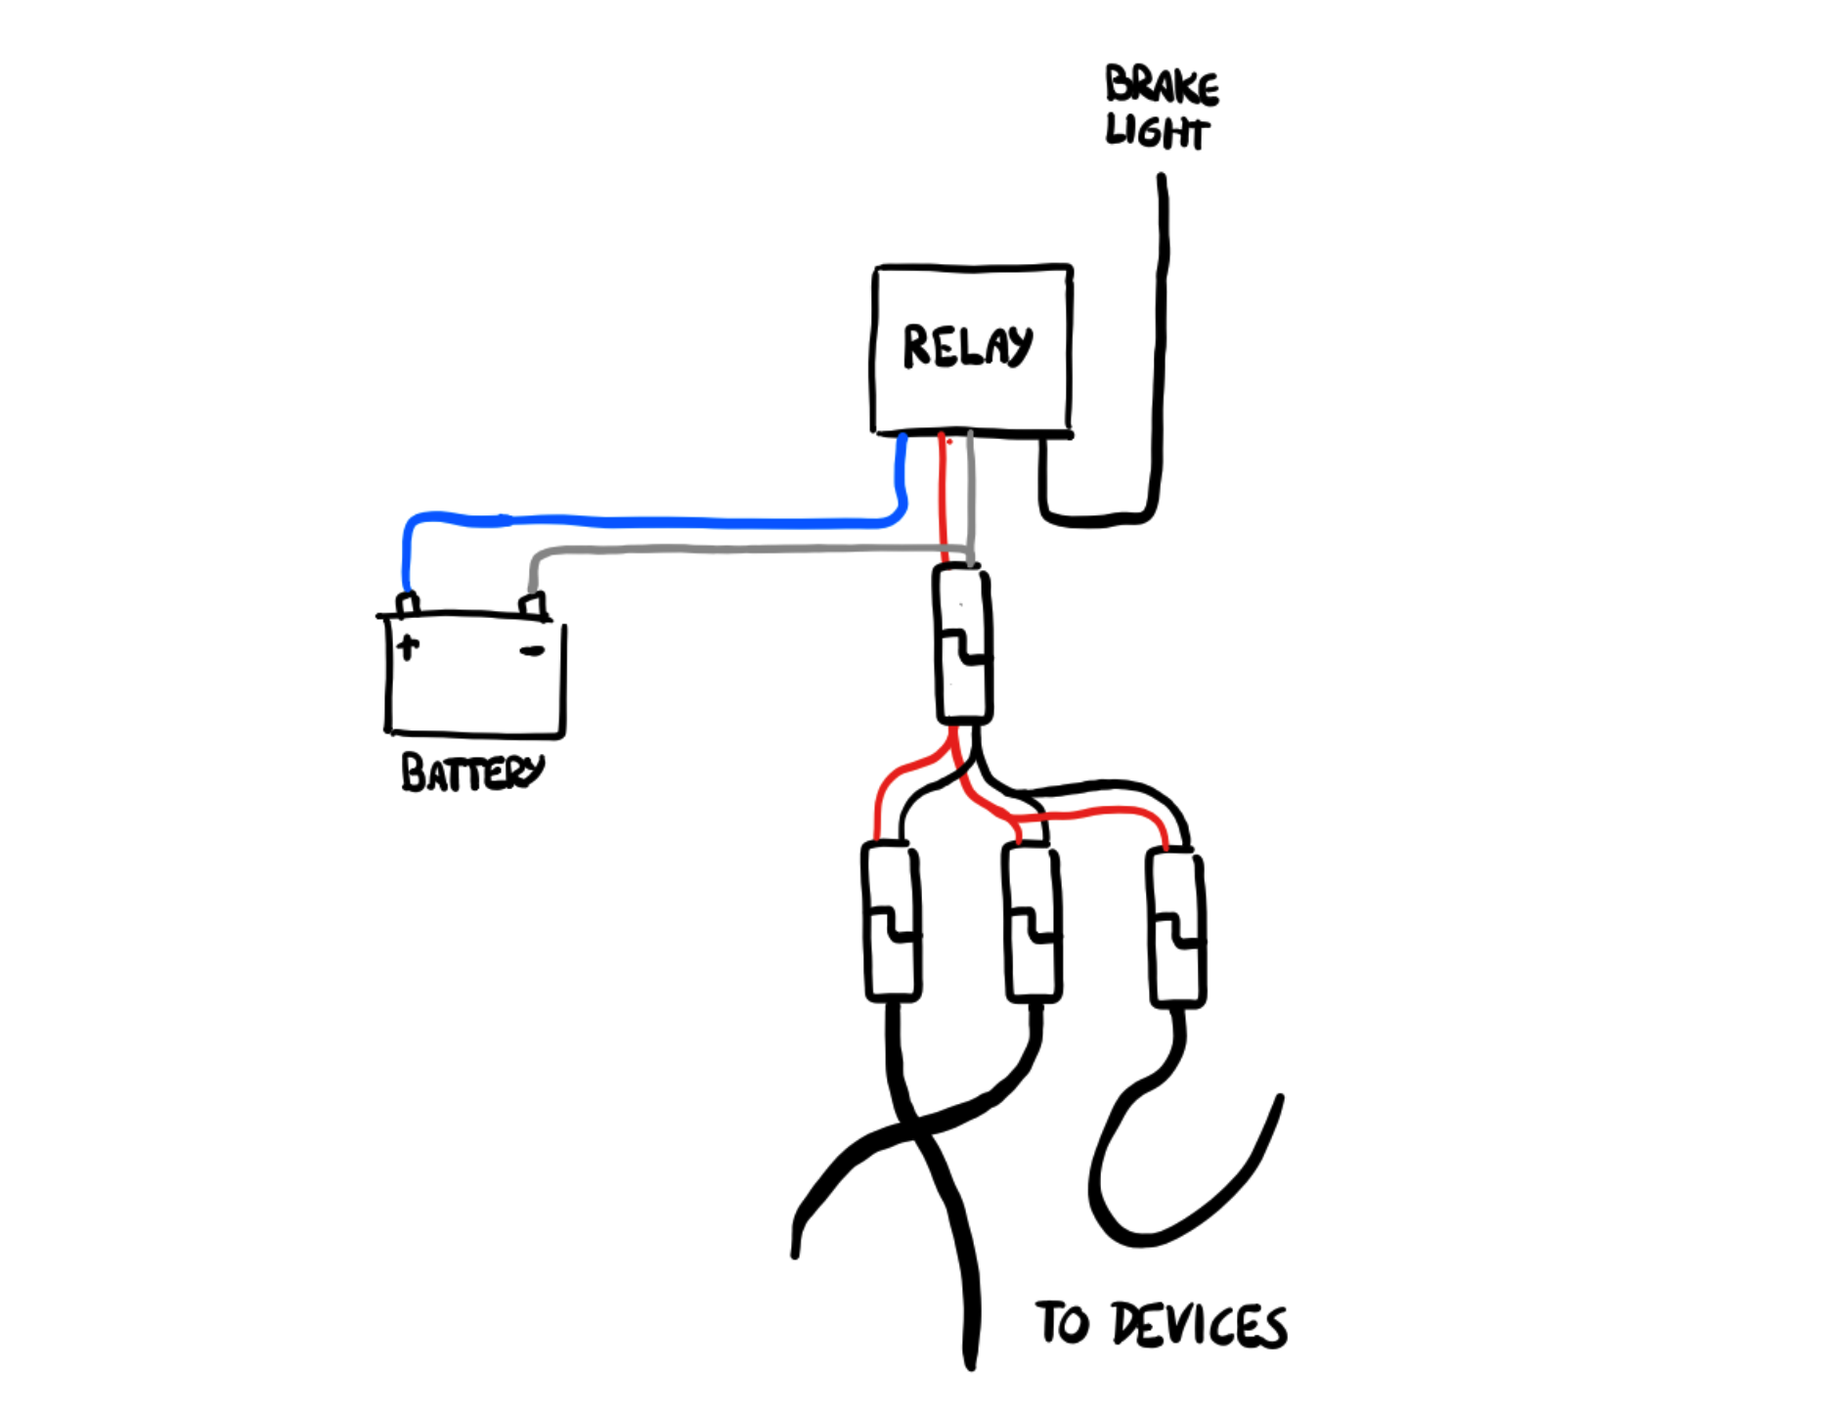
This is roughly how I wired everything together between the battery and the panniers. I designed the circuit to be modular, flexible and field-repairable. I used SAE connectors to connect the components together. Nothing is glued or soldered in place. If something needs maintenance, I can just disconnect it and pull it out. My mini compressor and my battery tender also use SAE connectors, so I can plug them right in.
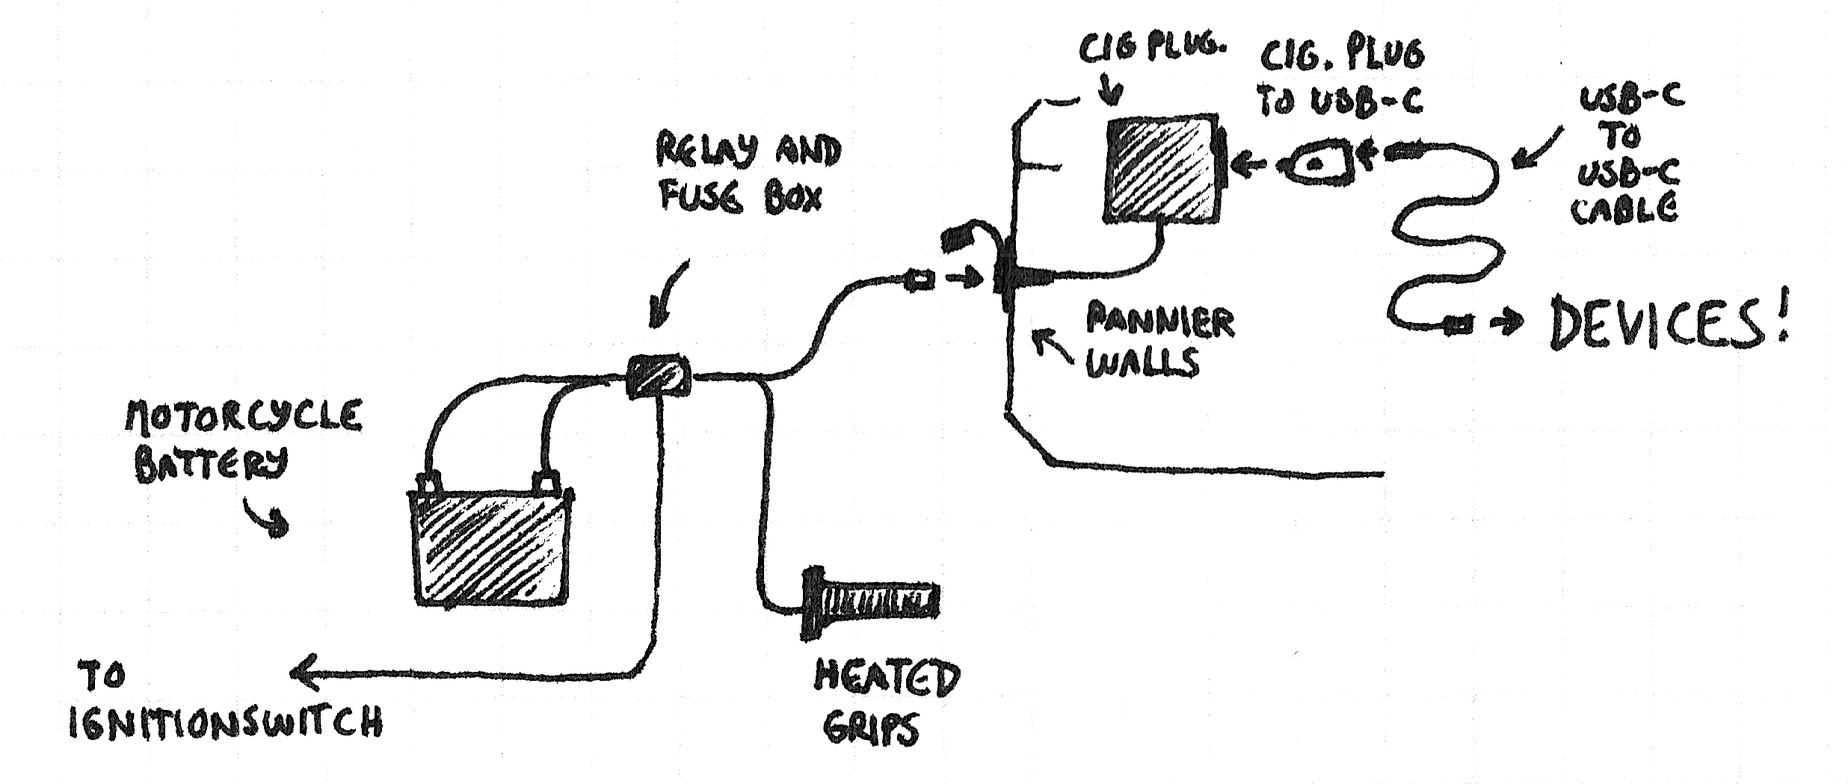
My Macbook draws up to 87 Watts (4.3A @ 20.2V), my phone up to 15 Watts (1.67A @ 15V), and everything else up to 10 Watts (2A @ 5V). In any case, the power draw is capped by my USB-C car adapters (72 Watts and 36 Watts). In other words, we top off at 108 Watts. That’s what the circuit must handle.
My heated grips also draw up to 39 Watts1. That brings us to roughly 150 Watts.
I also have a mini air compressor that draws up to 72 Watts. If I wanted to charge everything, keep my hands warm, reinflate a tire, and play video games at the same time, I’d draw roughly 220 Watts. Realistically, that never happens, so let’s stick to 150 Watts. At 12 volts, that’s 12.5 Amps. 16 gauge wire should be enough2.
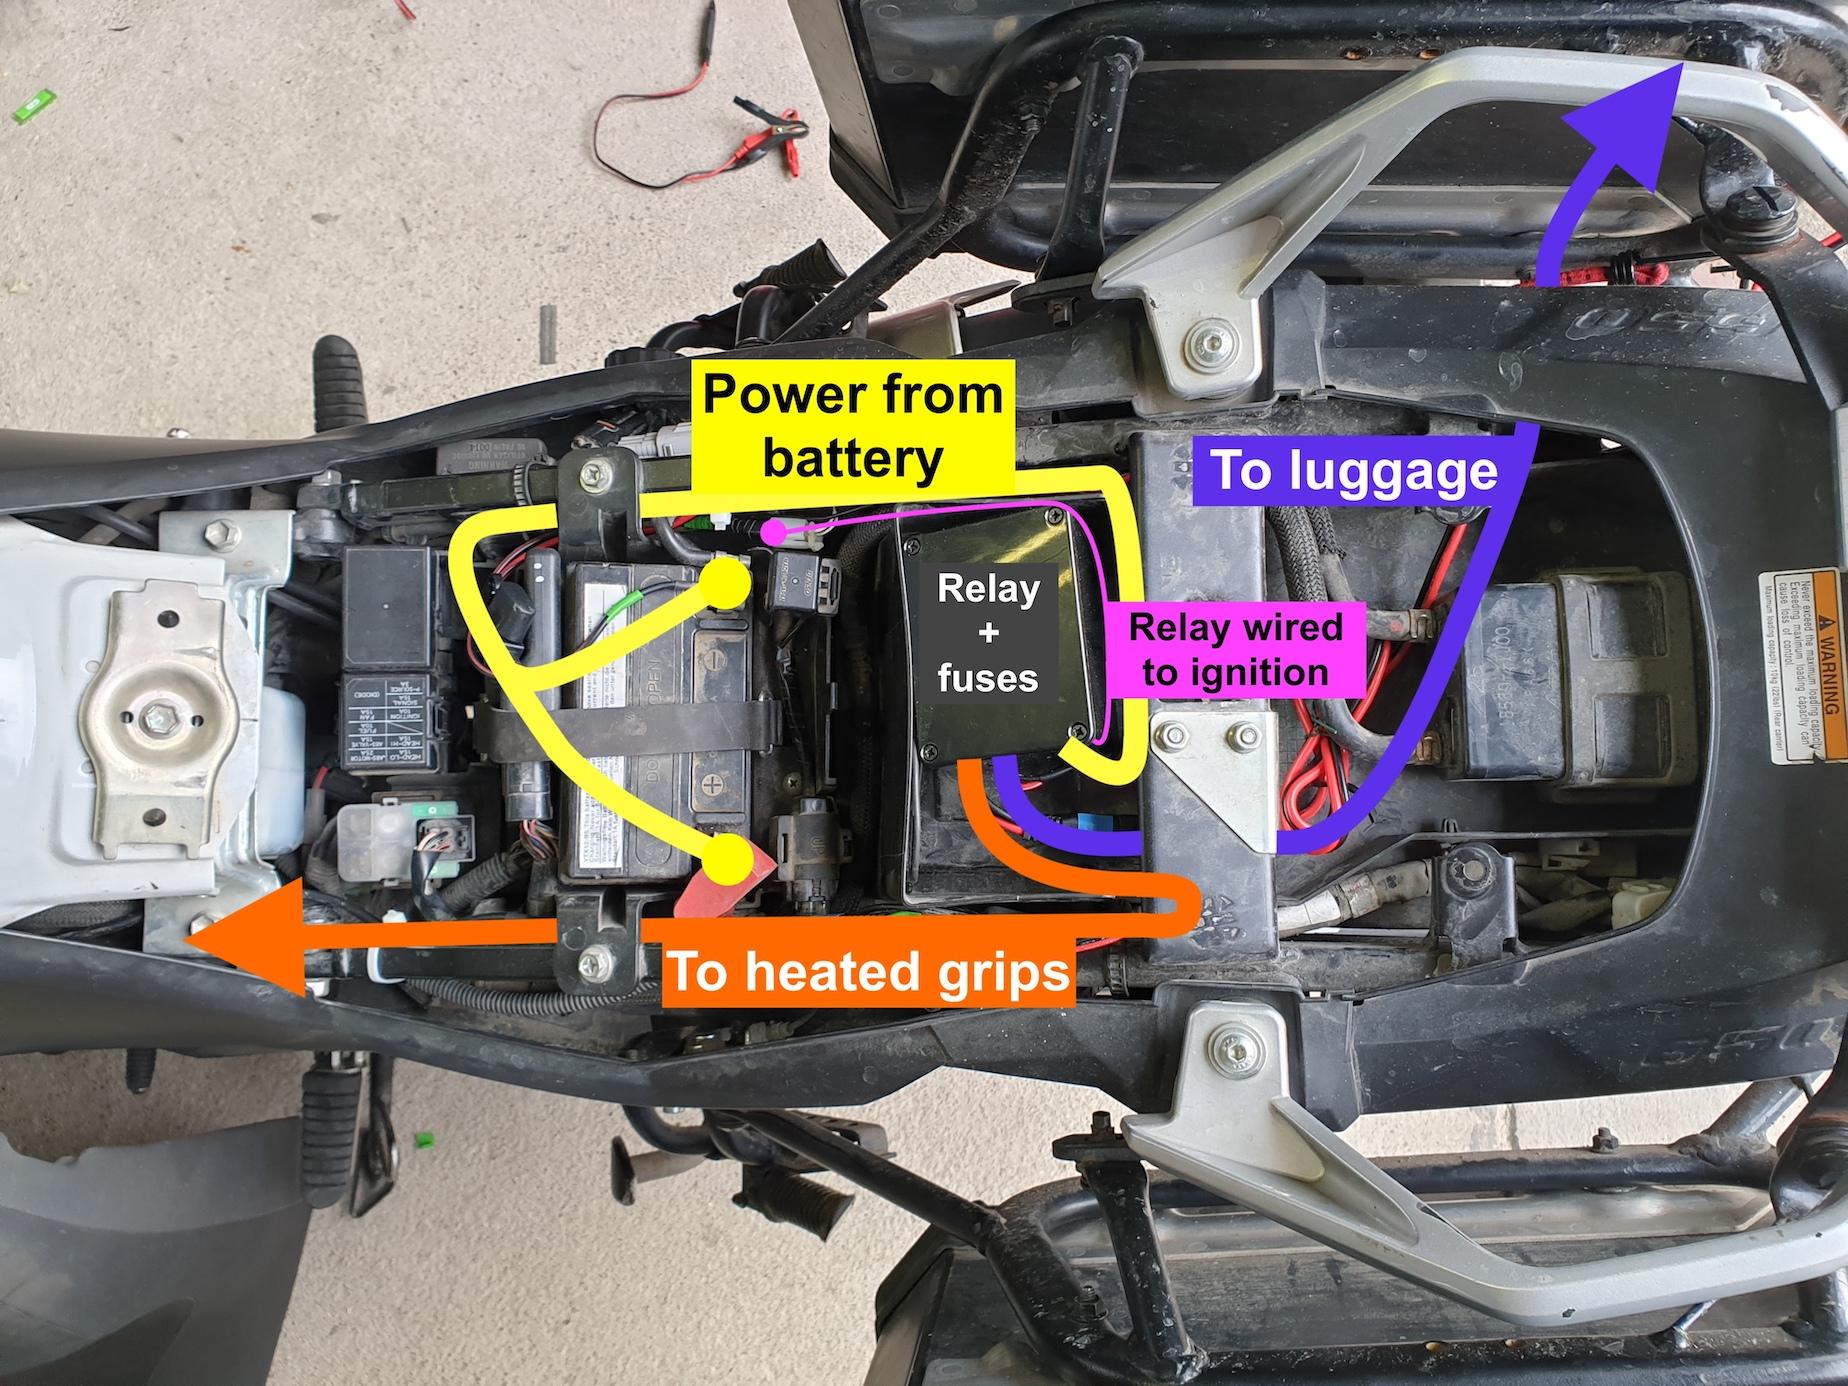
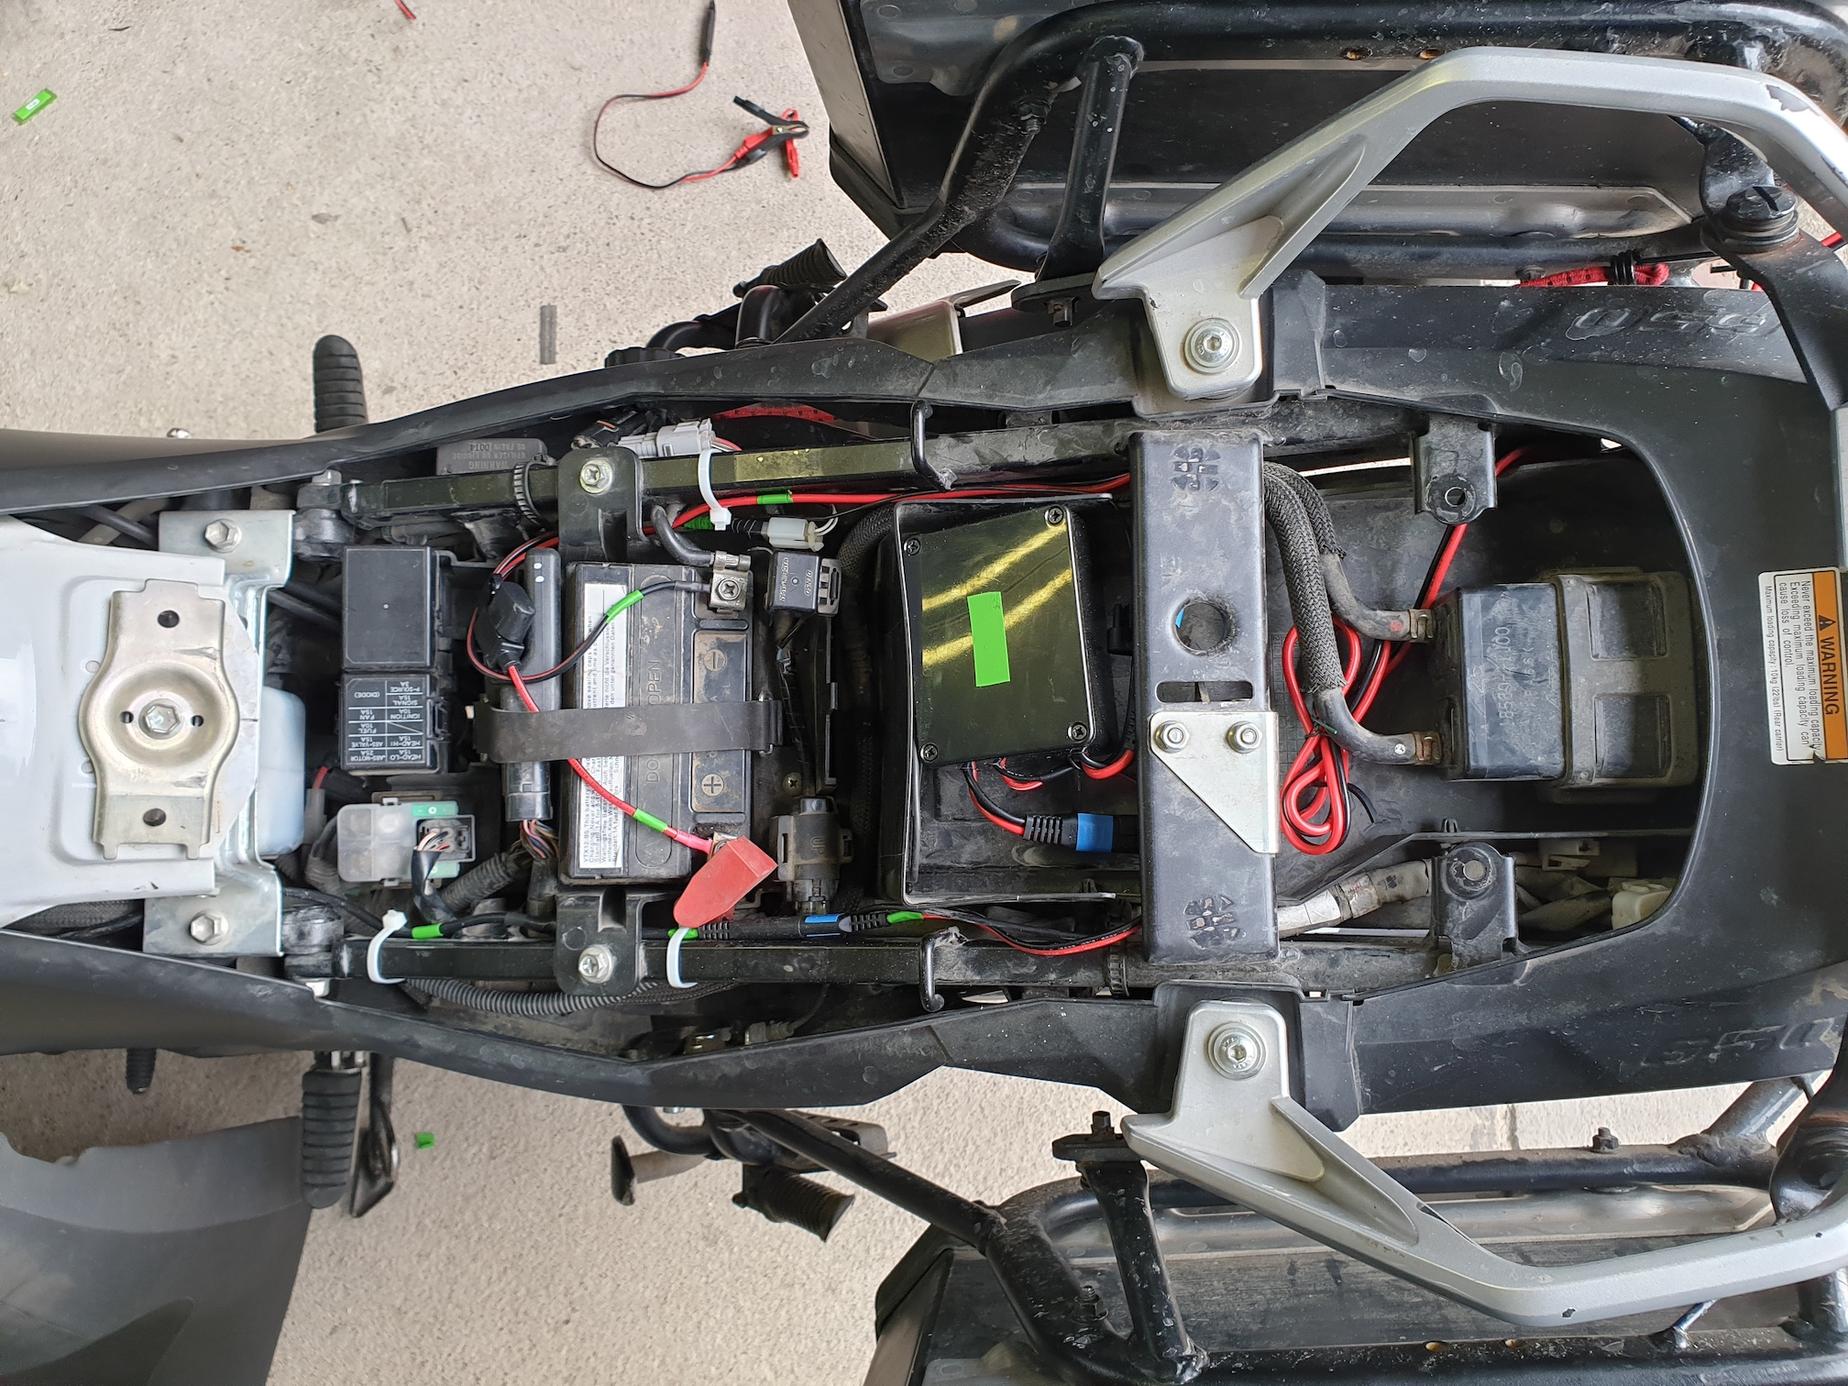
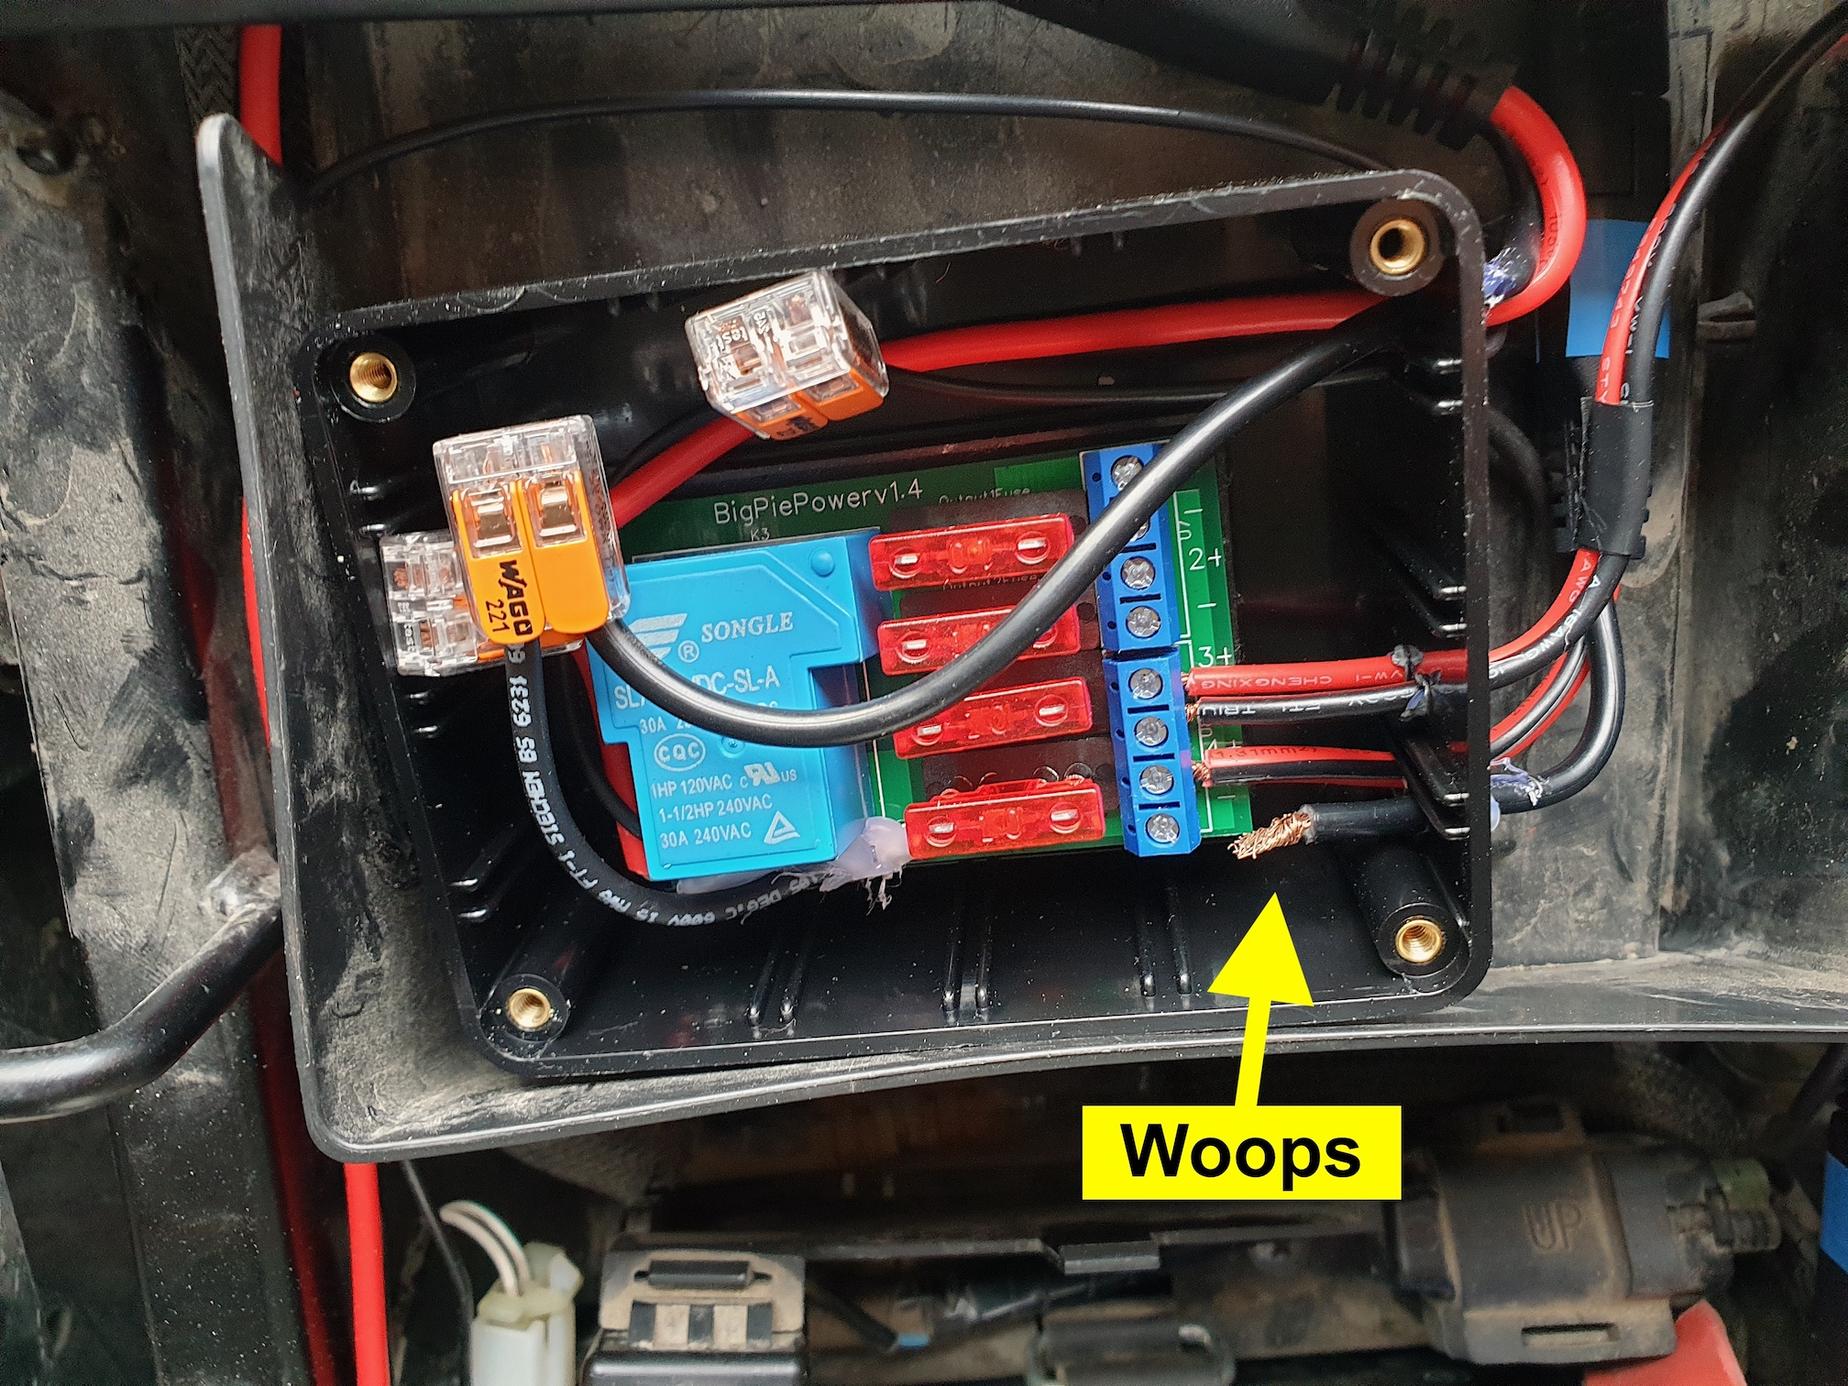
That black enclosure in the middle is the relay box. It connects everything to the ignition switch. When the ignition is off, the entire circuit is off. If I leave something plugged in overnight, I won’t wake up to a dead battery. I can’t afford that risk when I’m several thousand kilometres from home.
Inside the relay box, I use screw terminals and Wago connectors, no soldering. I can repair the circuit using the tools I usually carry. The relay circuit itself is Bigpie’s Fuse Box. It’s great, except that it uses full-sized ATC fuses, while the motorbike uses mini ATC fuses. I need to carry two kinds of spare fuses. Fuses weight less than a gram, so I can live with that.
I also had some issues with the screw terminal blocks. They’re flimsy. When I opened the relay box to take photos, one of the wires popped out. It happened twice again during the summer.
The relay box is right under the seat. I was a bit worried about water getting in there. After spending a few hours researching expensive waterproof grommets, I called my father, who asked me why I didn’t use hot glue. I’ve since spent days in the rain and mud, and no water got inside.
Finishing touches
Once the circuit was tested and working, I held everything in place with cable ties. I also added a bit of colour to tell things apart. Everything I added is marked with green electric tape. I marked outgoing SAE connectors with blue tape, to make sure I don’t plug anything backwards. If I connect two blue ends or two black ends together, I’m doing something wrong.
Field test
In 2021, I used the powered panniers on my 7,500 kilometre trip in the Balkans. It charged my devices flawlessly, but there were a few issues.
First, the cigarette lighter to USB-C converter would frequently get bumped out of its socket and stop charging. I wrapped its base with duct tape so it would fit more snugly in the socket, and that helped.
Second, my Macbook’s USB-C ports are slightly loose. This prevents you from knocking the laptop off your desk if you trip on the cable. The charger would often disconnect while I was driving. This wasn’t a problem with other devices.
Third, the vibration ground the corners of the relay box to dust. In the long run, it might expose the circuit board to water and dust.
Fourth, the relay box sits where my toolkit used to be. I have to store my tools in my panniers, and that wastes precious luggage space.
Finally, the connections inside the relay box rattled themselves loose a few times and everything stopped charging. Fixing it took 5-10 minutes and a few tools. Those blue terminal blocks just wouldn’t hold onto the wires. The Wago connectors on the other hand were indestructible.
Relay box redesign
The original design worked, but had a few issues, so I went back to the drawing board.
I ditched Big Pie’s relay board and used a simple automotive relay. It’s essentially the same thing, just without the circuit board or fuses. The fuses were redundant, so nothing was lost.
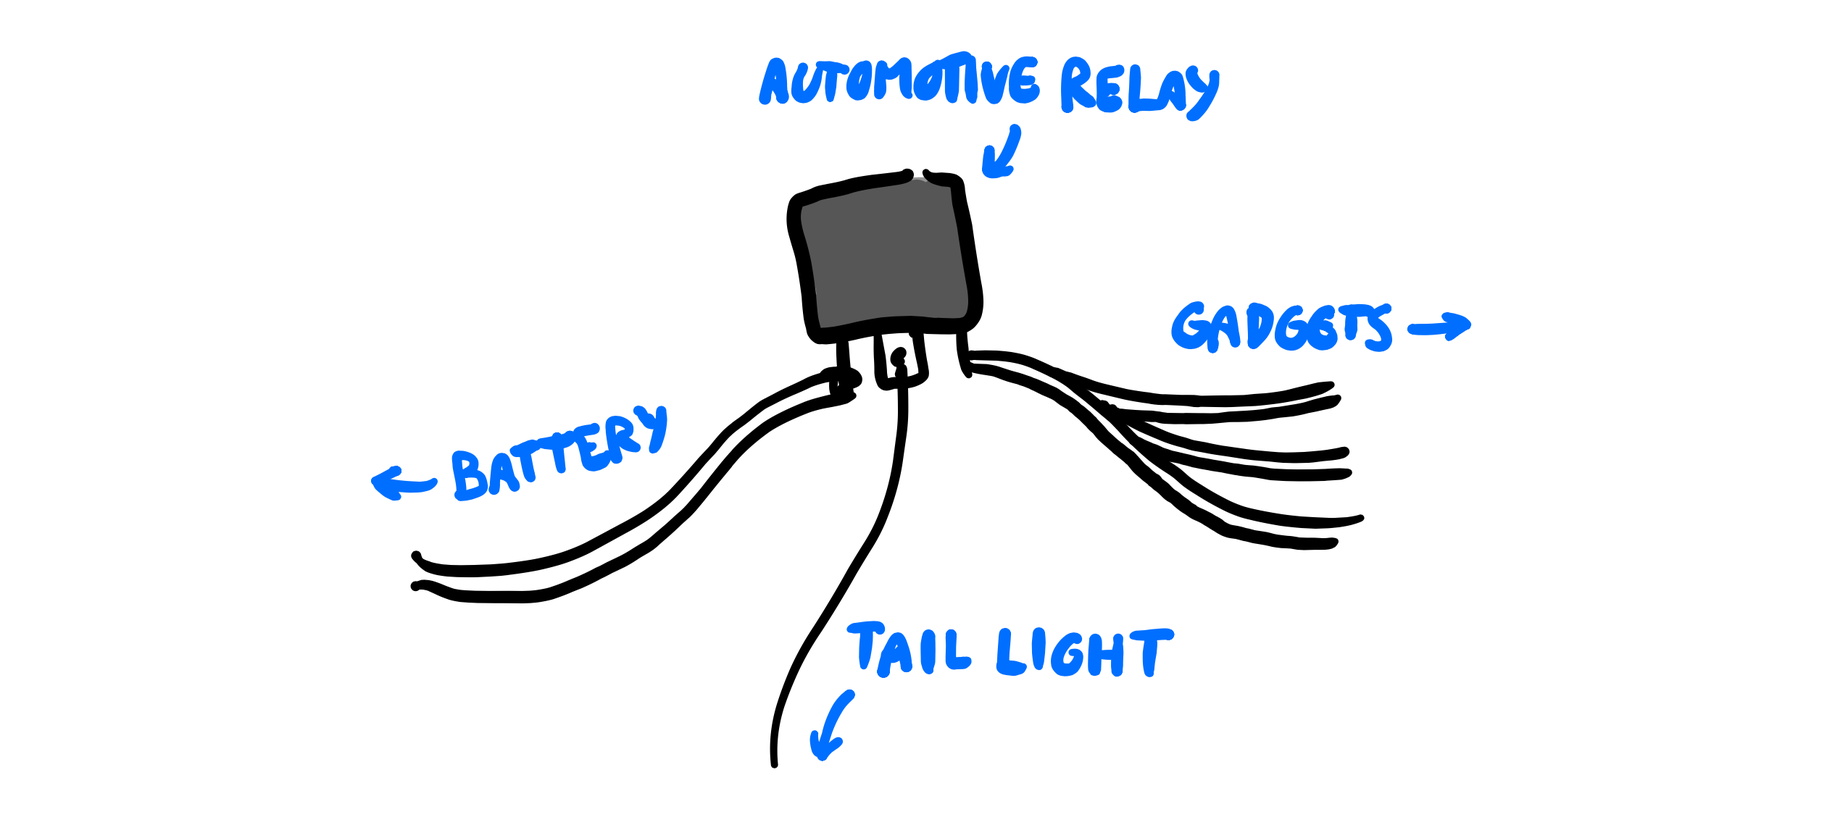
The new circuit is much more durable. I got rid of the finicky terminal blocks. I only use tested and proven SAE connectors (and one spade connector). Nothing will shake itself loose this time.
It’s also easier to repair in the field. It requires no tools whatsoever. If the new circuit fails, it can removed and the accessories connected directly to the battery. I won’t need to ride home with cold fingers because my heated grips stopped working.

The new relay circuit is much smaller, so it frees up some space under the seat for my toolkit.
I used the same colour scheme as with the previous design: power input in black, power output in blue. Everything that didn’t come with the bike is marked with green tape.
